
How to Set Up Your Development Certificate and Profile
How to Set Up Your Development Certificate and Profile
In this article, we will walk through how to set up yourdevelopment certificateandprovisioning profile. A development certificate is how Apple devices verify that your App comes from a trusted source and is required in order to publish your App! We will also walk through setting up a provisioning profile, which is a manifest of all the developers and devices that are linked to your account. Apple has streamlined the setup process for these two files so you won’t even need to open them. Once you’ve set them up,Xcodedoes the rest.
Linking Your Developer Account
To get started, you will need to add your Apple Developer credentials to Xcode. You can link to your Developer credentials by selecting “Preferences” from the Xcode menu option, or with the keyboard shortcut
From here, click the “Accounts” tab and then the “+” sign in the bottom left side. This will prompt you to enter your Apple ID; be sure you are using the ID that is linked to your Developer account!
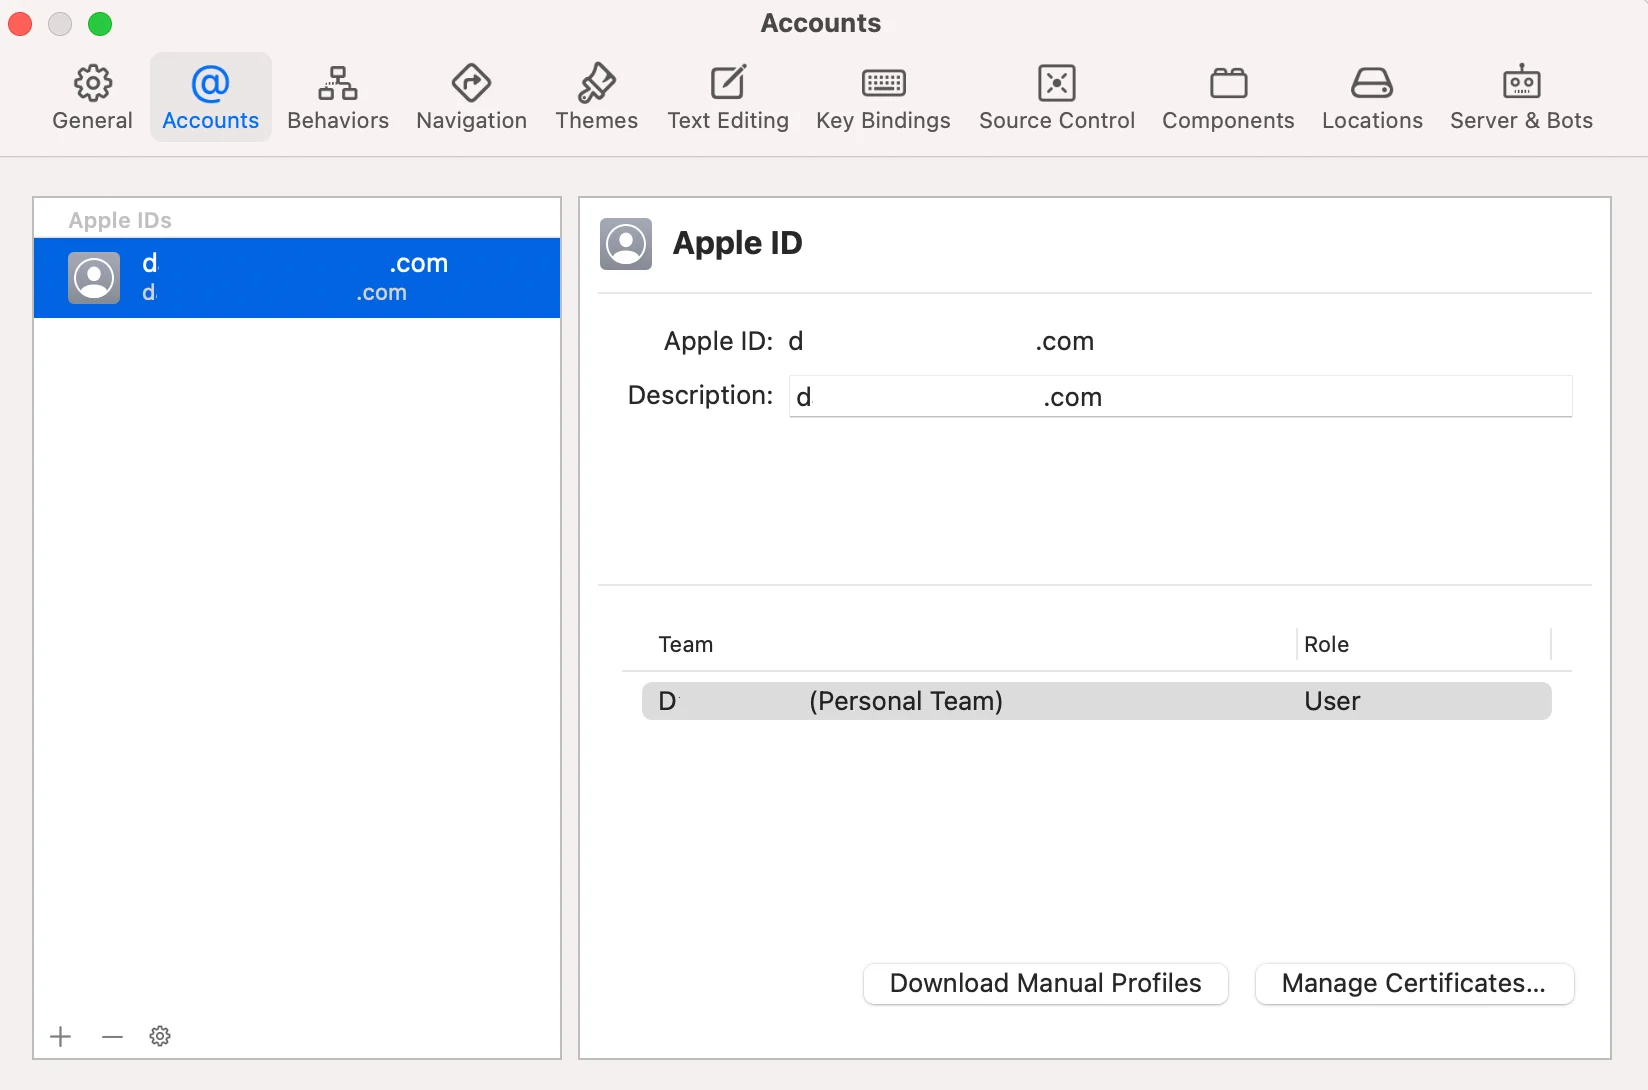
Accounts Tab for Setting up Account
Creating the Bundle ID
After successfully signing in, you need to set up some information that will allow Apple to identify your App. You will need to assign aBundle ID, which is a unique identifier for your App. You can assign the Bundle ID directly from Xcode. Click the outermost file in your Project navigator, the blue-icon “Project” file. In this new screen, make sure you’ve selected your App in the “Targets” section.
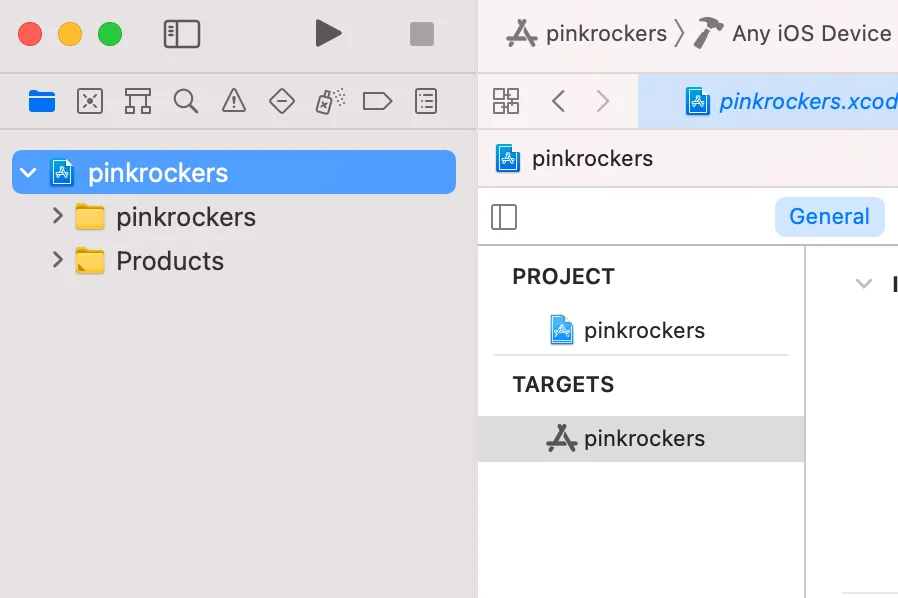
Project Target
In the “General” tab, the “Identity” section lists the Bundle ID. You can edit it directly in that section. The typical Bundle ID is named for your App and your organization with theReverse Domain Name format:com.{your-org-identifier}.{your-app-identifier}. For example, the Pink Rocket app from Star Rockers Industries might have the Bundle IDcom.starrockers.pinkrocket.
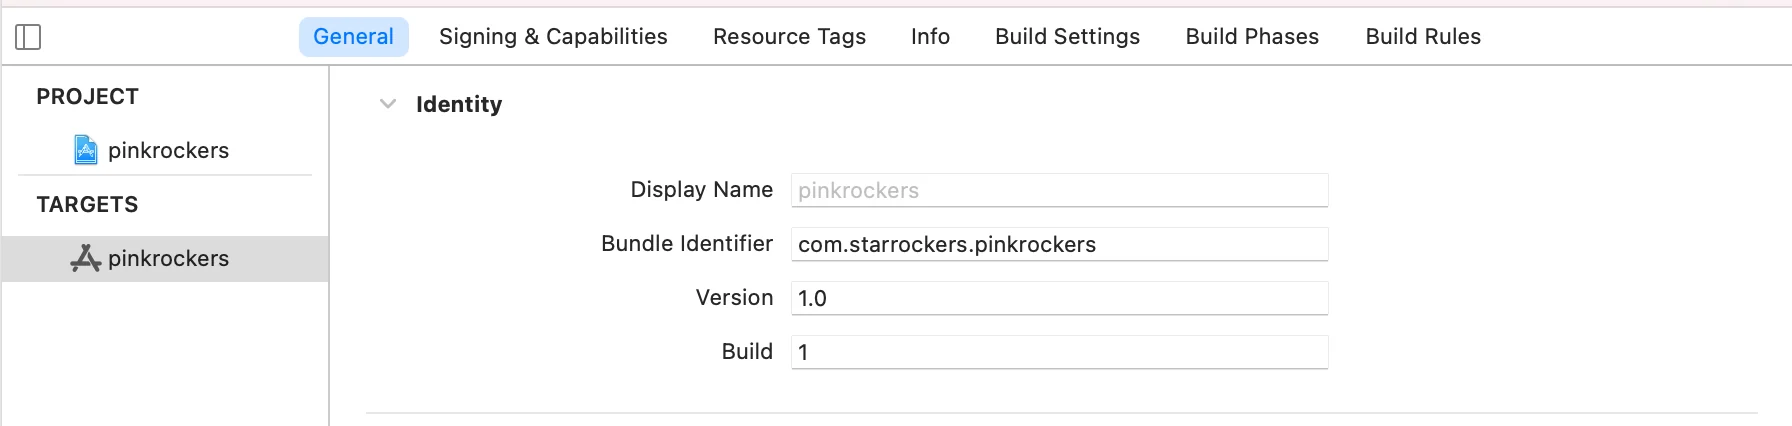
Identity Bundle ID
Generating a Development Certificate
Once your Bundle ID has been added, Xcode will be able to generate aDevelopment Certificatefor you. With your App still selected in the “Targets” section, select the “Signing & Capabilities” tab.
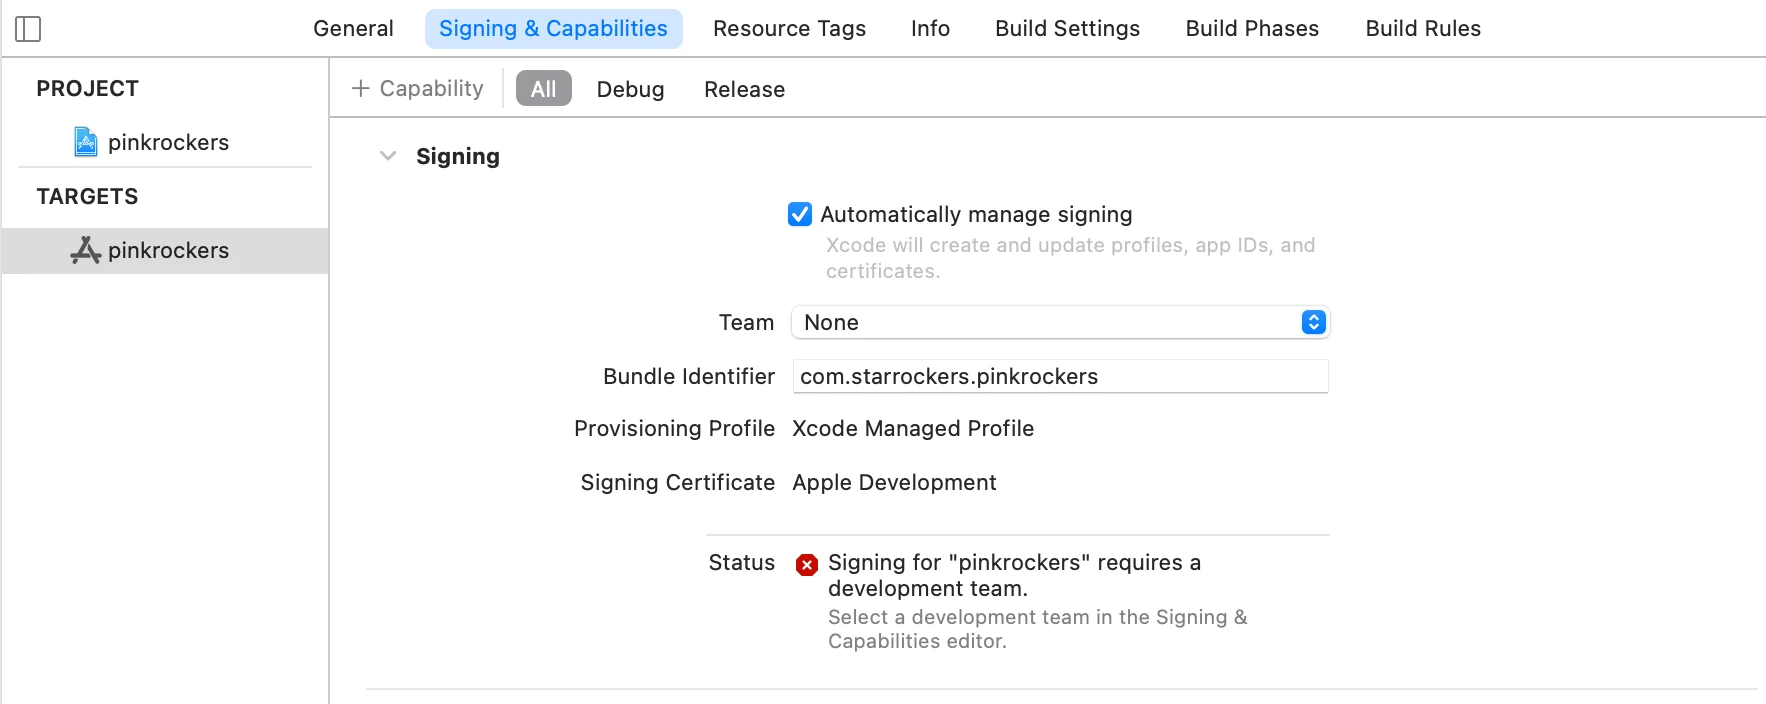
Signing, but still needs a team
Tap the “Team” selector and select your Apple ID from the list. Make sure that the “Automatically manage signing” option is checked, and that your name appears in the “Team” section. Once these options are entered correctly, you should see some loading indicators; Xcode is reaching out to the Developer Portal to create a certificate for you. If you don’t see error text after the loading indicators disappear, that means the certificate exists. Xcode handles this process automatically!
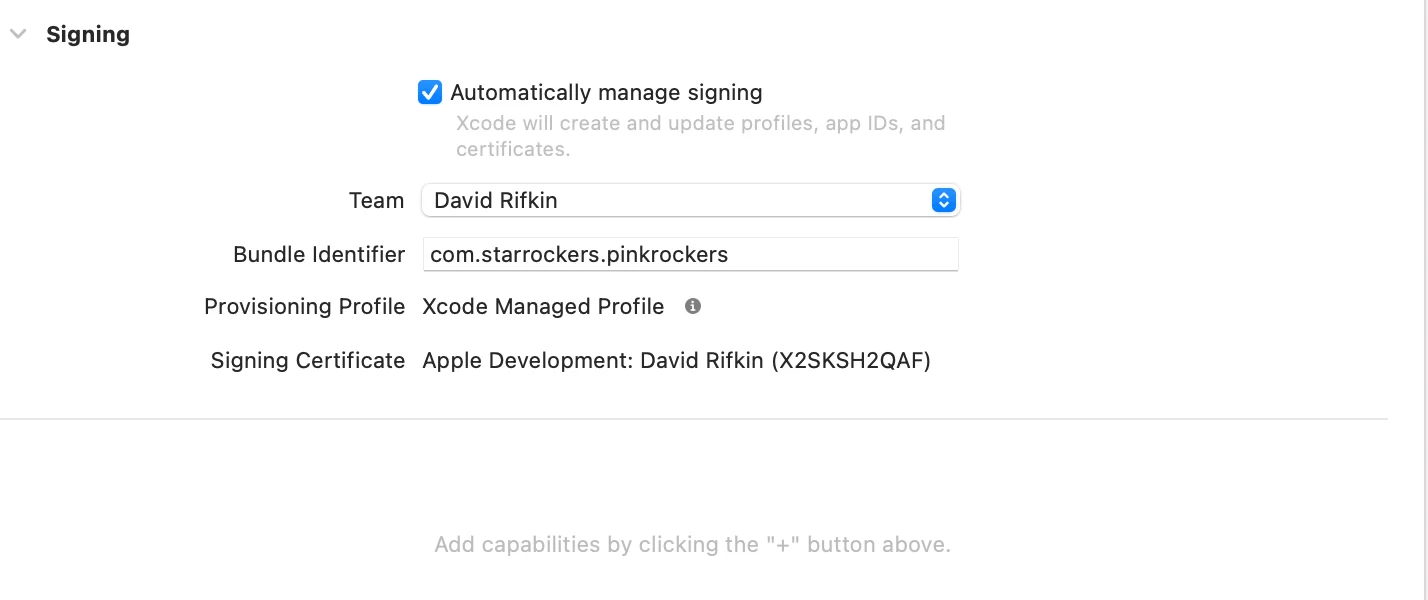
Signing with a team
Creating a Provisioning Profile
In order to run your App onto a personal device and build it for the App Store, you will also need aProvisioning Profile. At this point in the walk-through, the profile can be created automatically from Xcode as well.
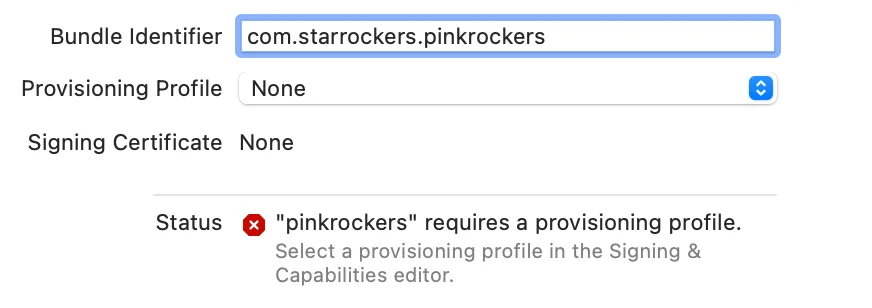
Signing without a provisioning profile
Apple needs to add one device to your account in order to create a profile. This can be done via plugging an iOS device into your computer, then picking it in the devices selector. This process will resolve any potential errors you may have encountered in the previous step.
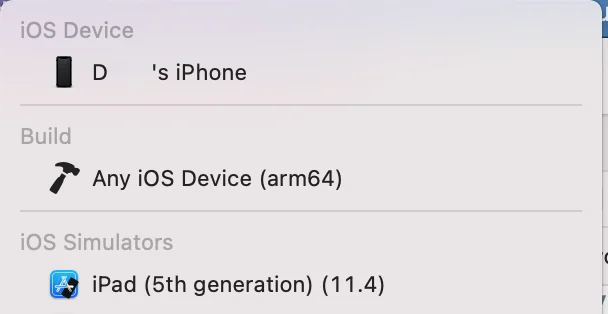
Device Selection
Wrap up
With no errors on the “Signing and Capabilities” page, you now have your development certificate and provisioning profile. Congratulations! In the next article, we will show you how to turn your code into a file that can be downloaded as your App!
'The Codecademy Team, composed of experienced educators and tech experts, is dedicated to making tech skills accessible to all. We empower learners worldwide with expert-reviewed content that develops and enhances the technical skills needed to advance and succeed in their careers.'
Complete Payment to Unlock Full Guide & Source Code
You are viewing the 30% preview. Join TopCourseAI Pro to unlock the remaining 70% of this article, unblur all code snippets, and gain full access to all 412 technical projects and guides.
Ready to access the complete step-by-step tutorial?
Gain full unhindered access to all 412 technical projects and guides, unblur all source code snippets, and download runnable scripts.
How to Run and Use OpenAI's GPT-OSS Locally
Next BlueprintHow to Set Up and Use Google Antigravity
Related Blueprints & Guides
View all 166 →Best IDEs for Mobile App Development: A Complete Guide
AnIDE(Integrated Development Environment) combines essential development tools into a single application, making mobile app development more efficient and organized. Rather than juggling separate tools for coding, debugg...
Mobile developmentBuilding Lists in SwiftUI
Presenting textual and graphical information in a column is a very familiar and natural way to visually organize data. Almost all modern apps utilize some sort of columnar data display. Think of popular social media apps...
Mobile developmentGrids in SwiftUI
The grid layout has become a familiar paradigm for mobile user experiences. The canonical example of grid layout is in the built-in camera roll app for iOS. It can also be found on an extremely popular social photo-shari...
Ready to build production-grade AI systems?
Enjoyed this guide? Continue exploring our library of 166+ production blueprints, multi-agent swarms, and autonomous agent systems with 100% unblurred, executable source code.