
Building Lists in SwiftUI
Building Lists in SwiftUI
Presenting textual and graphical information in a column is a very familiar and natural way to visually organize data. Almost all modern apps utilize some sort of columnar data display. Think of popular social media apps that display posts in a timeline, or an e-commerce app that allows you to browse products in a vertical column.
Not surprisingly, SwiftUI provides us with theListstructureto help us display columnar views. In this article, we will explore how to use lists as a fundamental building block to create fantastic experiences for our users. Let’s dive in.
Getting started with SwiftUI lists
Let’s start by creating a new project inXcode. We’re going to make a simple app to help a zoo manage its animals. Let’s call the app Zookeeper, set the interface toSwiftUIand the Life Cycle toSwiftUI App.
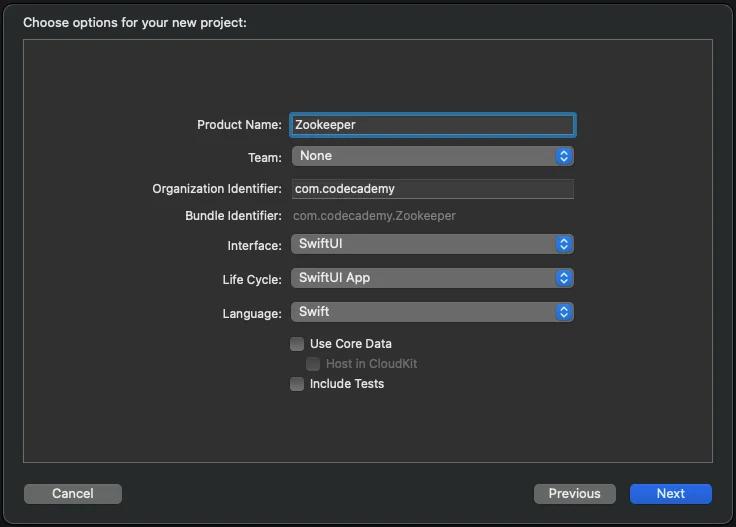
Figure 1
We should now see the standard starting point for a SwiftUI project:
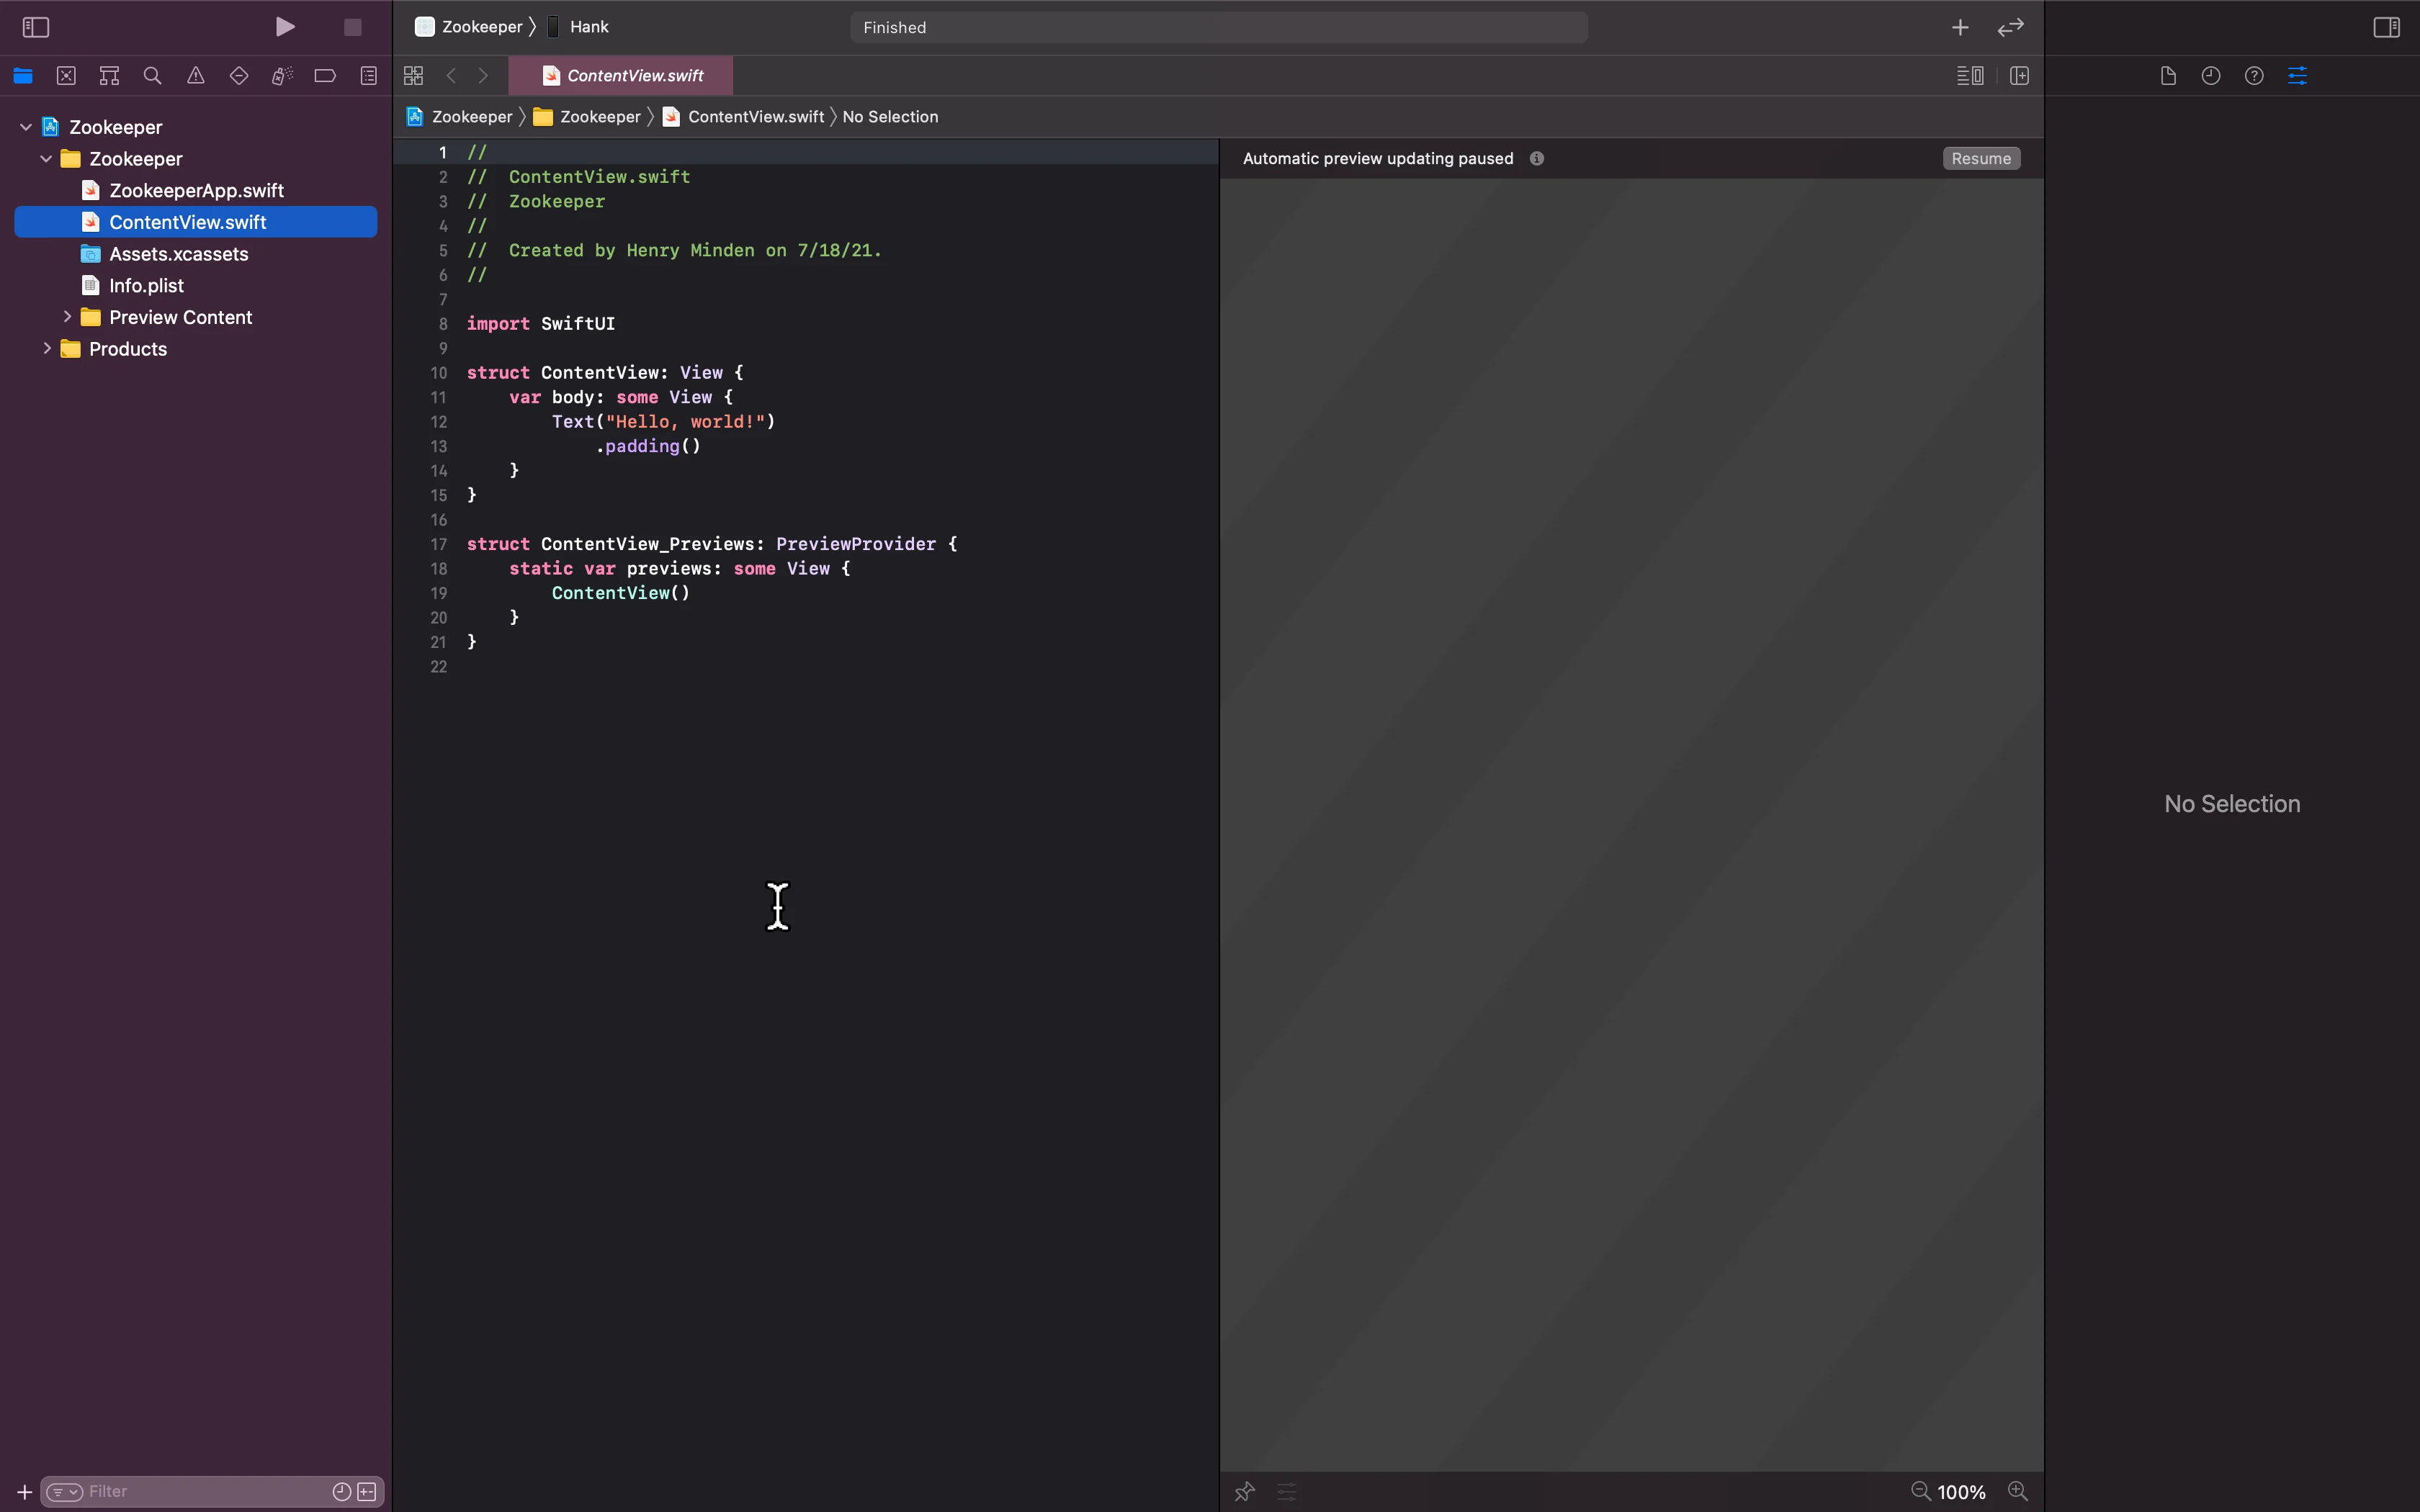
Figure 2
Let’s replace thebodyvariable of theContentViewstructure with the following code:
var body: some View {        VStack {            Text("Item 1")            Text("Item 2")            Text("Item 3")        }    }
Copy to clipboard
var body: some View { VStack { Text("Item 1") Text("Item 2") Text("Item 3") } }TheVStack, or vertical stack, organizes its child views in a vertical line. Let’s look at the result of stacking three text views within aVStack:
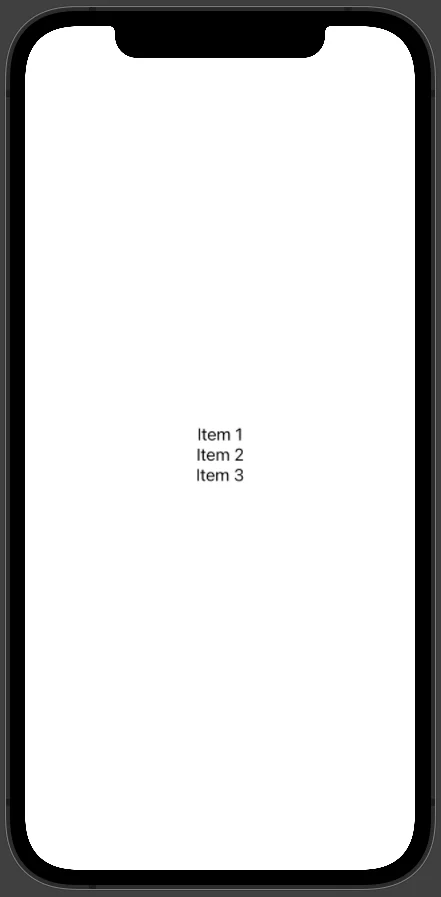
Figure 3
As we can see, the three text views are stacked vertically as we expected. But there is another way to achieve this visual hierarchy that is more powerful. Let’s replace the contents of thebodyvariable with the following code:
var body: some View {        List {            Text("Item 1")            Text("Item 2")            Text("Item 3")        }    }
Copy to clipboard
var body: some View { List { Text("Item 1") Text("Item 2") Text("Item 3") } }Look in thePreview Windowand press theResumebutton if necessary in order to see a live preview of the code changes you made. You should see something like this:
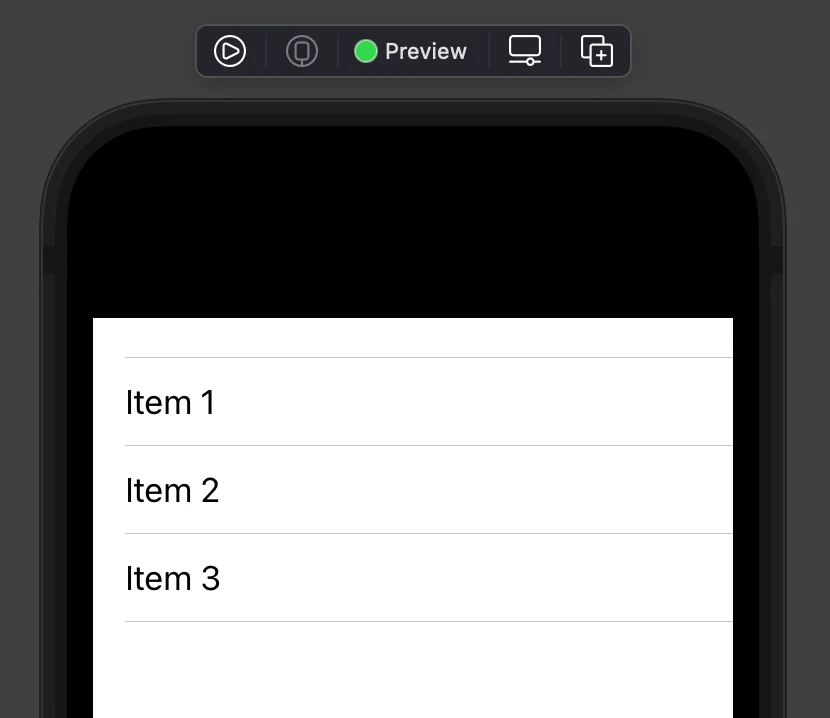
Figure 4
Awesome! We just created a static list consisting of three text views. As we can see, theListstructure acts as a container to vertically list the views defined within it. While it is visually similar to aVStack, the list structure has more functionality. Lists have built-in scrolling, modifiers to help with visual formatting, and the ability to edit the list dynamically.
List modifiers
Like other SwiftUI views, we can apply specific view modifiers to change the styling of our view. Modify your code so thebodyofContentViewlooks like this:
var body: some View {        VStack {            Text("I ❤️ List").font(.headline)            List {                Text("Item 1")                Text("Item 2")                Text("Item 3")            }            .listStyle(InsetGroupedListStyle())        }    }
Copy to clipboard
var body: some View { VStack { Text("I ❤️ List").font(.headline) List { Text("Item 1") Text("Item 2") Text("Item 3") } .listStyle(InsetGroupedListStyle()) } }Resume the live preview and you can now see we have a slightly different visual presentation of our list provided by the inset grouped list style. Also, notice how it is possible to include a list as a child view to achieve a more sophisticated visual hierarchy.
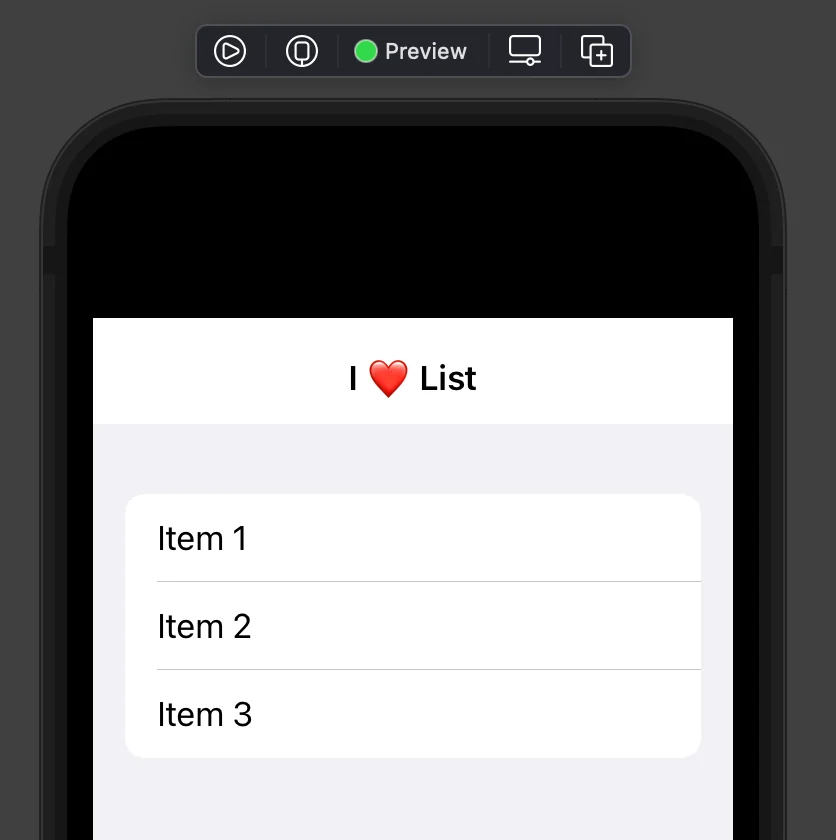
Figure 5
Dynamically generated lists
Creating static lists with theListstructure couldn’t be simpler, but in practice, we will encounter many situations where we want our lists to visualize an ever-changing stream of data. Consider a news app that has a list of the stories of the day, a music app that shows a list of your favorite songs, or an email app that presents your newest messages in order.
Luckily, theListstructure has built-in functionality to help us presentarraysof structured data that might be provided by adatabaseorAPI.
Below yourContentViewstructure, let’s create a new structure calledAnimalwith two parameters:uniqueIDandname:
struct Animal {    var uniqueID : Int    var name: String}
Copy to clipboard
struct Animal { var uniqueID : Int var name: String}We will be listing a dynamic array ofAnimalinstances, meaning the data can change over time. When the data changes, the list needs to be able to compare the current data state to the last data state and see what changed. If there isn’t a unique identifier, this might be impossible.
A simple way to understand this concept is to imagine identical twins named Alice. If you took a picture of them standing next to each other, then they switched places and you took another picture, would you be able to tell if they switched places by looking at the two pictures?
The way to solve this conundrum is to have them wear some sort of unique identifier. It could be different color shirts or a tag with a number on it. As long as it is guaranteed to be unique for each twin, you will never get them mixed up. 👯♀️ This is why we need to specify theuniqueIDproperty.
Next, let’s create an array ofAnimalinstances:
let animals = [    Animal(uniqueID: 0, name: "Dog"),    Animal(uniqueID: 1, name: "Cat"),    Animal(uniqueID: 2, name: "Parrot")]
Copy to clipboard
let animals = [ Animal(uniqueID: 0, name: "Dog"), Animal(uniqueID: 1, name: "Cat"), Animal(uniqueID: 2, name: "Parrot")]Now let’s use a list to visualize theanimalsarray and modify thebodyvariable of yourContentViewso it looks like this:
var body: some View {        List(animals, id: \.uniqueID) { animal in            Text(animal.name)        }    }
Copy to clipboard
var body: some View { List(animals, id: \.uniqueID) { animal in Text(animal.name) } }There’s a lot going on in this tiny piece of code, so let’s break it all down. The first parameter we provide for the list is the data, which in this case is theanimalsarray. The data needs to have a unique identifier for each element, which we specify using theidparameter. Theidparameter expects akeypath, which is what we are defining by using\.uniqueID(a keypath expression).
Swift keypaths are a means to store a reference to a property, without actually storing the value of the property itself. Think of it as a path to the property. The notation\.uniqueIDis actually shorthand for\Animal.uniqueID, but the compiler can infer the type so we can leave off theAnimaland it still works. Now that we have specified this keypath for theidargument, the list will look at theuniqueIDproperty to identify each element.
TheListstructure executes the{ animal in }closure for each element in theanimalsarray. In this example, we simply show aTextview of thenameof eachanimal.
You should now see this view when weResumethe live preview:
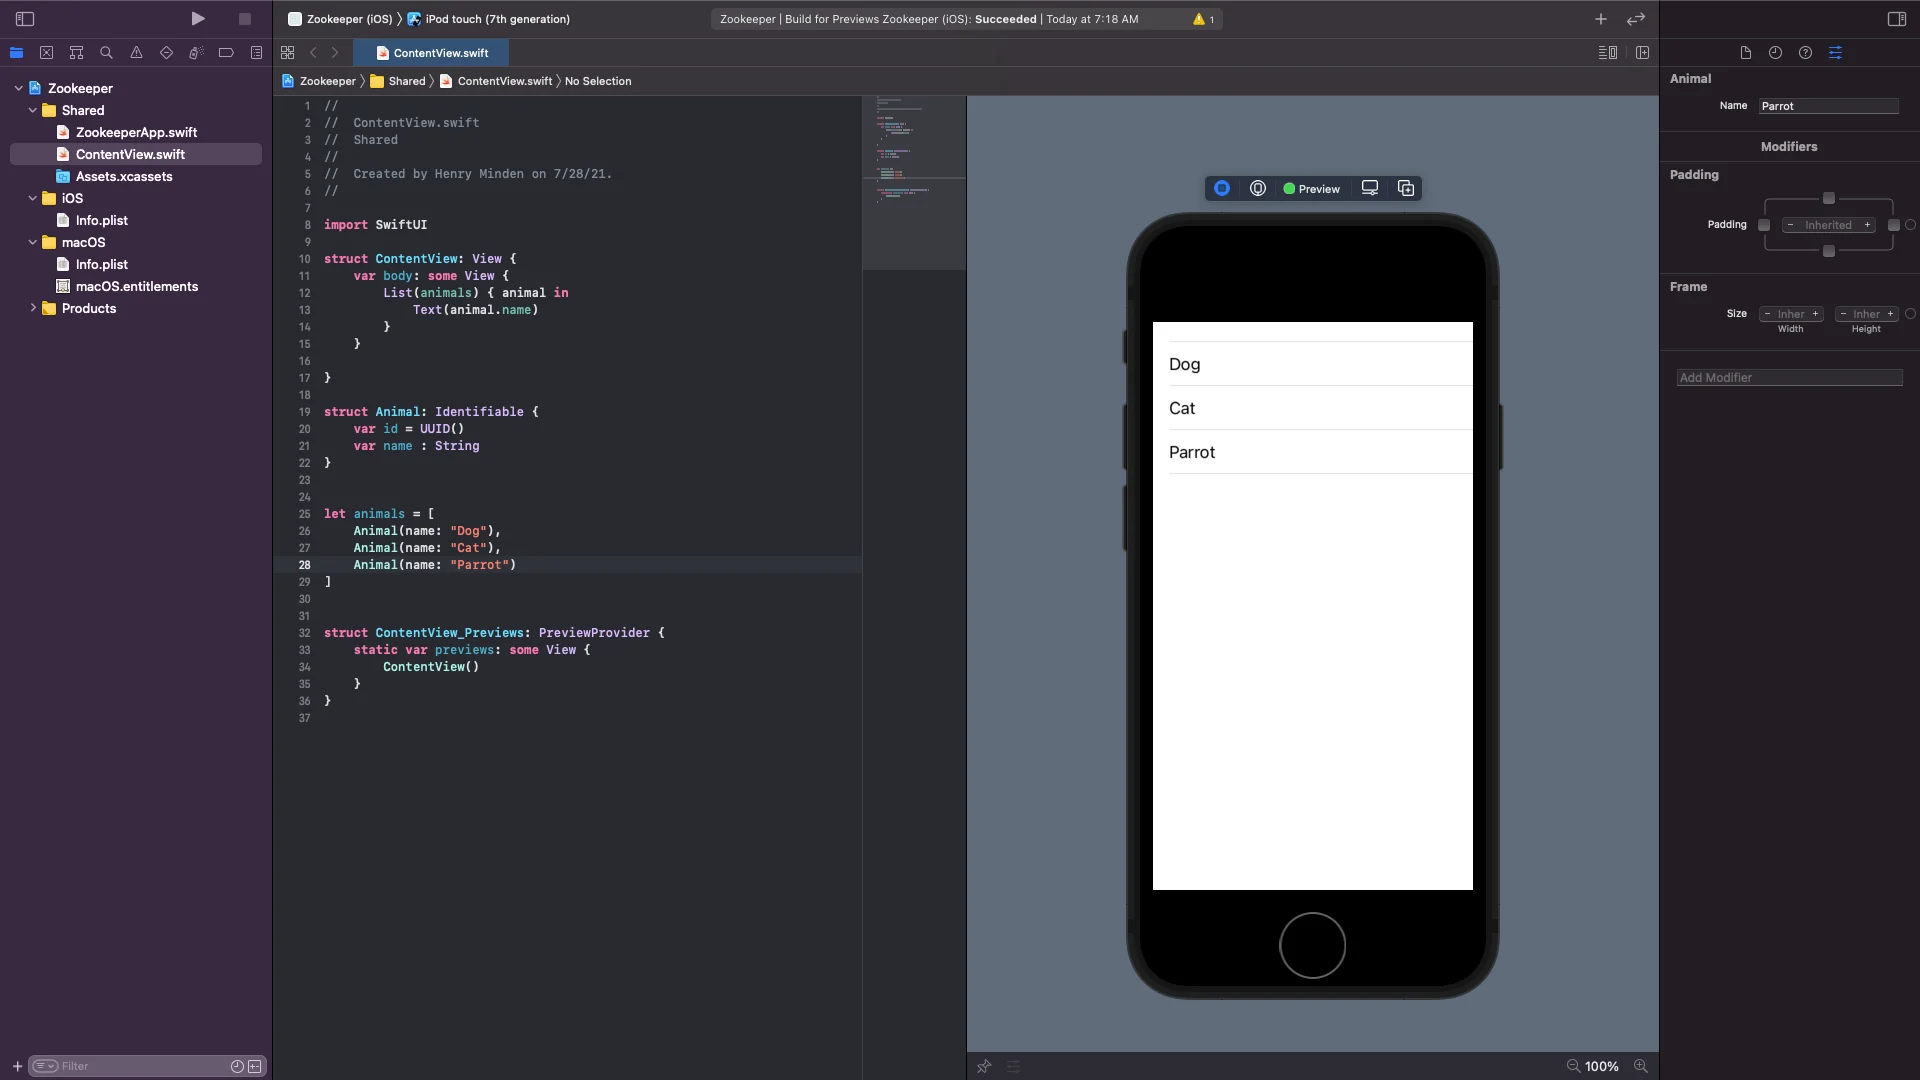
Figure 6
Identifiable protocol
We just saw that each element of the data source forListmust be uniquely identifiable. It turns out, there is a protocol that can help with this and ensure that each element is identifiable without having to specify a keypath.
Let’s modify theAnimalstruct so that it looks like this:
struct Animal: Identifiable {    var id = UUID()    var name : String}
Copy to clipboard
struct Animal: Identifiable { var id = UUID() var name : String}We have made theAnimalstructure conform to theIdentifiableprotocol, which means that it must have a property calledidthat is a unique identifier. By using an instance of theUUIDstructure (built into Swift Foundation) we guarantee thatidis unique.
Now we don’t need theuniqueIDto be specified when we instantiateAnimalin theanimalsarray:
let animals = [    Animal(name: "Dog"),    Animal(name: "Cat"),    Animal(name: "Parrot")]
Copy to clipboard
let animals = [ Animal(name: "Dog"), Animal(name: "Cat"), Animal(name: "Parrot")]Because we are giving the list data that isIdentifiable, the list automatically knows to look at the ‘id’ property of the data to find its unique identifier. Therefore, we can refactor theListdefinition to remove the keypath specification:
var body: some View {        List(animals) { animal in            Text(animal.name)        }    }
Copy to clipboard
var body: some View { List(animals) { animal in Text(animal.name) } }Making the data dynamic
One of the powerful features of lists is their ability to seamlessly update when their underlying data changes. Imagine a newsfeed app that needs to update as new stories flow in. By adding just a few lines of code, we can see how easy this is to implement.
Let’s delete theanimalsconstant and redefine theContentViewso it looks like this:
struct ContentView: View {        @State var animals = [        Animal(name: "Dog"),        Animal(name: "Cat"),        Animal(name: "Parrot")    ]
    var body: some View {        VStack {            List(animals) { animal in                Text(animal.name)            }            Button("Add") {                animals.append(Animal(name: "New Animal"))            }        }    }    }
Copy to clipboard
struct ContentView: View { @State var animals = [ Animal(name: "Dog"), Animal(name: "Cat"), Animal(name: "Parrot") ]
var body: some View { VStack { List(animals) { animal in Text(animal.name) } Button("Add") { animals.append(Animal(name: "New Animal")) } } } }The first modification we made was to changeanimalsto a variable and add the@Stateproperty wrapper to let the compiler know to change any views that it is used in when its value changes. Next, we wrapped the list view with aVStackand added a button to the bottom of the stack. The button appends a new instance ofAnimalto theanimalsarray each time it is pressed. Resume your live preview and see the button in action!
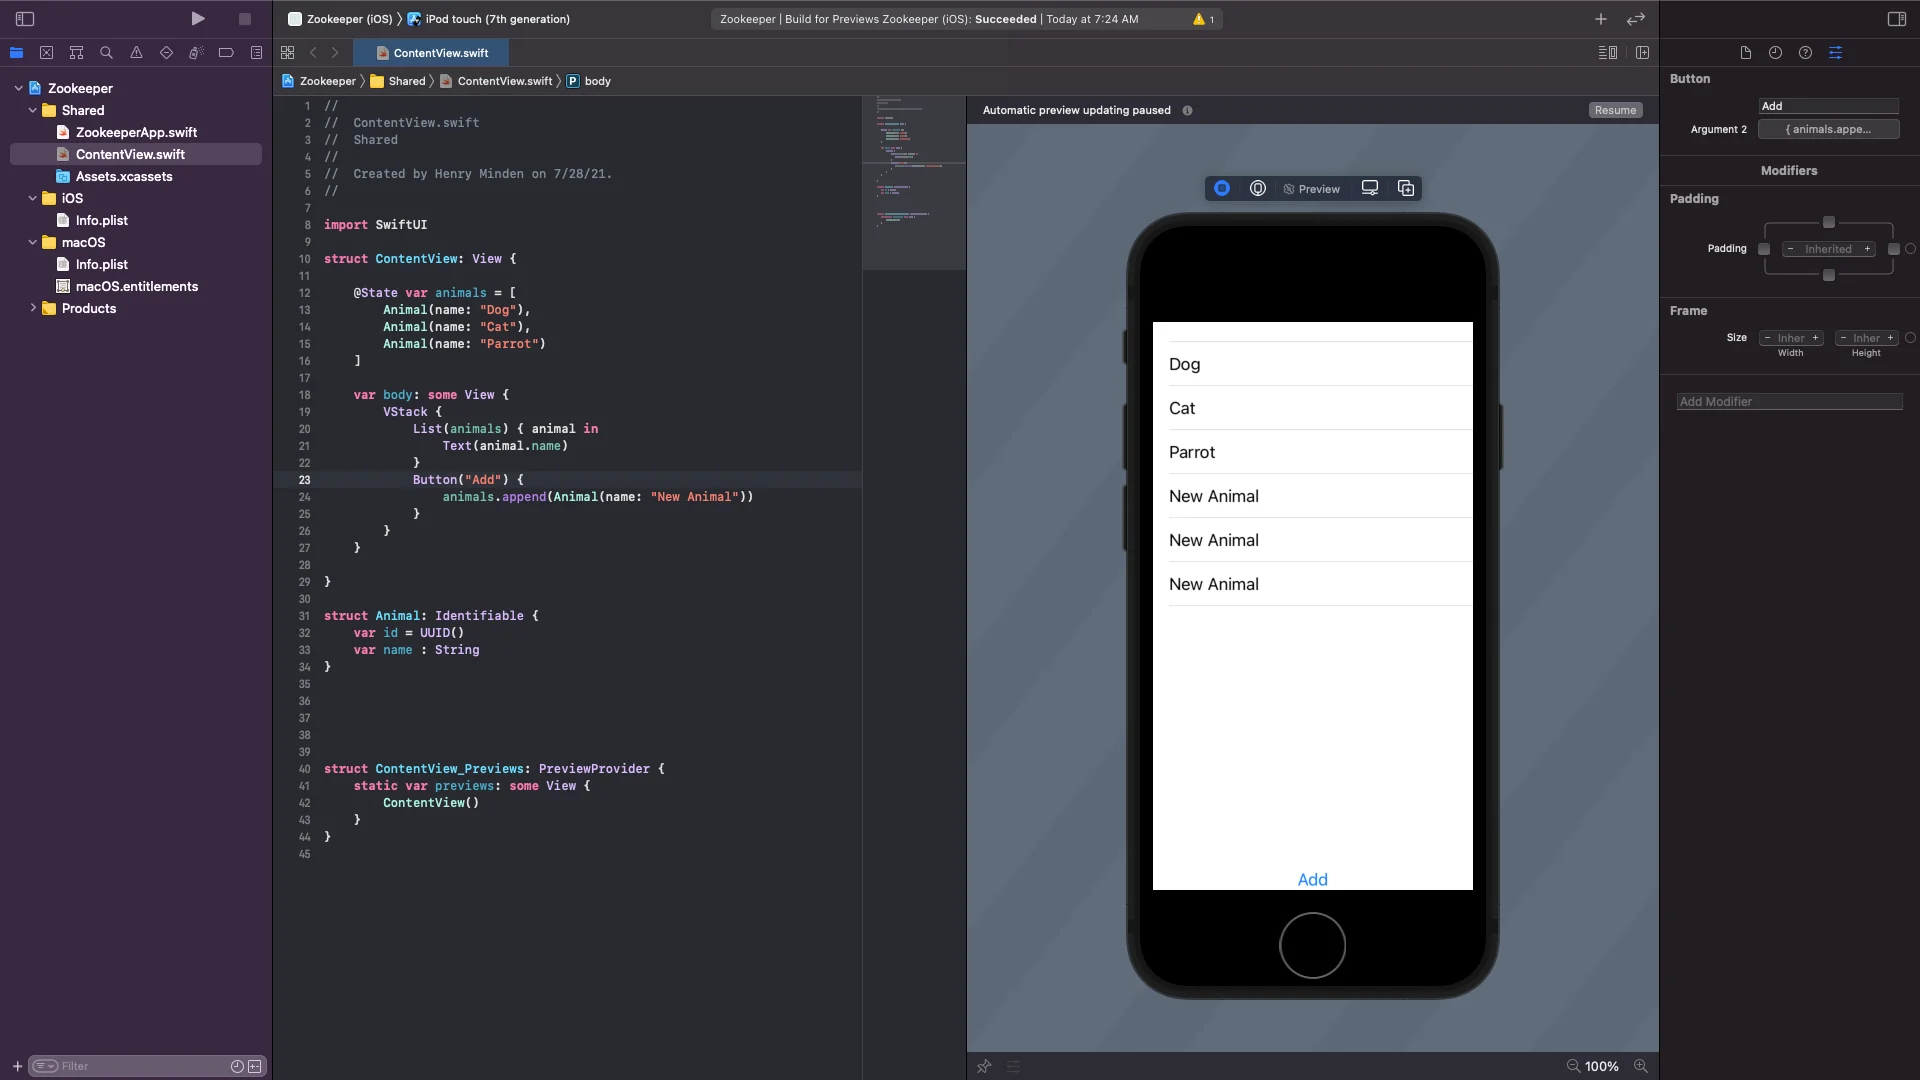
Figure 7
Adding sections
A common visual hierarchy we will want to specify is a list separated by sections. By using theForEachandSectionstructures within ourListthis is easy to accomplish!
ForEach structure
TheForEachstructure can compute views from a collection of data that conforms to theIdentifiableprotocol. Let’s refactor our list to use aForEachstructure:
var body: some View {        List {            ForEach(animals) { animal in                Text(animal.name)            }        }    }
Copy to clipboard
var body: some View { List { ForEach(animals) { animal in Text(animal.name) } } }TheForEachexecutes the{ animal in }closure for each element in theanimalscollection, much like theListdid previously. While this accomplishes the same thing as what we had before, we’ll find this quite useful when we add sections to our list.
List sections
A common visual hierarchy you may need to implement in list views is a section view. Let’s see how easy they are to implement with a SwiftUIList.
First, let’s add a new structure under ourAnimaldefinition calledAnimalGroup:
struct AnimalGroup: Identifiable {    var id = UUID()    var groupName : String    var animals : [Animal]}
Copy to clipboard
struct AnimalGroup: Identifiable { var id = UUID() var groupName : String var animals : [Animal]}Since we will use aForEachto dynamically generate the sections, we need to makeAnimalGroupconform toIdentifiable. EachAnimalGrouphas a name and an array ofAnimals.
Next, let’s replace theanimalsarray with the following array ofAnimalGroups:
let animalGroups = [    AnimalGroup(groupName: "Pets", animals: [        Animal(name: "Dog"),        Animal(name: "Cat"),        Animal(name: "Parrot"),        Animal(name: "Mouse")    ]),    AnimalGroup(groupName: "Farm", animals: [        Animal(name: "Cow"),        Animal(name: "Horse"),        Animal(name: "Goat"),        Animal(name: "Sheep"),    ]),    AnimalGroup(groupName: "Critters", animals: [        Animal(name: "Firefly"),        Animal(name: "Spider"),        Animal(name: "Ant"),        Animal(name: "Squirrel"),    ])]
Copy to clipboard
let animalGroups = [ AnimalGroup(groupName: "Pets", animals: [ Animal(name: "Dog"), Animal(name: "Cat"), Animal(name: "Parrot"), Animal(name: "Mouse") ]), AnimalGroup(groupName: "Farm", animals: [ Animal(name: "Cow"), Animal(name: "Horse"), Animal(name: "Goat"), Animal(name: "Sheep"), ]), AnimalGroup(groupName: "Critters", animals: [ Animal(name: "Firefly"), Animal(name: "Spider"), Animal(name: "Ant"), Animal(name: "Squirrel"), ])]Here we’re simply instantiating threeAnimalGroupstructures, each with an array ofAnimals.
Now for someSectionmagic! Let’s replace thebodyofContentViewwith this code:
var body: some View {        List {            ForEach(animalGroups) { animalGroup in                Section(header: Text(animalGroup.groupName)) {                    ForEach(animalGroup.animals) { animal in                        Text(animal.name)                    }                }            }        }    }
Copy to clipboard
var body: some View { List { ForEach(animalGroups) { animalGroup in Section(header: Text(animalGroup.groupName)) { ForEach(animalGroup.animals) { animal in Text(animal.name) } } } } }The firstForEachgenerates aSectionview for each of theAnimalGroupstructures in theanimalGroupsarray. TheSectionview defines a discrete section of the list, which in turn has a nestedForEachthat generates the list items for each of theAnimalstructures in theanimalproperty of its correspondingAnimalGroup. The header of theSectionis specified by itsheaderproperty, which can be any SwiftUI view.
HitResumeand you should now see this list with sections:
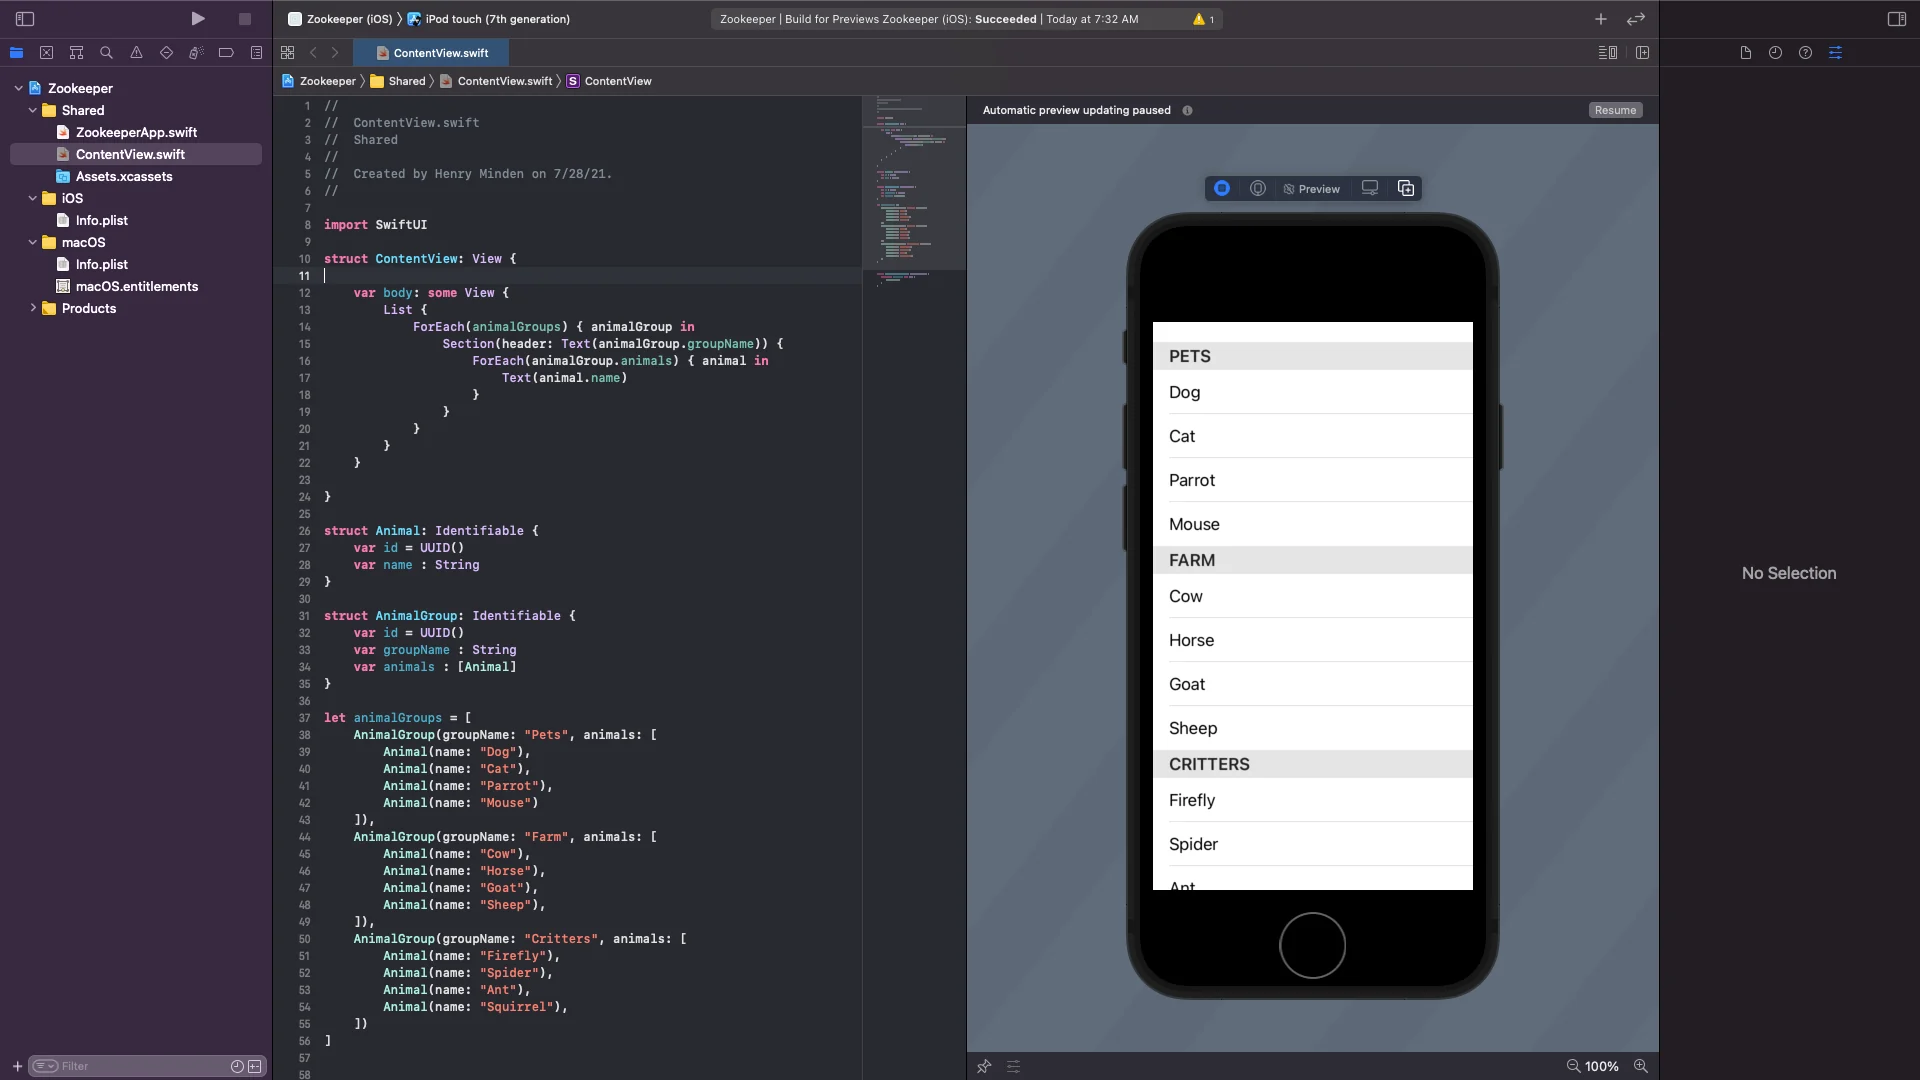
Figure 8
Conclusion
Great job! In this article we learned:
- How to implement a SwiftUIListview with static data as well as data from a collection.
- Liststructures need identifiable data.
- We can provide identifiable data using keypaths or using theIdentifiableprotocol.
- How to use theForEachstructure to generate lists expressively.
- How to useSectionstructures to make lists prettier and easier to read.
SwiftUI list views are simple to use, they are extremely powerful for creating wonderful user experiences. You can download the final code from the project at the linkhere.
'The Codecademy Team, composed of experienced educators and tech experts, is dedicated to making tech skills accessible to all. We empower learners worldwide with expert-reviewed content that develops and enhances the technical skills needed to advance and succeed in their careers.'
Complete Payment to Unlock Full Guide & Source Code
You are viewing the 30% preview. Join TopCourseAI Pro to unlock the remaining 70% of this article, unblur all code snippets, and gain full access to all 412 technical projects and guides.
Ready to access the complete step-by-step tutorial?
Gain full unhindered access to all 412 technical projects and guides, unblur all source code snippets, and download runnable scripts.
Building LangChain Agents for LLM Applications in Python
Next BlueprintBuilding Multi-Agent Application with CrewAI
Related Blueprints & Guides
View all 166 →Best IDEs for Mobile App Development: A Complete Guide
AnIDE(Integrated Development Environment) combines essential development tools into a single application, making mobile app development more efficient and organized. Rather than juggling separate tools for coding, debugg...
Mobile developmentGrids in SwiftUI
The grid layout has become a familiar paradigm for mobile user experiences. The canonical example of grid layout is in the built-in camera roll app for iOS. It can also be found on an extremely popular social photo-shari...
Mobile developmentHow to Create SwiftUI Forms with Pickers: A Step-by-Step Guide
InSwiftUI, aFormis a specialized container view used to create user-friendly input interfaces, typically for data entry tasks like filling out settings, profile details, or preferences. It’s optimized for grouping contro...
Ready to build production-grade AI systems?
Enjoyed this guide? Continue exploring our library of 166+ production blueprints, multi-agent swarms, and autonomous agent systems with 100% unblurred, executable source code.