
How To Install Jupyter Notebook on Mac and Windows
How To Install Jupyter Notebook on Mac and Windows
What is Jupyter Notebook?
Jupyter Notebookis an essential tool for data science that allows you to create interactive documents combining code, visualizations, and explanatory text. Installing Jupyter Notebook through conda provides the most reliable setup for data science work, ensuring all dependencies are properly managed.
We recommend installing Jupyter Notebook as part of eitherAnacondaor as an addition toMiniconda. Jupyter Notebook can be installed separately, but having either Anaconda or Miniconda already installed makes installing Jupyter Notebook easier.
Chromebook users, please see this article onInstalling Jupyter Notebook on a Chromebookbecause the installation process is slightly different.
What is Anaconda, Conda, and Miniconda?
Anaconda is a Python and R distribution that comes with all the tools you need to start working with data, including packages, development environments, and more. However, it requires significant memory (3 GB). Miniconda is a minimal version of Anaconda that requires less memory (about 50 MB) but does not come with any packages or environments pre-installed.
Both Anaconda and Miniconda come with conda. Conda is a package manager. Package managers help with installing, updating, and removing packages.Pipis another popular package manager, and we will use both. The difference between conda and pip is that conda manages packages and environments in any language (including Python), whereas pip only manages Python packages.
We will use pip to manage Python packages since it is the method recommended by thePython Packaging Authority. Conda’s role in our workflow is to manage Jupyter Notebook.
Anaconda vs. Miniconda: Which one to install for Jupyter Notebook?
If you have 3 GB of space on your computer and want the most straightforward installation, install Anaconda. Scroll to the Windows Anaconda or Mac Anaconda section below.
If you do not have 3 GB of space available or you want to save space and don’t mind doing some manual work, install Miniconda. Scroll to Windows Miniconda or Mac Miniconda
Installing Jupyter Notebook using Anaconda on Windows
You will need to know what System type (number of bits) you have before downloading the package (for more on bits,see here). If you are unsure, let’s check!
On Windows 10 and Windows 8.1:
- Select the Start button, then select Settings > System > About.
- At the right, under Device specifications, see System type.
On Windows 7:
- Select the Start button, right-click Computer, and then select Properties.
- Under System, see the System type.
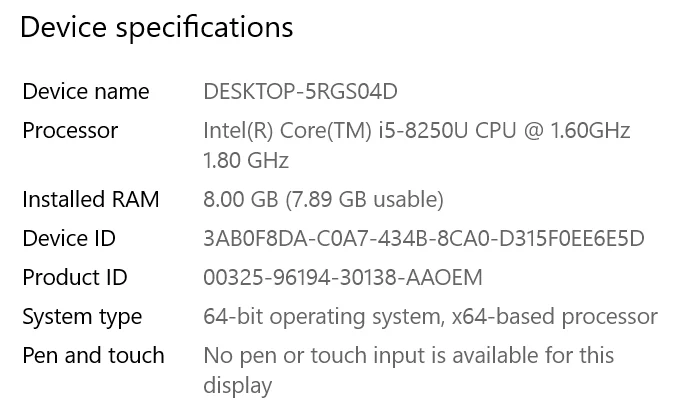
Screenshot of Windows device specifications where system type is '64-bit operating system, x64-based processor'
Go to theAnaconda Downloads pageand download the appropriate version of Anaconda (32- or 64-bit Graphical Installer)
- Double click on the.exefile and clickInstall.
- Read and agree to the licensing terms.
- Select if you want to install for ‘Just Me’ or ‘All Users’. If you are installing for ‘All Users’, you must have Administrator privileges.
- You will be prompted to select the installation location. By default, Anaconda should try to install in your home directory. We recommend accepting this default. ClickInstall.
- You will be asked if you want to add Anaconda to your PATH environment variable. Do not add Anaconda to the PATH because it can interfere with other software.
- You will be asked if you want Anaconda to be your default version of Python. We recommend ‘Yes’. There are some rare instances where you might not make Anaconda the default version, but they are beyond the scope of this article.
- Click theInstallbutton.
- Go ahead and finish the installation.
Now, you can verify your installation. Go to the Windows Start menu and search for ‘Anaconda Navigator’ (not the Anaconda Prompt).
anaconda navigator icon
If it appears, it is installed. Congratulations!
Double-click on it, and the Anaconda Navigator window should appear.
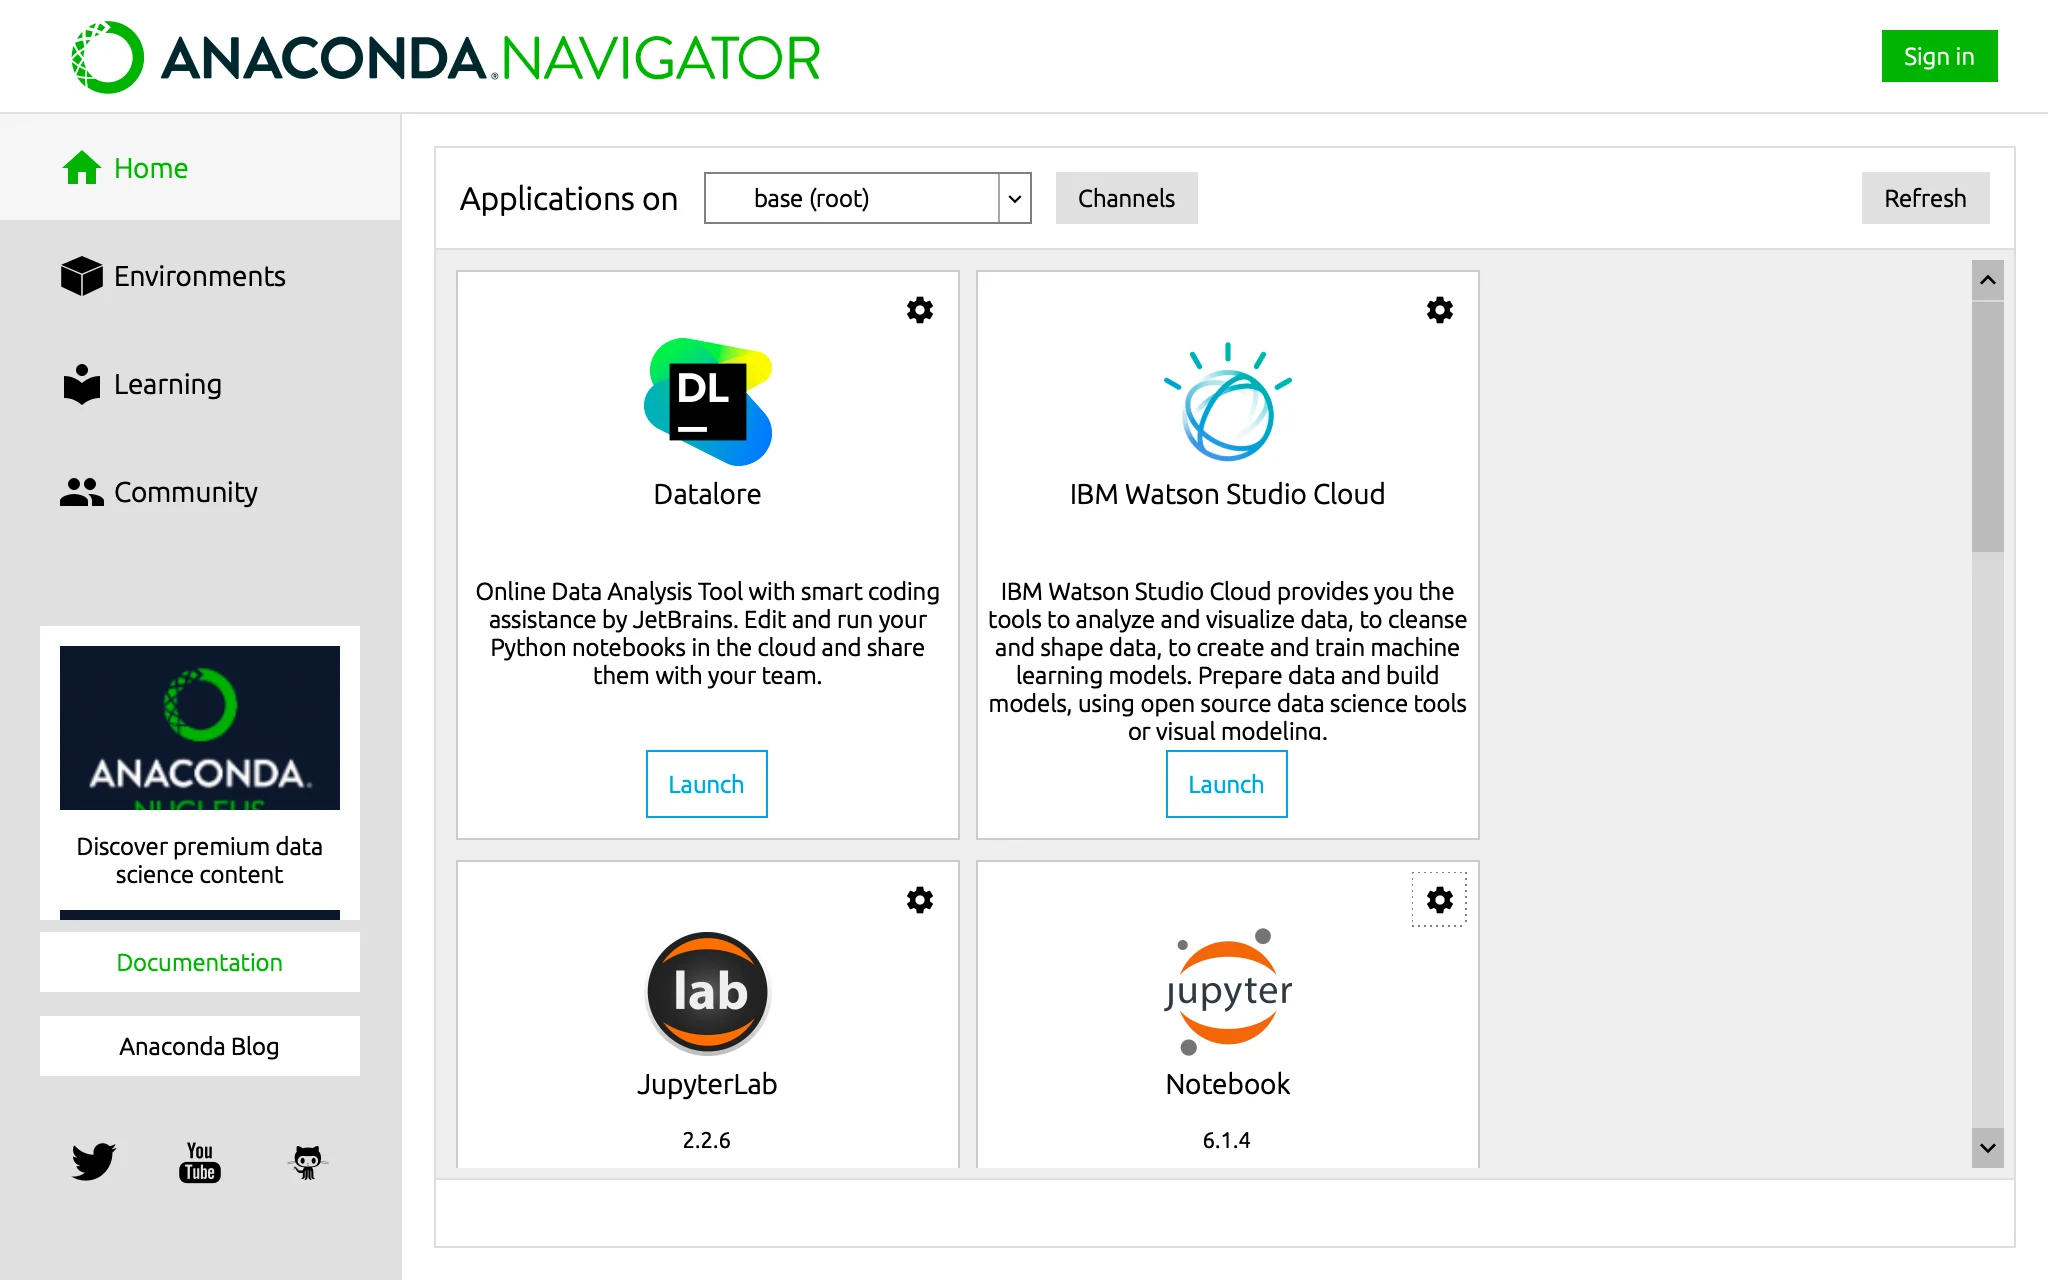
Anaconda navigator prompt with menu of 'Home,' 'Environments,' 'Learning,' and 'Community' are listed. In Home, a few applications are visible, including JupyterLab and Jupyter Notebook.
Your application screen may look slightly different from this one, but that is normal. Click theLaunchbutton under Jupyter Notebook. A Jupyter Notebook interface will appear in your default browser.
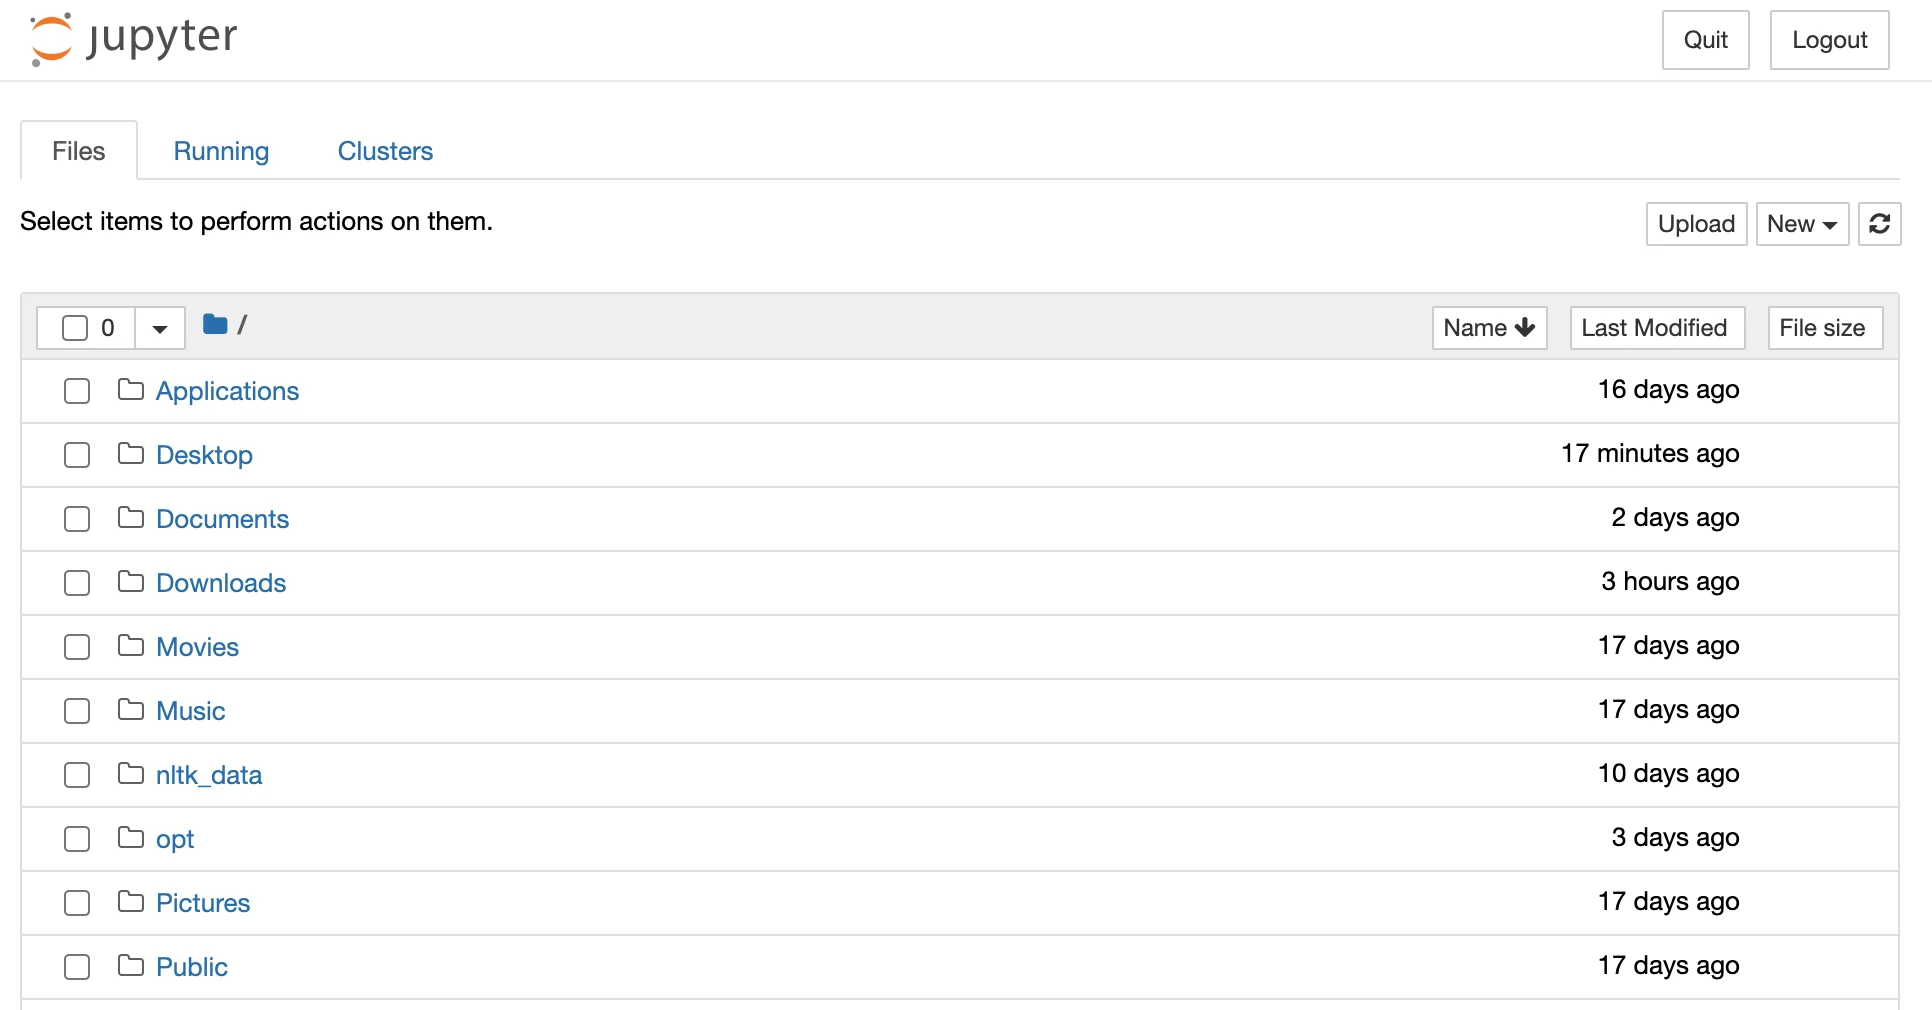
Jupyter Notebook file directory
An Anaconda Prompt might also open and display a URL. If it does, do not close it until you are done working with Jupyter Notebook. If it does not appear, don’t worry - this has to do with your operating system and will not affect Jupyter Notebook’s performance.
Congratulations!! You are ready to move on to the next article andget started using Jupyter Notebook!
Installing Jupyter Notebook using Miniconda on Windows
Go to theMiniconda Downloads page. Download the appropriate (32- or 64-bit) Python 3.X version of Miniconda.
- Double click on the .exe file and clickInstall.
- Read and agree to the licensing terms.
- Select if you want to install for ‘Just Me’ or ‘All Users’. If you are installing for ‘All Users’, you must have Administrator privileges.
- You will be prompted to select the installation location. By default, Anaconda should try to install in your home directory. We recommend accepting this default. ClickInstall.
- You will be asked if you want to add Anaconda to your PATH environment variable. Do not add Anaconda to the PATH because it can interfere with other software.
- You will be asked if you want Anaconda to be your default version of Python. We recommend ‘Yes’. There are some rare instances where you might not make Anaconda the default version, but they are beyond the scope of this article.
- Click theInstallbutton.
Verify Miniconda installation
First, let’s verify that Miniconda was installed. We will use theAnaconda Prompt (miniconda3)Go to the Start Menu and search for the Anaconda Prompt. Anaconda Prompt is the Command Line Interface (CLI) we will use with Miniconda (more about the Command Line). In the shell, type:
conda --version
Copy to clipboard
conda --version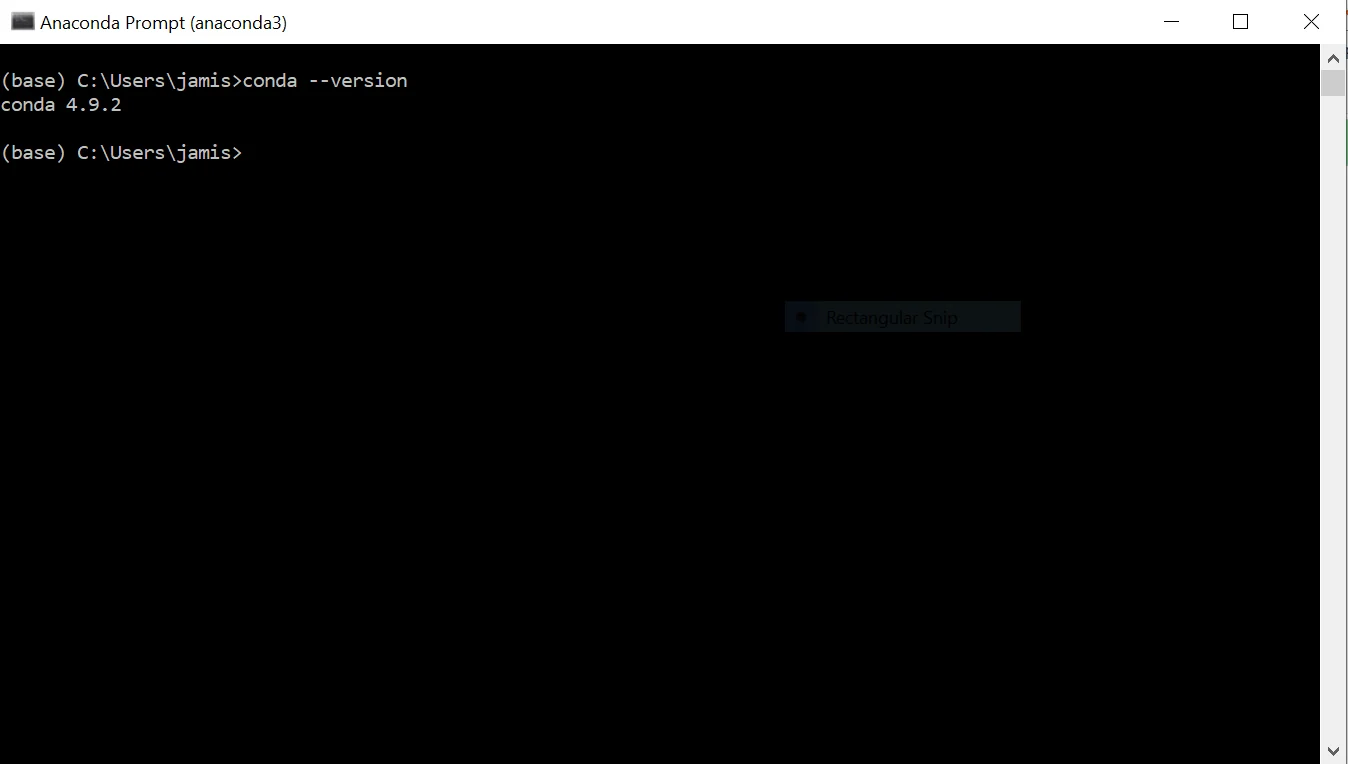
Anaconda Prompt showing conda version 4.9.2
A number should be returned. This is the version number of conda that you have installed.
Now, we need to install Jupyter Notebook using conda. In the Anaconda Prompt, type
conda install jupyter
Copy to clipboard
conda install jupyterWhen prompted with ‘Proceed ([y]/n)?’ typey
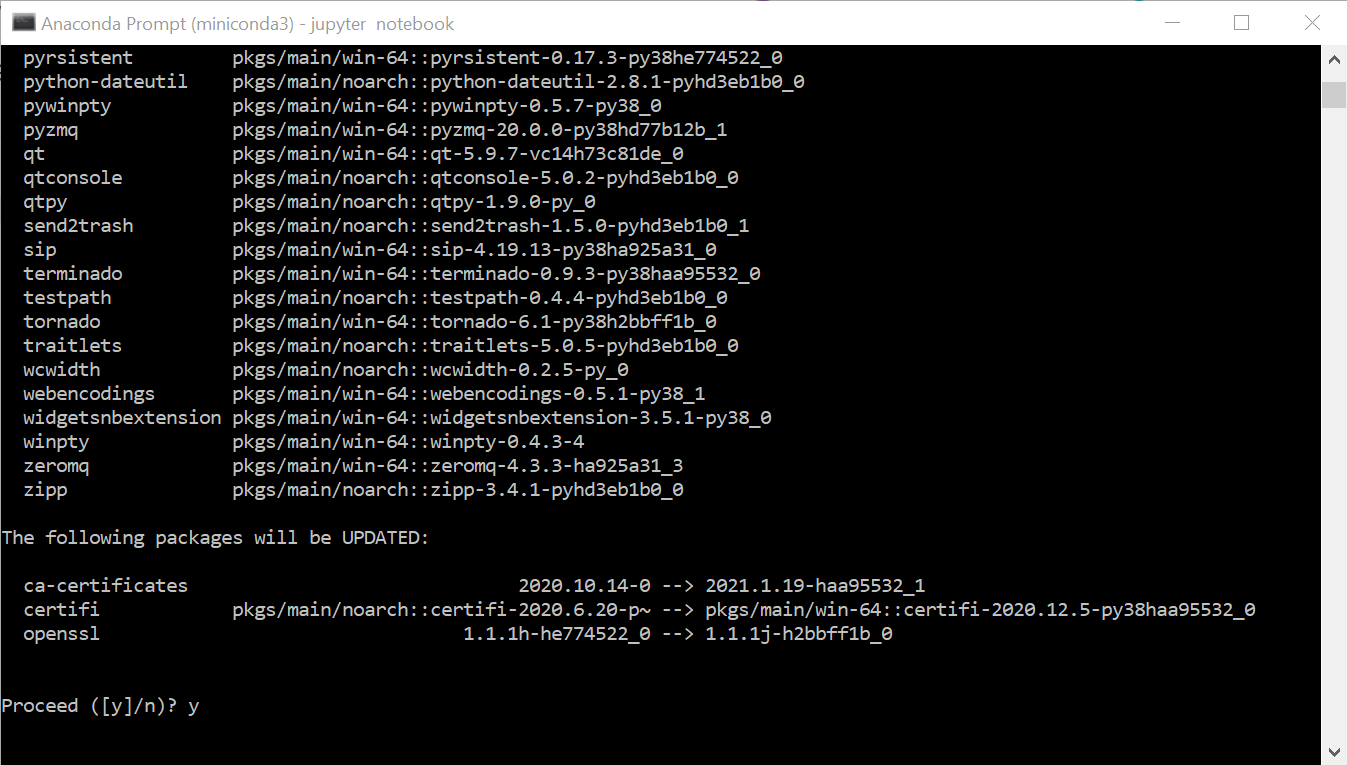
screenshot of terminal to conda install jupyter in which the user is asked whether to proceed with updating packages ca-certificates, certify, and openssl
Once the installation completes, in the Anaconda Prompt, type:
jupyter notebookA Jupyter Notebook interface will appear in your default browser.
An Anaconda Prompt might also open and display a URL. If it does, do not close it until you are done working with Jupyter Notebook. If it does not appear, don’t worry — this has to do with your operating system and will not affect Jupyter Notebook’s performance.
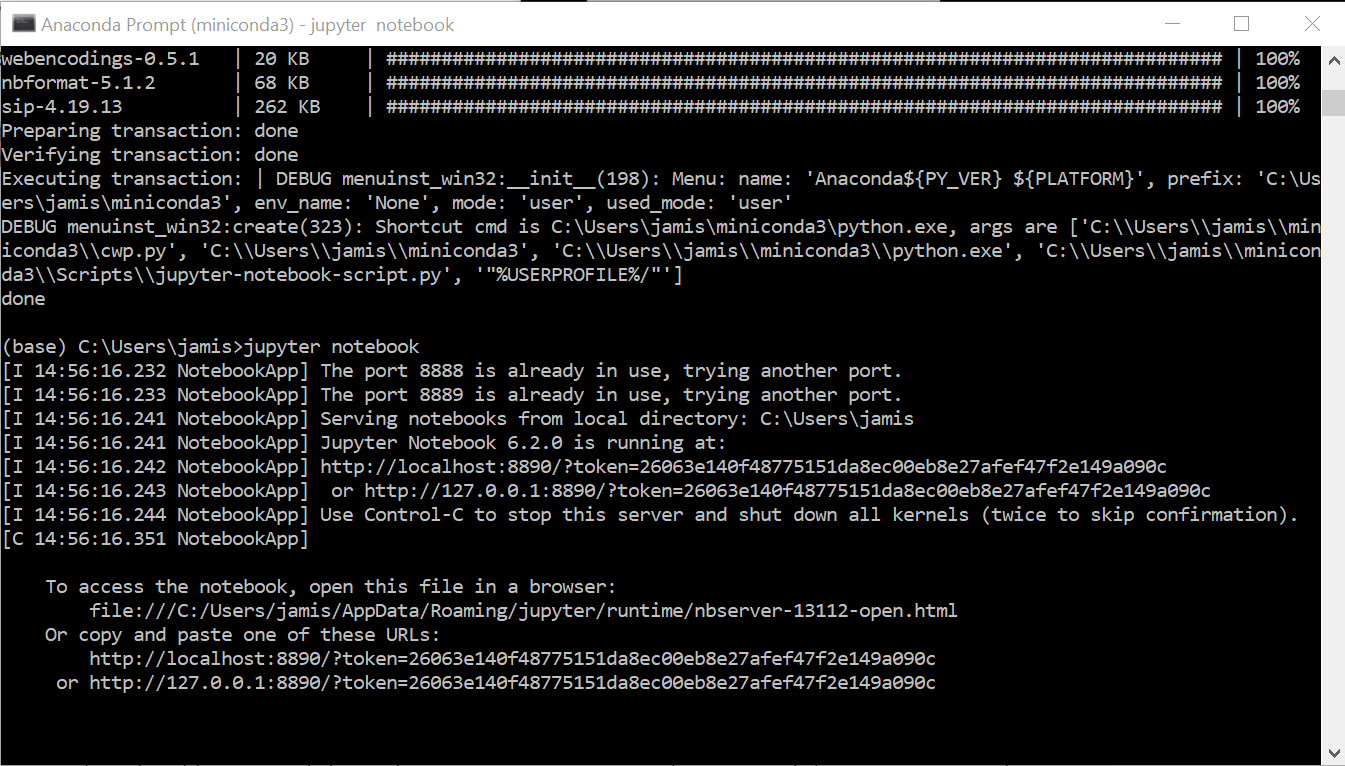
terminal showing Jupyter Notebook running with possible localhost urls
Install additional Python packages
Let’s install a few packages to get you started working with data in Jupyter Notebook. These are all Python packages, so we will usepipinstead ofcondato install them.
We will load:
- pandasfor working with DataFrames
- scikit-learnfor machine learning
- Matplotlibfor visualizations
- seabornfor statistical visualizations
- NLTKfor text analysis
- spaCyfor more text analysis
Note that some of these packages depend on other packages. For example, scikit-learn requiresNumPy(among others). Package managers (like pip) automatically find all the dependencies and install them for you. So when you install scikit learn, pip automatically installsNumPyand any other dependencies scikit-learn needs.
Open a new Anaconda Prompt and type the following commands (press ‘Enter’ after each row):
pip install pandas
pip install scikit-learn
pip install matplotlib
pip install seaborn
pip install nltk
pip install beautifulsoup4
Copy to clipboard
pip install pandas
pip install scikit-learn
pip install matplotlib
pip install seaborn
pip install nltk
pip install beautifulsoup4You can check to be sure these are all installed by starting Python in your Anaconda Prompt.
On a new line, typepython
The header will change to be>>>:
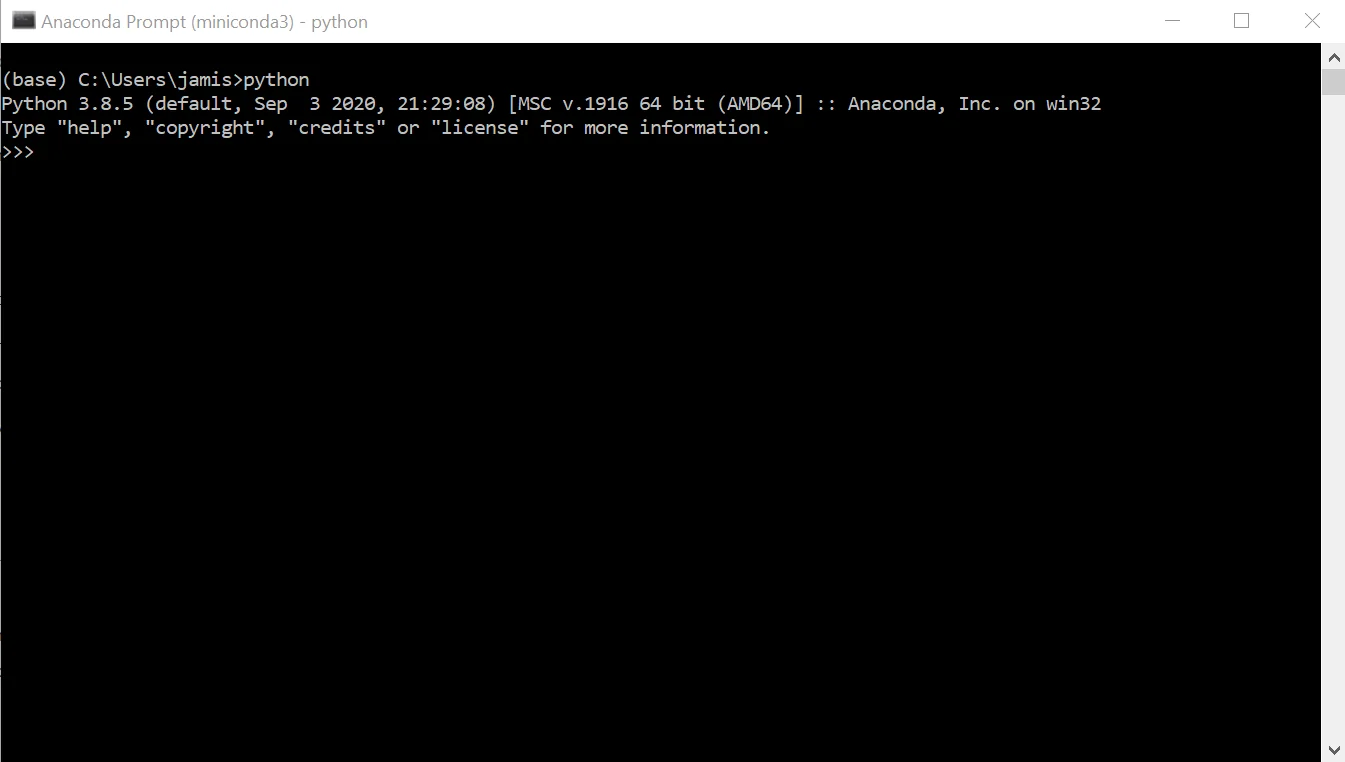
terminal showing python version “Python 3.8.5”
You can import each package on a separate line or take a shortcut and import them all at once. Type:
import pandas
import sklearn
import matplotlib
import seaborn
import nltk
import bs4
Copy to clipboard
import pandas
import sklearn
import matplotlib
import seaborn
import nltk
import bs4Or:
import pandas, sklearn, matplotlib, seaborn, nltk, bs4
Copy to clipboardimport pandas, sklearn, matplotlib, seaborn, nltk, bs4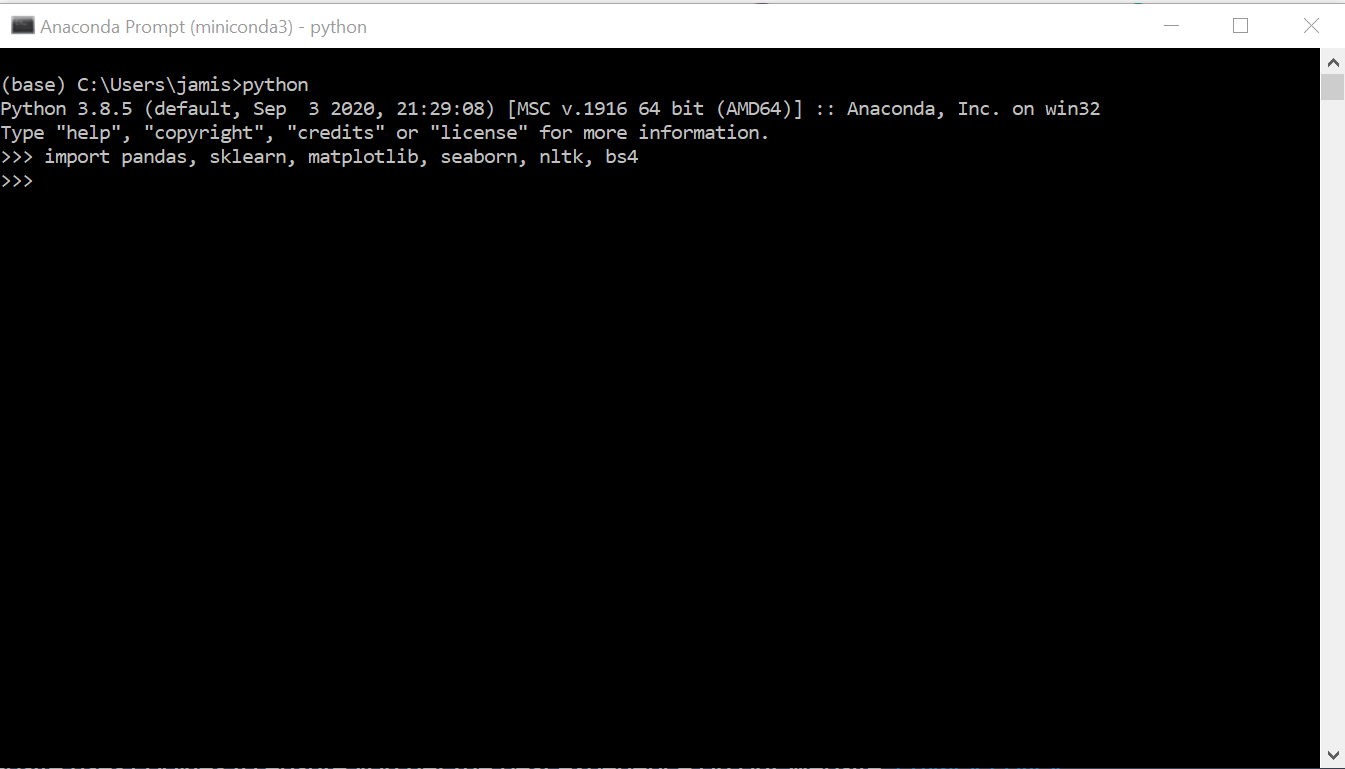
the import statement: import pandas, sklearn, matplotlib, seaborn, nltk, bs4 is shown in a terminal window
If nothing happens, everything is installed correctly, and you are ready to move on to the next article. Congratulations!!!
Troubleshooting installation issues
What if it didn’t work? You will probably get this error message:
ModuleNotFoundError: No module named MODULE(Note that ‘packages’, ‘modules’, and ‘libraries’ all refer to the same thing.)
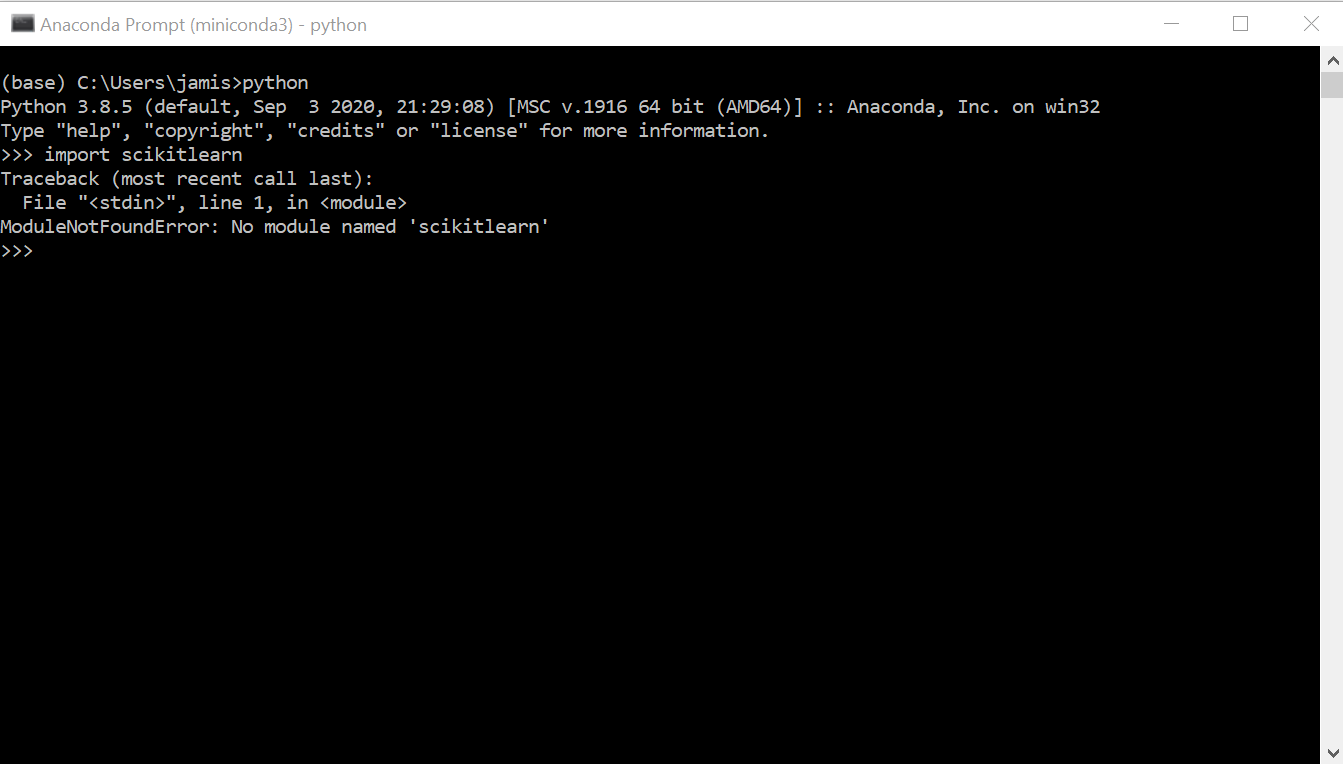
A user has run the statement import scikitlearn in a Python terminal. The terminal displays the following error: ModuleNotFoundError: No module named 'scikitlearn'
No worries — let’s debug! Usually, this is caused by a typo. There are two places to look:
- your import statement
- your installation statement
Check the import statement first. Tryimport MODULE, where MODULE is the module listed in the Error message. (In our case above, the statementimport scikitlearnwas the problem because scikit-learn must be imported withimport sklearn.) If there is no typo there, go back to the installation step.
You will have to open a new Anaconda Prompt (this one is still running Python). Try installing the module specified in the error message usingpip install MODULE. Then return to your window running Python and try importing the module again.
If you are still having trouble, be sure to reach out on theCodecademy forumfor help.
How to install Jupyter Notebook on Mac using Anaconda
You will need to have access to your BASH or zsh Terminal. This is also called the Command Line Interface (CLI). If this is new to you, please read the articleCommand Line Interface Setupor take aBash coursebefore proceeding.
Mac Anaconda
Go to theAnaconda Downloads pageand download the 64-bit Graphical Installer for Mac.
- Double click on the .pkg file and clickInstall.
- Read and agree to the licensing terms.
- Select if you want to install for ‘Just Me’ or ‘All Users’. If you are installing for ‘All Users’, you must have 4. Administrator privileges.
- You will be prompted to select the installation location. By default, Anaconda should try to install in your home directory. We recommend accepting this default. ClickInstall.
- You will be asked if you want to add Anaconda to your PATH environment variable. Do not add Anaconda to the PATH because it can interfere with other software.
- You will be asked if you want Anaconda to be your default version of Python. We recommend ‘Yes’. There are some rare instances where you would not make Anaconda the default version, but they are beyond the scope of this article.
- Click theInstallbutton.
- You may be asked if you want to install PyCharm. PyCharm is anotherIDE(similar to Jupyter Notebook), but it is not necessary right now.
- Go ahead and finish the installation.
Verify Anaconda installation
Now, you can verify your installation. Go to your Applications folder and double-click on Anaconda Navigator.
If the shortcut doesn’t appear (since Anaconda isn’t a regular program, it may appear differently depending on your operating system), clickCommand+Shiftand search for ‘Anaconda Navigator’. If you have to do this, we recommend manually creating a shortcut to your Applications, Desktop, or any other folder you find convenient.
Double click on it, and the Anaconda Navigator window should appear.
Your applications screen may look slightly different from this one, but that is ok. Click theLaunchbutton under Jupyter Notebook. A Jupyter Notebook interface will appear in your default browser.
You may also notice that an Anaconda Prompt also opened. This needs to stay open while you are working in Jupyter Notebook. For more information about the features available in Anaconda, see theAnaconda Documentation.
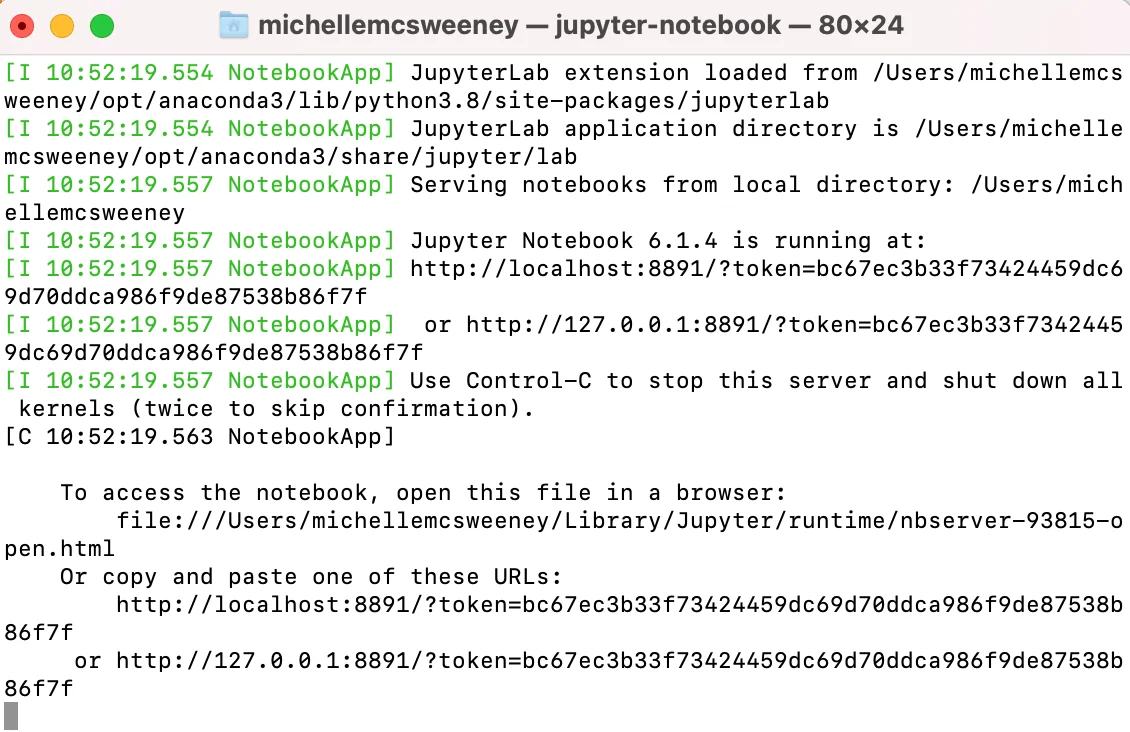
terminal showing possible local host urls for running Jupyter Notebook
How to install Jupyter Notebook on Mac using Miniconda
Go to theMiniconda Downloads page. Download the Miniconda3 MacOSX 64-bit pkg
- Double click on the.pkgfile and clickContinue.
- Read and agree to the licensing terms.
- Select if you want to install for ‘Just Me’ or ‘All Users’. If you are installing for ‘All Users’, you must have Administrator privileges.
- You will be prompted to select the installation location. By default, Anaconda should try to install in your home directory. We recommend accepting this default. ClickInstall.
- You will be asked if you want to add Miniconda to your PATH environment variable. Do not add Miniconda to the PATH because it can interfere with other software.
- You will be asked if you want Miniconda to be your default version of Python. We recommend ‘Yes’. There are some rare instances where you would not make Miniconda the default version, but they are beyond the scope of this article.
- Click theInstallbutton.
Verify Miniconda installation
First, let’s verify that Miniconda was installed. Open a BASH or zsh terminal and type:
conda --version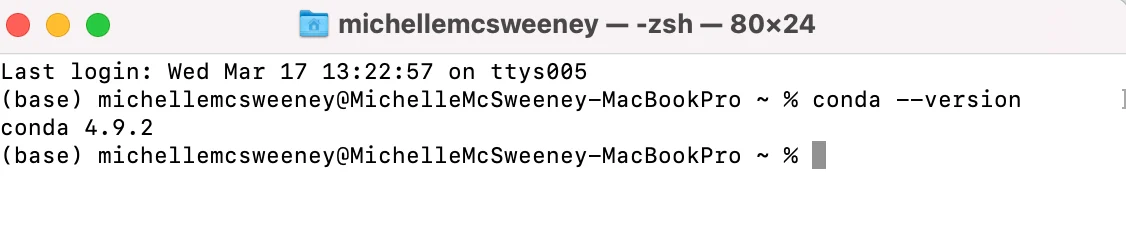
terminal showing conda version 4.9.2
Install Jupyter Notebook
Now we need to install Jupyter using conda. In the BASH or zsh terminal, type:
conda install jupyter
Copy to clipboardWhen prompted with ‘Proceed ([y]/n)?’ typey.
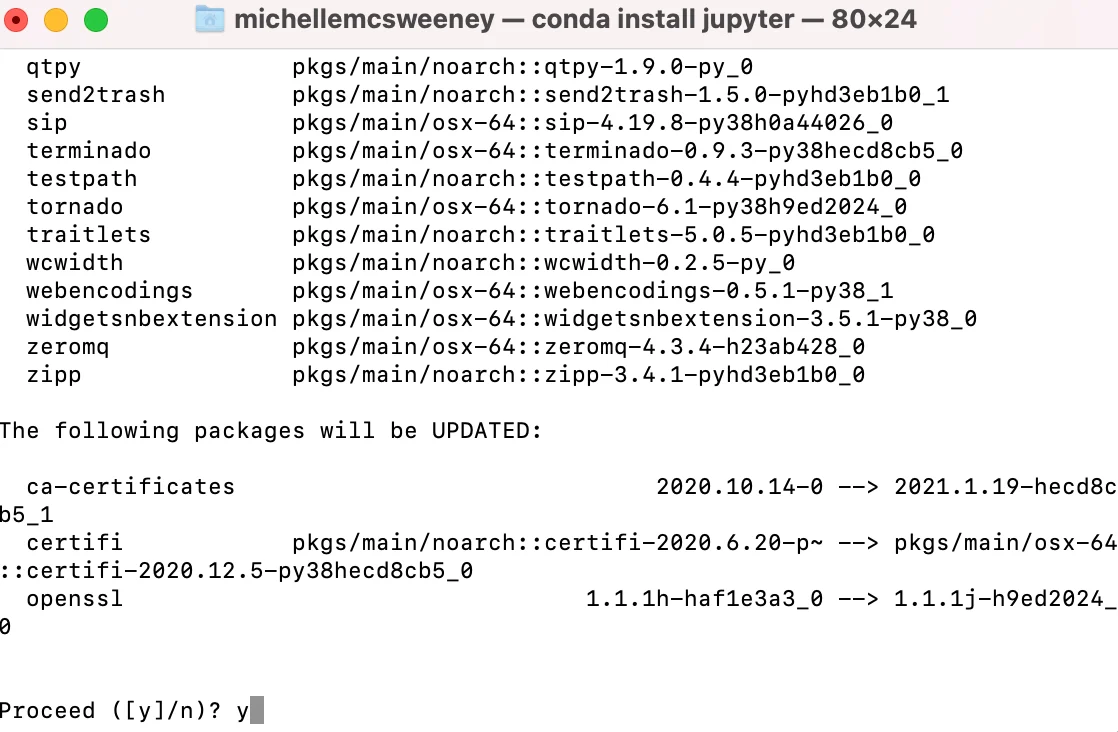
terminal displaying conda install jupyter option displaying ‘Proceed ([y]/n)?’: y
Once the installation completes, in the BASH or zsh terminal, type:
You may also notice that the BASH or zsh terminal is now displaying a url. This needs to stay open while you are working in Jupyter Notebook.
terminal showing local host urls running Jupyter Notebook
Install additional Python packages
- pandasfor working with DataFrames.
- scikit-learnfor machine learning.
- Matplotlibfor visualizations.
- seabornfor statistical visualizations.
- NLTKfor text analysis.
- spaCyfor more text analysis.
Note that some of these packages depend on other packages. For example, scikit-learn requiresNumPy(among other packages). Package managers (like pip) automatically find all the dependencies and install them for you. So when you install scikit-learn, pip automatically installs NumPy, and any other dependencies scikit-learn needs.
Open a new BASH or zsh terminal and type the following commands:
pip install pandas
pip install sklearn
pip install matplotlib
pip install seaborn
pip install nltk
pip install beautifulsoup4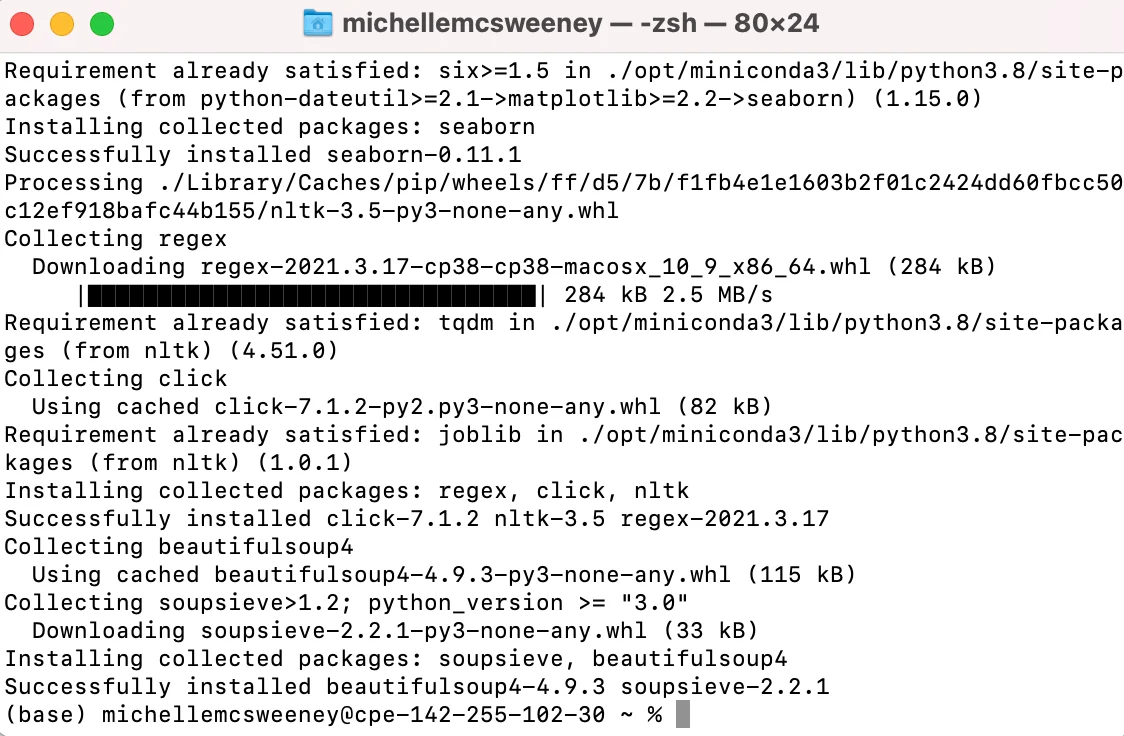
terminal showing pip install packages: pandas, sklearn, matplotlib, seaborn, nltk, beautiful soup with a final statement 'Successfully installed MODULE" after each package has been installed
You can check to be sure these are all installed by starting Python in your Terminal.
On a new line, typepython.
The header will change to>>>
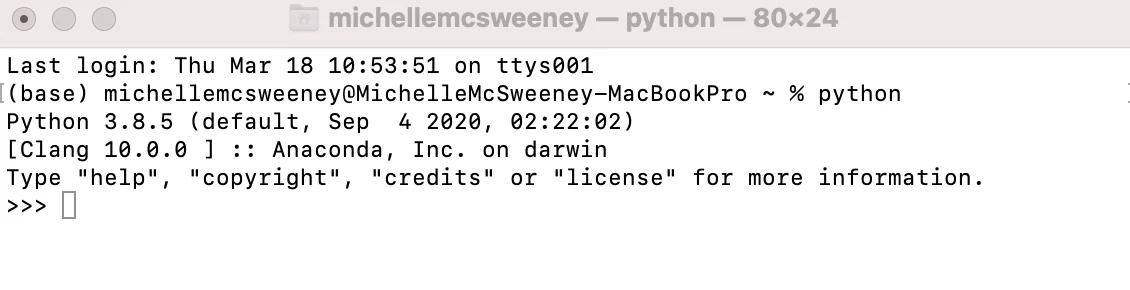
terminal showing “Python 3.8.5” and Anaconda after user has typed "python"
You can import each package on a separate line or take a shortcut and import them all at once.
import pandas
import sklearn
import matplotlib
import seaborn
import nltk
import bs4
Copy to clipboardimport pandas, sklearn, matplotlib, seaborn, nltk, bs4
Copy to clipboard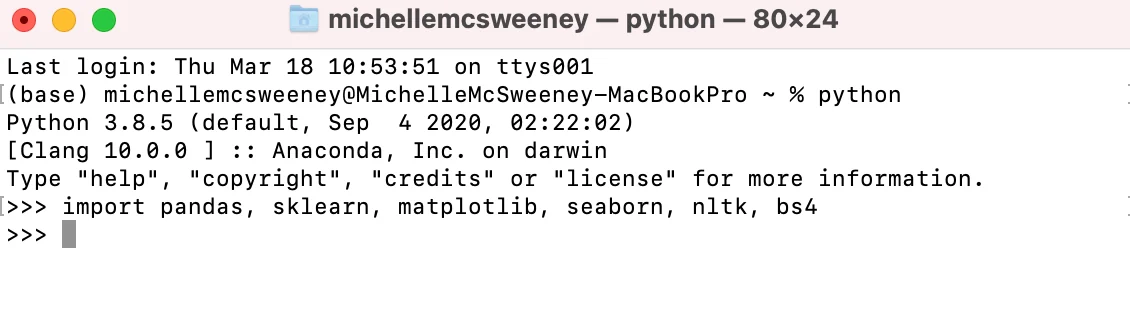
terminal showing import pandas, sklearn, matplotlib, seaborn, nltk, bs4 and new line
Troubleshooting installation issues
What if they are not installed correctly? You will get this error message:
(Note that ‘packages’ and ‘modules’ are the same thing.)
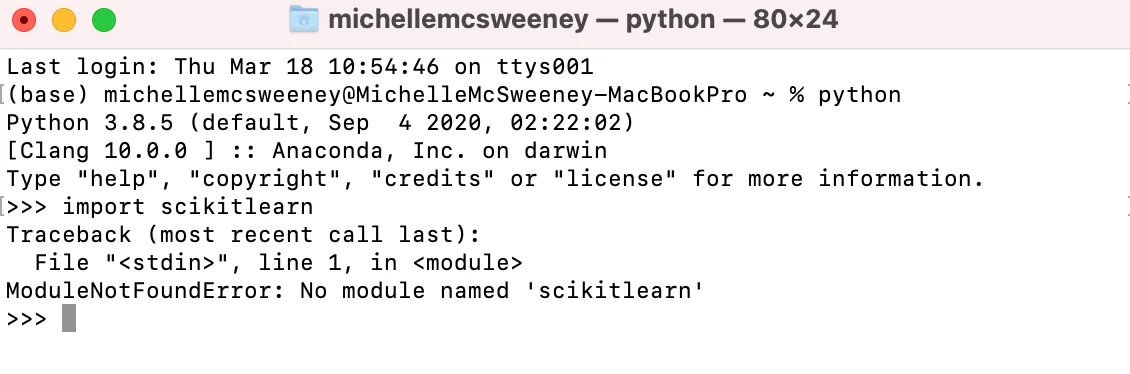
A user has run the statement import scikitlearn in a Python terminal. The terminal displays the following error: ModuleNotFoundError: No module named 'scikitlearn'
You will have to open a new Anaconda Prompt (this one is still running Python). Try importing the module specified in the error message usingpip install MODULE. Then return to your window running Python and trying to import the module again.
If you are still having trouble, be sure to reach out on theCodecademy forumfor help.
Next Steps After Installing Jupyter Notebook
Now that you have a development environment installed on your computer, you are ready to start working locally! For more on using Jupyter, read the articleWriting and Debugging Code in Jupyter.
Conclusion
You now have Jupyter Notebook successfully installed on your system using conda. Whether you chose Anaconda for its comprehensive package collection or Miniconda for its minimal footprint, you’re equipped with a powerful data science environment. Start exploring your local Jupyter setup and begin building your first data science projects!
Frequently asked questions
1. What’s the difference between Anaconda and Miniconda for Jupyter Notebook installation?
Anaconda comes with Jupyter Notebook pre-installed and includes over 150 data science packages, requiring 3GB of space. Miniconda is a minimal installer that lets you use conda install jupyter notebook command manually, requiring only 50MB initially.
2. Can I use conda to install Jupyter Notebook?
Yes, conda is the recommended installation method. Conda manages both the Jupyter Notebook application and its dependencies more reliably than other installation methods.
3. Which installation method is best for beginners?
We recommend Anaconda for beginners because it includes Jupyter Notebook and essential data science packages pre-installed. Advanced users who prefer minimal installations should choose Miniconda and use conda install jupyter notebook.
4. What should I do if conda install jupyter notebook fails?
First, verify your conda installation withconda --version. If conda is working, try updating conda withconda update condabefore running conda install jupyter notebook again. Check our troubleshooting sections above for specific error solutions.
'The Codecademy Team, composed of experienced educators and tech experts, is dedicated to making tech skills accessible to all. We empower learners worldwide with expert-reviewed content that develops and enhances the technical skills needed to advance and succeed in their careers.'
Complete Payment to Unlock Full Guide & Source Code
You are viewing the 30% preview. Join TopCourseAI Pro to unlock the remaining 70% of this article, unblur all code snippets, and gain full access to all 412 technical projects and guides.
Ready to access the complete step-by-step tutorial?
Gain full unhindered access to all 412 technical projects and guides, unblur all source code snippets, and download runnable scripts.
Related Blueprints & Guides
View all 166 →Creating a Word Cloud With Python
In Data Visualization,word cloudsare used to display textual data in a specific shape. The more frequent a word is in a chunk of text, the larger it will appear in the word cloud. This can provide interesting insights in...
Data visualizationData Visualizations for Messy Data
Data visualization tutorials generally use pre-processed data. But what about datasets in the wild? What do we do about missing data? Or outliers that largely skew visualizations? What do we do when there are too many ob...
Data visualizationEDA Prior To Fitting a Regression Model
Before fitting any model, it is often important to conduct an exploratory data analysis (EDA) in order to check assumptions, inspect the data for anomalies (such as missing, duplicated, or mis-coded data), and inform fea...
Ready to build production-grade AI systems?
Enjoyed this guide? Continue exploring our library of 166+ production blueprints, multi-agent swarms, and autonomous agent systems with 100% unblurred, executable source code.