
Creating a Word Cloud With Python
Creating a Word Cloud With Python
Introduction
In Data Visualization,word cloudsare used to display textual data in a specific shape. The more frequent a word is in a chunk of text, the larger it will appear in the word cloud. This can provide interesting insights in datasets, such as determining which metatags have the most prominence on a web page. Other uses for word clouds include displaying what topics are usually covered in speeches and excerpts.
In this article, we will learn how to create, mask, and display the following word cloud in Python:
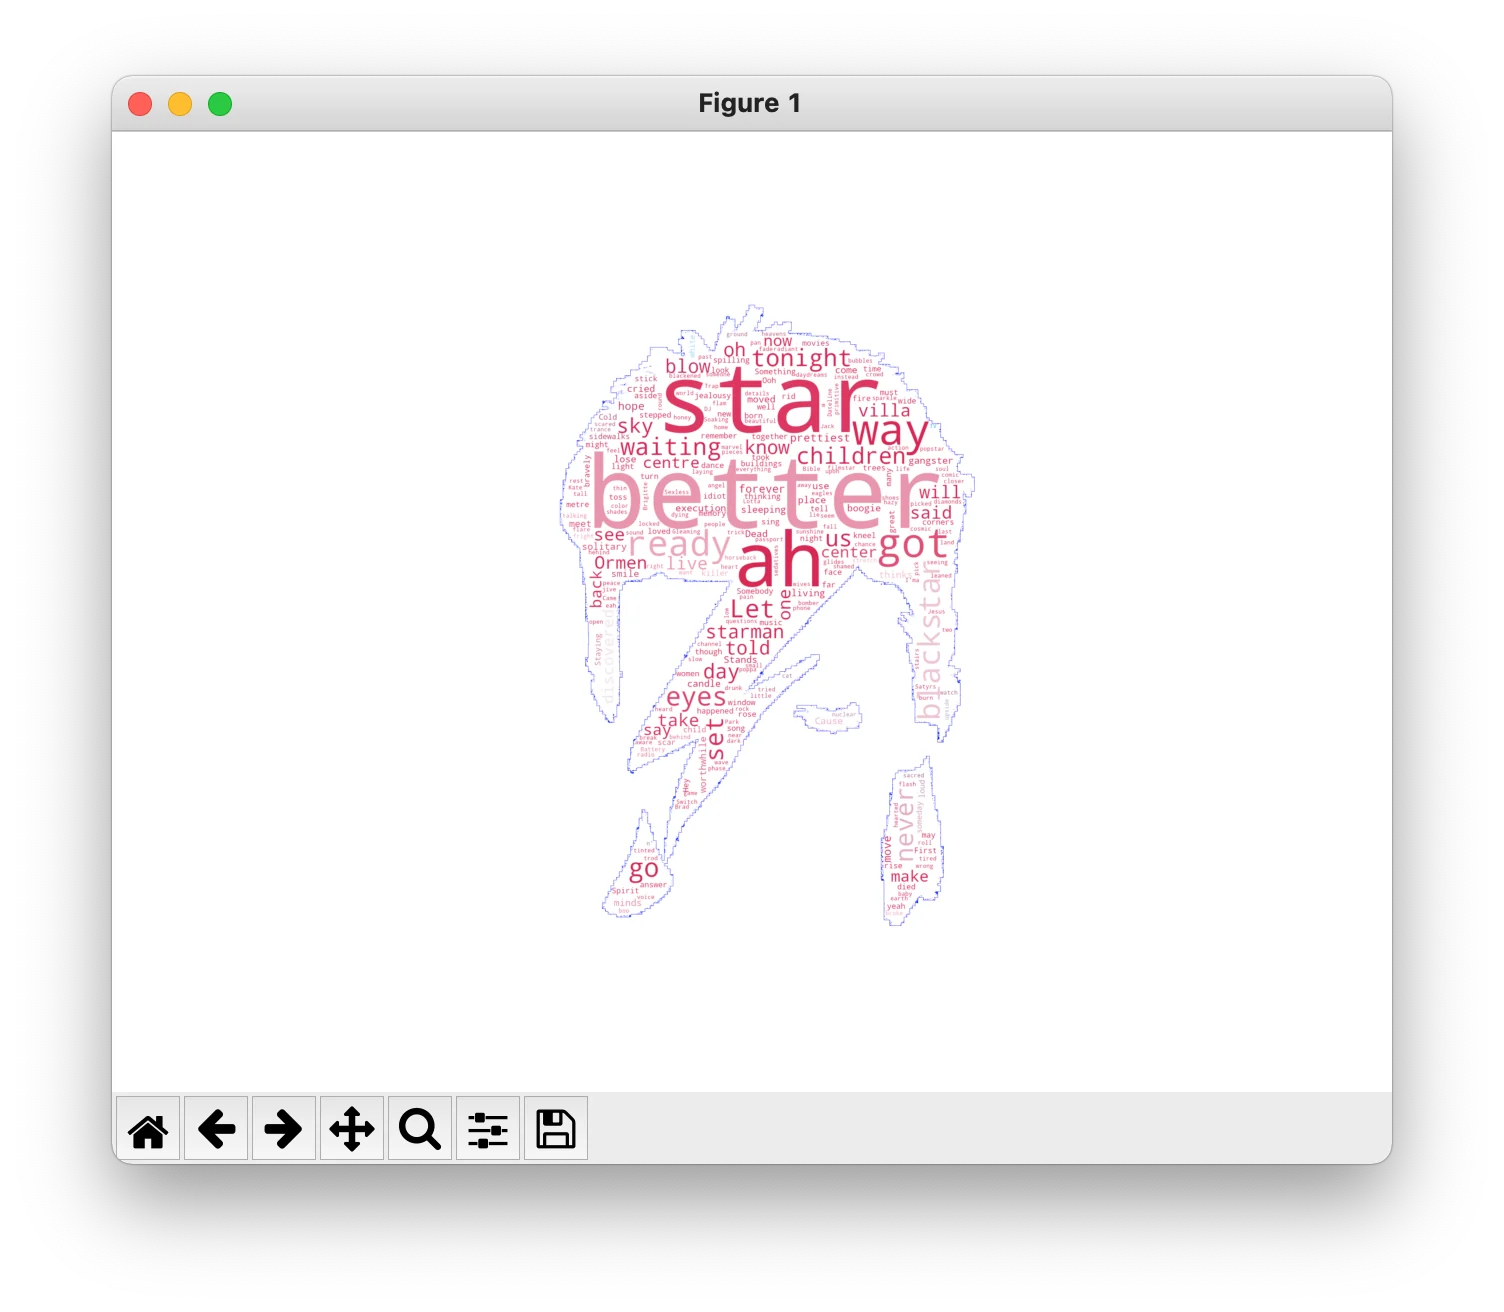
Final version of Bowie word cloud
It’s a word cloud of the late and great David Bowie filled with words from his songs with “star” in the lyrics!
We will use the following libraries:
- Thewordcloudmodule will generate our word cloud using a text file.
- NumPywill be used to mask, or shape, an image to be applied to the word cloud.
- Pillow, a fork of Python Imaging Library (PIL), will be used for making a copy of the original image to work with.
- Modules from theoslibrary, including theos.pathmodule, will allow us to access the folders and files in our project’s directory.
- Matplotlibwill ultimately be used to display our new word cloud.
Note:With the exception of theoslibrary, the rest will need to be installed to complete this tutorial. Usingpipversion 3, the following command be run to install them:
pip3 install numpy pillow wordcloud matplotlib
Copy to clipboard
pip3 install numpy pillow wordcloud matplotlibThis tutorial assumes familiarity with the Pythonprogramminglanguage, including importing libraries and using some of Python’sbuilt-in functions.
Let’s get started with the first step!
Step 1: Project setup
To begin, we will create the root directory for our project. After launching theterminalor command prompt, we’ll run the following commands to create a newmy_wordclouddirectory and change to it:
mkdir my_wordcloudcd my_wordcloud
Copy to clipboard
mkdir my_wordcloudcd my_wordcloudWe’re now working from the newly createdmy_wordclouddirectory. Next, let’s create a new file calledmy_wordcloud.py:
touch my_wordcloud.pyls
Copy to clipboard
touch my_wordcloud.pylsRunning thelscommand confirms we successfully created themy_wordcloud.pyfile in the correct directory:
my_wordcloud.py
Copy to clipboardmy_wordcloud.pyNote:The file that will ultimately import thewordcloudlibrary must not be namedwordcloud.py. Otherwise, when executing the file, errors will be thrown due tocircular imports.
For this project, we’ll need to have access to thefile pathof our current working directory while creating the word cloud. For this step, let’s open themy_wordcloud.pyfile and write the following:
import os
current_directory = os.path.dirname(__file__)
Copy to clipboard
import os
current_directory = os.path.dirname(__file__)In the snippet above, we passed the__file__path attribute to theos.path.dirname()method to return the full path string of the parent directorymy_wordcloud.
Let’s save the file and proceed to the next step.
Step 2: Find an image to mask with
Finding a suitable image for the word cloud can be challenging at first. There are a few criteria to keep in mind when searching for one:
- The image must have a white background (#ffffff); anything off-white or transparent will be populated by words for the word cloud.
- The shape(s) within the image should be well-defined and composed of mostly non-white colors.
- Although this tutorial uses.pngimages, as long as the image is small, a.jpgimage file can be used instead.
Googling for “word cloud mask images” will yield some promising results. For this tutorial, we are going to use the following image:

Original Bowie image
After downloading the image, let’s rename it tobowie.pngand save it in ourmy_wordcloudparent directory.
Next, let’s assign the full path of ourbowie.pngfile to a variable calledbowie_image_path. Then, we will import theImagemodule from thePILlibrary to create an object representation of our image with the file path:
import osfrom PIL import Image
…
bowie_image_path = os.path.join(current_directory, "bowie.png")bowie_image = Image.open(bowie_image_path)
Copy to clipboard
import osfrom PIL import Image
…
bowie_image_path = os.path.join(current_directory, "bowie.png")bowie_image = Image.open(bowie_image_path)Note:TheImage.open()method is not to be confused with Python’s built-inopen()function.
With our image now stored inside the variablebowie_image, let’s save themy_wordcloud.pyand move to the next step.
Step 3: Create mask with image path
For this step, we will import and useNumPyto create the “mask” for our image. By this, we mean we are going to shape out the part of the image we’d like to generate a word cloud from.
We will create anndarrayof pixel values that indicate which ones should not be included in the mask (255 represents “white”) and which ones should be included; all other colors are fair game. Using thebowie_imagewe made in the last step, let’s add the following to themy_wordcloud.pyfile:
import osfrom PIL import Imageimport numpy as np
…
bowie_mask = np.array(bowie_image)
print(bowie_mask)
Copy to clipboard
import osfrom PIL import Imageimport numpy as np
…
bowie_mask = np.array(bowie_image)
print(bowie_mask)Here, we imported thenumpylibrary and can access its methods with thenpalias. Then, we invoked thenp.array()method to create a newndarraycalledbowie_mask.
Let’s run our program thus far with thepython3 my_wordcloud.pycommand. Theprint()statement will check that ourbowie_maskarray was created correctly. We should see (mostly) values of 255, confirming that our image had a proper white background and the mask can be applied to our word cloud.
Let’s remove theprint()statement, save themy_wordcloud.pyfile, and head to the next step.
Step 4: Find text to generate
In this step, we are going to find some text to use for generating our word cloud. All we need to generate a word cloud is a singlestringof text. The string can be locally defined in the same.pyfile or it can be saved to an external file and accessed from there.
For this tutorial, we will use a text (.txt) file filled with lyrics from Bowie songs featuring the word “star.” They can be accessedhere.
Let’s create a new file calledbowie_star_lyrics.txt, copy/paste the lyrics into it, and save the file.
Then, inside themy_wordcloud.pyfile, let’s add the following code:
with open(os.path.join(current_directory, "bowie_star_lyrics.txt")) as f:  lyrics = f.read()
Copy to clipboard
with open(os.path.join(current_directory, "bowie_star_lyrics.txt")) as f: lyrics = f.read()We did the following in the snippet above:
- We used theos.path.join()method to return the full path string for ourbowie_star_lyrics.txtfile.
- The built-inopen()function created an object representation of our file with the path string.
- Inside thewithblock, the contents of the file were accessed with the.read()method and assigned to a variable calledlyrics.
- Lastly, the file was closed after the program exited thewithblock.
Let’s save ourmy_wordcloud.pyfile once more and go to the next step.
Step 5: Create and generate word cloud
It is now time to begin building the word cloud! To start, we will import the following from thewordcloudlibrary like so:
import osfrom PIL import Imageimport numpy as npfrom wordcloud import WordCloud, STOPWORDS, ImageColorGenerator
Copy to clipboard
import osfrom PIL import Imageimport numpy as npfrom wordcloud import WordCloud, STOPWORDS, ImageColorGeneratorNote:STOPWORDSandWordCloudare both case-sensitive.
TheWordCloudclass contains all of the methods we need for generating the word cloud. TheSTOPWORDSproperty filters out superfluous filler words like “an”, “and”, “the”, and “they.” More words can be added with the.add()method if desired. TheImageColorGeneratorwill be utilized later on in this step.
Let’s now create an instance of theWordCloudclass and assign to a variable with the following code:
from wordcloud import WordCloud, ImageColorGenerator
…
wordcloud = WordCloud(background_color="white", mask=bowie_mask, collocations=False, stopwords=STOPWORDS, contour_color="white", contour_width=1)
Copy to clipboard
from wordcloud import WordCloud, ImageColorGenerator
…
wordcloud = WordCloud(background_color="white", mask=bowie_mask, collocations=False, stopwords=STOPWORDS, contour_color="white", contour_width=1)- Thebowie_maskwe previously made was assigned to themaskparameter to “shape” our word cloud.
- We also assigned theSTOPWORDSproperty to the (lowercase)stopwordsparameter.
- The defaultbackground_colorof a word cloud is black, so we changed it to"white".
- Thecollocationsparameter was set toFalseto break up word combinations and better distribute the text throughout the word cloud.
- We outlined our word cloud with thecontour_colorandcontour_widthparameters.
Next, we will invoke the.generate()with ourwordcloudvariable, passing in thelyricsstring we defined earlier in this tutorial:
wordcloud = WordCloud(background_color="white", mask=bowie_mask, collocations=False, stopwords=STOPWORDS, contour_color="white", contour_width=1)
wordcloud.generate(lyrics)
print(wordcloud)
Copy to clipboard
wordcloud = WordCloud(background_color="white", mask=bowie_mask, collocations=False, stopwords=STOPWORDS, contour_color="white", contour_width=1)
wordcloud.generate(lyrics)
print(wordcloud)This will populate our word cloud with the words read from thebowie_star_lyrics.txtfile, without theSTOPWORDS.
If we save the file, runpython3 my_wordcloud.py, and confirm ourwordcloudvariable is stored in memory, then the word cloud was created and generated correctly.
<wordcloud.wordcloud.WordCloud object at 0x7fb404433be0>
Copy to clipboard
<wordcloud.wordcloud.WordCloud object at 0x7fb404433be0>After confirming ourwordcloudwas created, let’s remove theprint()statement.
The last matter we’ll cover in this step is attaching a color generator to our word cloud. Let’s add the following to themy_wordcloud.pyfile:
wordcloud.generate(lyrics)
image_colors = ImageColorGenerator(bowie_mask)
Copy to clipboard
wordcloud.generate(lyrics)
image_colors = ImageColorGenerator(bowie_mask)Note:An RGB image must be passed to theImageColorGeneratorconstructor.
Theimage_colorsobject maps the color(s) of the generated words to the original image as closely as possible.
save themy_wordcloud.pyfile, and head to the final step.
Step 6: Show word cloud on pyplot figure
The last library we will use for this tutorial will be Matplotlib. The methods from the library’spyplotinterface will display our new word cloud. Let’s first importmatplotlib.pyplotat the top of ourmy_wordcloud.pyfile:
import osfrom PIL import Imageimport numpy as npfrom wordcloud import WordCloud, ImageColorGeneratorimport matplotlib.pyplot as plt
Copy to clipboard
import osfrom PIL import Imageimport numpy as npfrom wordcloud import WordCloud, ImageColorGeneratorimport matplotlib.pyplot as pltLike with NumPy, we use the aliaspltas a shorthand for tools we imported. Let’s now add the following to our file:
plt.imshow(wordcloud, interpolation="bilinear")plt.axis("off")plt.show()
Copy to clipboard
plt.imshow(wordcloud, interpolation="bilinear")plt.axis("off")plt.show()In the snippet above, we used the following methods:
- The.imshow()method creates and draws the figure on which ourwordcloudis placed; the"bilinear"setting helps smooth out the image.
- We turned off the labels of the x- and y-axes with.axis("off").
- Lastly, the figure with our word cloud was displayed with the.show()method.
Let’s save ourmy_wordcloud.pyfile and run it withpython3 my_wordcloud.py. The following figure window should appear on our screen:
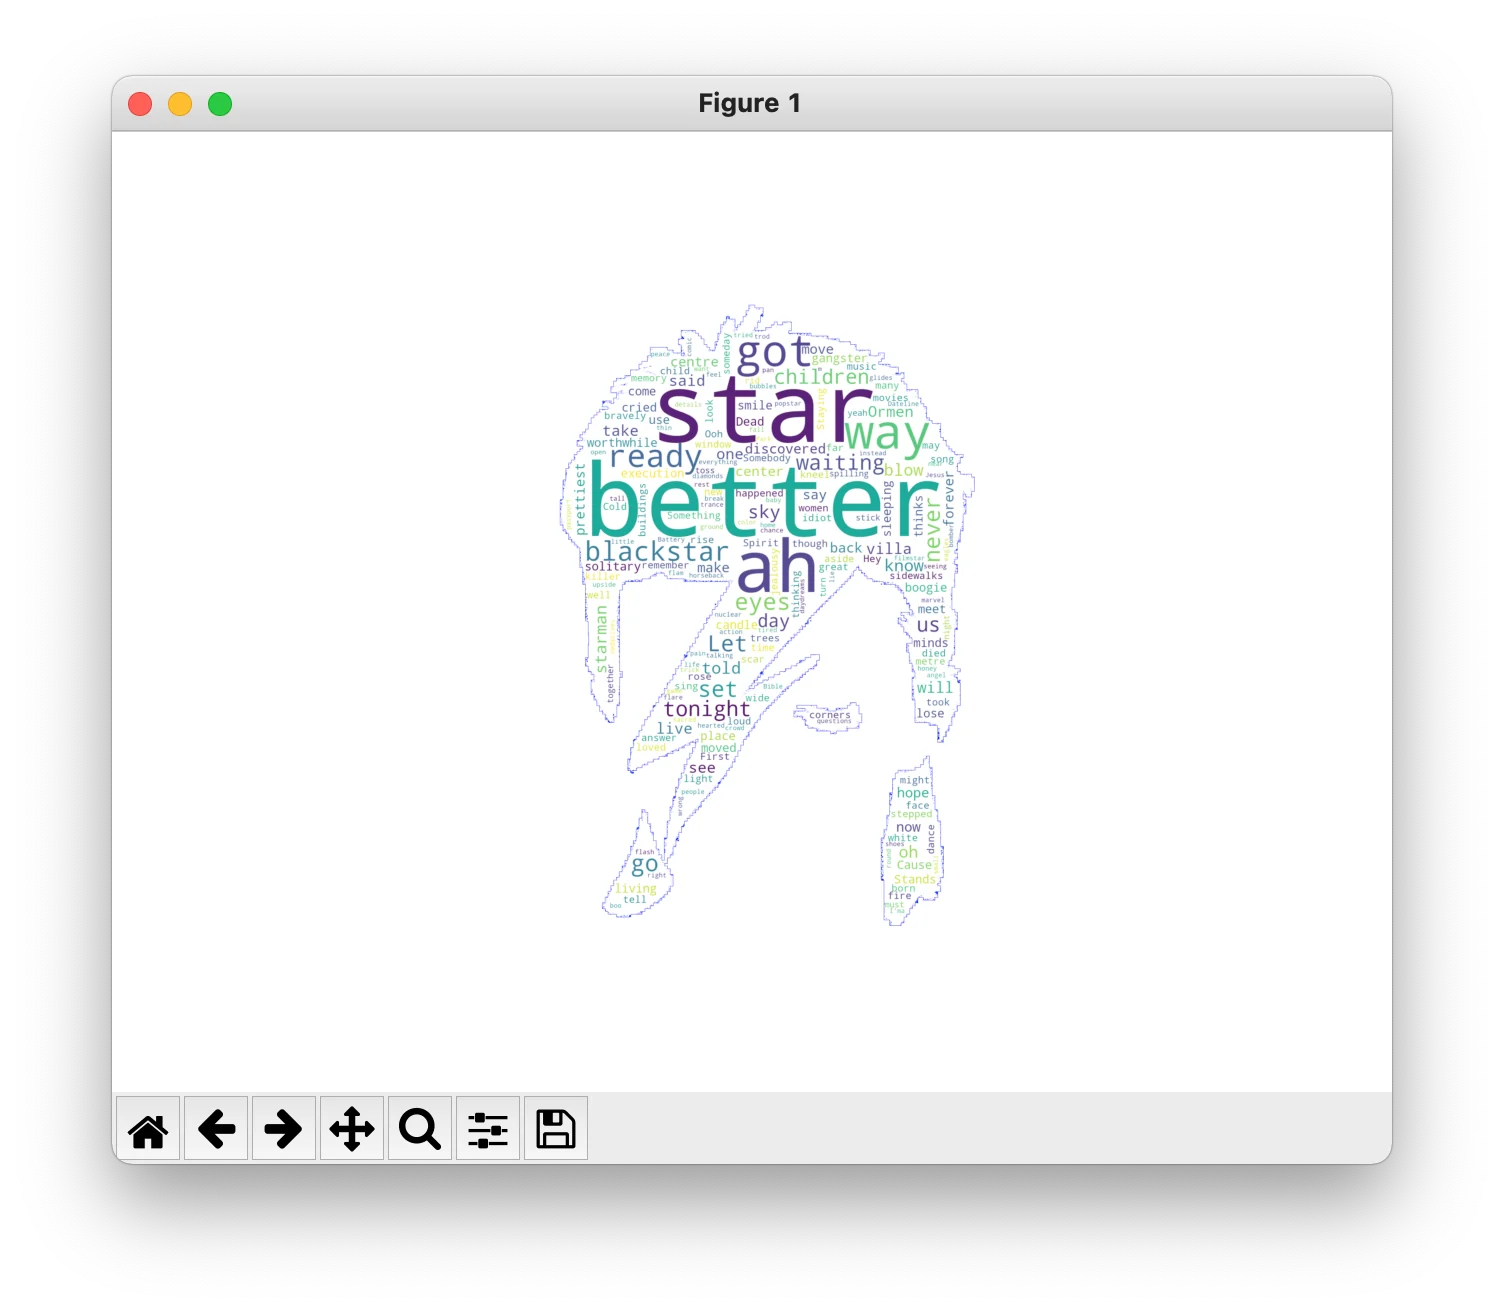
Unfinished Bowie word cloud
The word cloud figure should render onto the screen within a few seconds after running the file. The generated lyrics should be shaped like the Bowie image.
The last task in this tutorial is to apply coloring to the word cloud with theimage_colorsobject. Let’s close the figure window and add the following change to theplt.imshow()method:
plt.imshow(wordcloud.recolor(color_func=image_colors), interpolation="bilinear")plt.axis("off")plt.show()
Copy to clipboard
plt.imshow(wordcloud.recolor(color_func=image_colors), interpolation="bilinear")plt.axis("off")plt.show()The.recolor()method will display ourwordcloudwith the same colors as the original image. If we save ourmy_wordcloud.mdfile and re-run, we should see the following figure:
Conclusion
We have successfully rendered our first word cloud! All in all, we were able to generate a word cloud with less than 40 lines of code.
In this tutorial, we learned how to utilize various Python libraries and modules to create, mask, generate, and display a word cloud.
Source code for this tutorial
'The Codecademy Team, composed of experienced educators and tech experts, is dedicated to making tech skills accessible to all. We empower learners worldwide with expert-reviewed content that develops and enhances the technical skills needed to advance and succeed in their careers.'
Complete Payment to Unlock Full Guide & Source Code
You are viewing the 30% preview. Join TopCourseAI Pro to unlock the remaining 70% of this article, unblur all code snippets, and gain full access to all 412 technical projects and guides.
Ready to access the complete step-by-step tutorial?
Gain full unhindered access to all 412 technical projects and guides, unblur all source code snippets, and download runnable scripts.
Related Blueprints & Guides
View all 166 →Data Visualizations for Messy Data
Data visualization tutorials generally use pre-processed data. But what about datasets in the wild? What do we do about missing data? Or outliers that largely skew visualizations? What do we do when there are too many ob...
Data visualizationEDA Prior To Fitting a Regression Model
Before fitting any model, it is often important to conduct an exploratory data analysis (EDA) in order to check assumptions, inspect the data for anomalies (such as missing, duplicated, or mis-coded data), and inform fea...
Data visualizationExploratory Data Analysis with Data Visualization
Data visualization is an important component of Exploratory Data Analysis (EDA) because it allows a data analyst to “look at” their data and get to know the variables and relationships between them. In order to choose an...
Ready to build production-grade AI systems?
Enjoyed this guide? Continue exploring our library of 166+ production blueprints, multi-agent swarms, and autonomous agent systems with 100% unblurred, executable source code.