
Writing and Debugging Code in Jupyter
Writing and Debugging Code in Jupyter
Let’s walk through the process of working with a Jupyter Notebook.
There are multiple ways to open a Jupyter Notebook. If you have Anaconda, you can continue to launch from the Navigator like we didwhen we installed Jupyter Notebook. Note that Jupyter Notebook works best on Chrome, Safari and Firefox browsers.
If you would prefer, here isa video walkthrough.
If you have Miniconda or just want to use the Command Line, open the BASH/zsh Shell (Mac) or Anaconda Prompt (Windows) and launch a Jupyter Notebook with the command:
jupyter notebookA Jupyter Notebook interface will appear in your default browser. (If you don’t know how to use the command line, check out ourBash courses.)

Jupyter Notebook file directory
A Command Line Interface (Bash/zsh/Anaconda Prompt) might also open and display a url.
- If it does, do not close it until you are done working with Jupyter Notebook.
- If it does not appear, don’t worry — this has to do with your operating system and will not affect Jupyter Notebook’s performance.
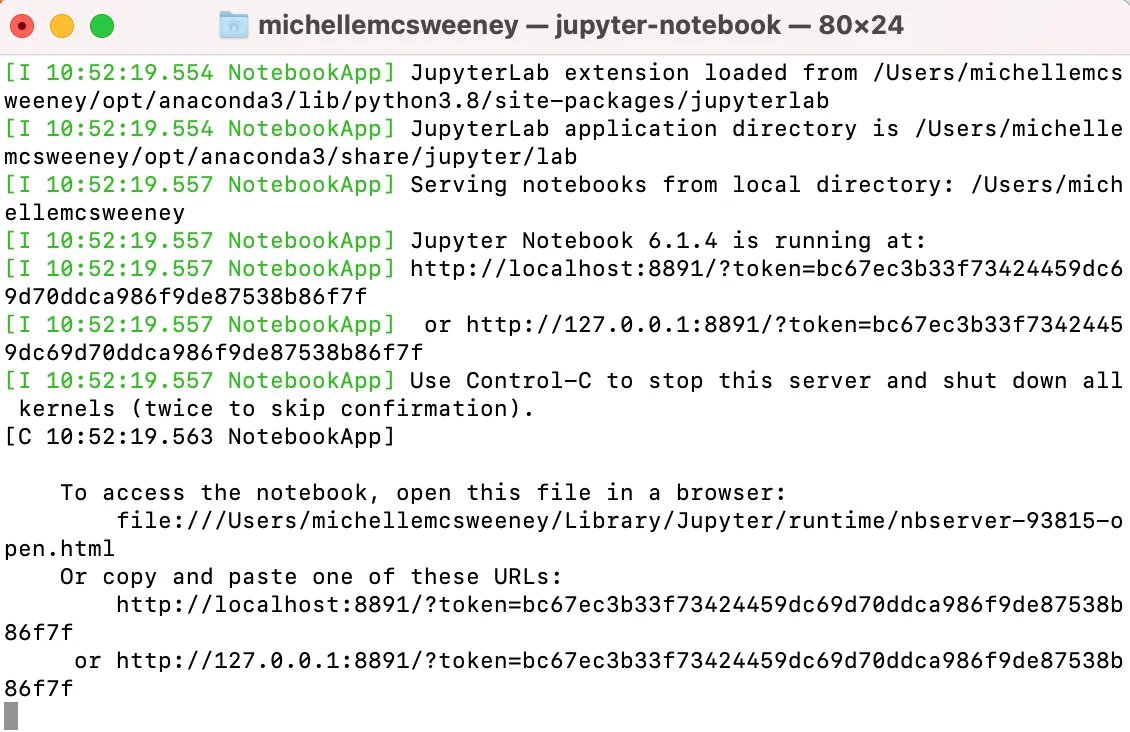
terminal showing Jupyter Notebook running with directions to access the notebook in a browser
When the notebook starts, you will be redirected to your default browser, and you will see a list of all the folders your program will have access to.
You can open a new Python file by selectingNew>>Python3
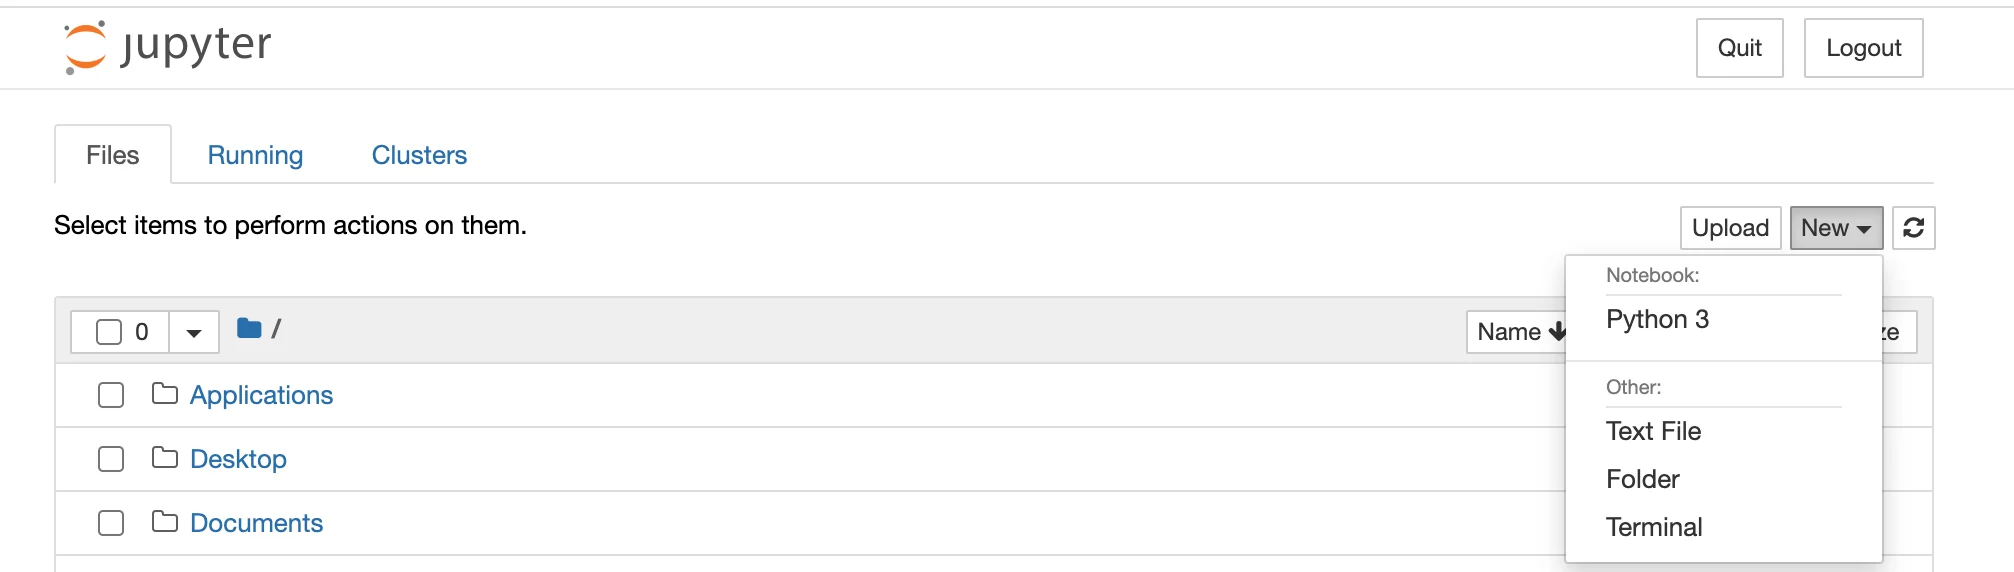
launch Python3 from jupyter with command: python
The new Notebook will open in a new tab. Click on the title to rename it.

Image of an empty Jupyter notebook.
This is where you will write your code. You can write small or large chunks of code in each cell and run each cell independently of others.
To run a cell, you can use theRunbutton orShift+Enter.

run button in the Jupyter Notebook menu
A new cell will appear after you run the cell you are working in. You can also add a new cell by clicking the+button at the top.

+ button in the Jupyter Notebook menu
In this section, we will go through some examples of how to write code in Jupyter Notebook. This section is a preview of how notebooks work. For more on Jupyter’s useful features, check outthe documentation.
When you write code in Jupyter Notebook, you will need to run each cell individually. Start with a basic print statement:print("hello world").
Notice that the result is printed below the cell.
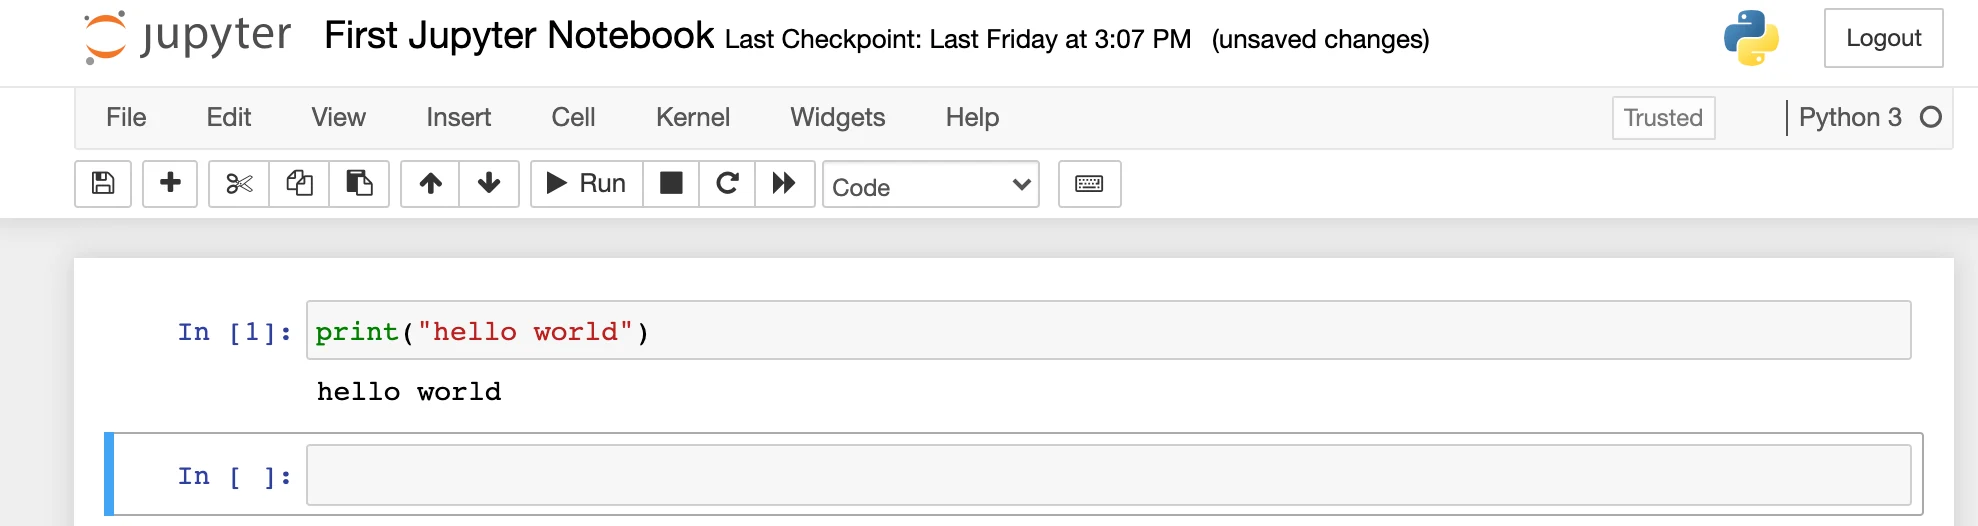
notebook showing print("hello world")
Let’s try another one. This time, we will assign variablesx = 2andy = 3. When we run this cell, nothing appears in the output. Why?
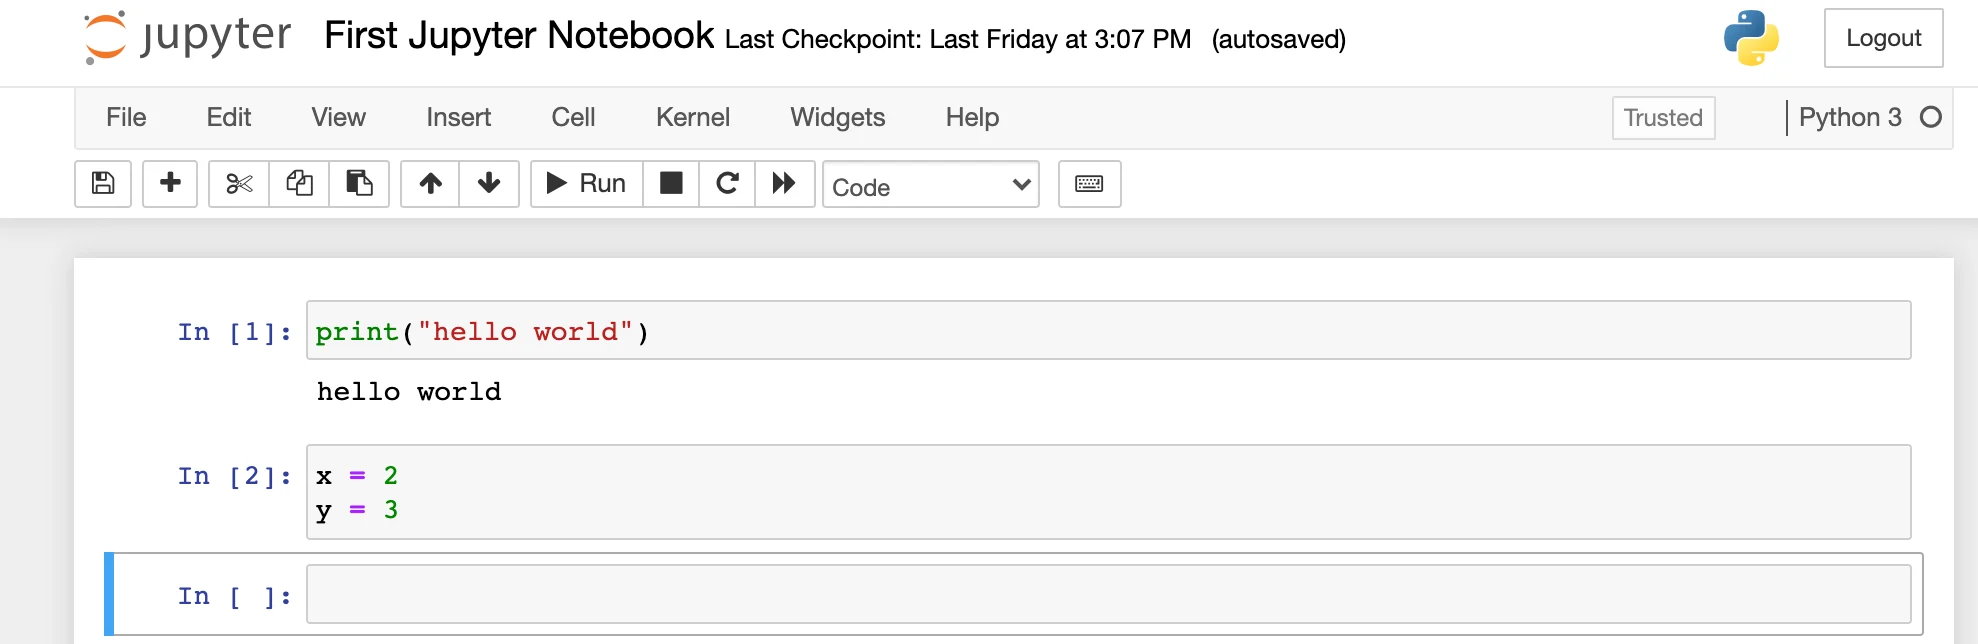
notebook of variables x = 2, y = 3
Assigning variables doesn’t generate any output, so there is no result to write. We know the cell has finished running because a number appeared in the[ ](this is a temporary cell number). Let’s try using ourxandyvariables. We can add them together.
Enterx + yin the next cell.
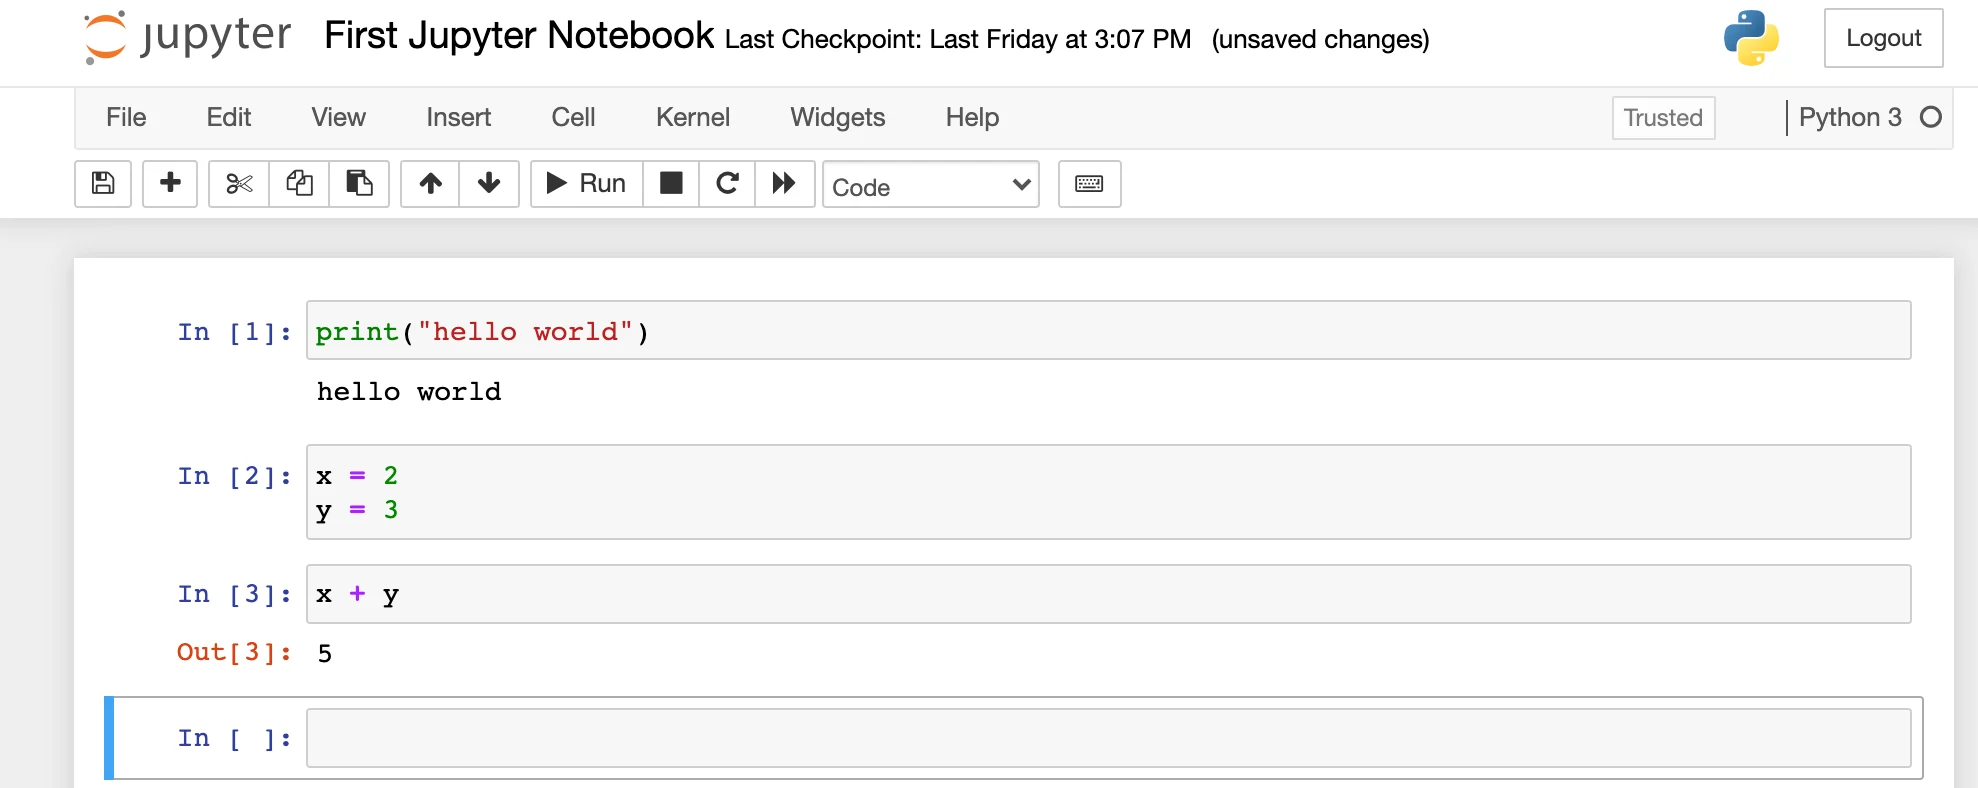
notebook with In[2]: x=2\ny=3, In[3]: x + y, Out[3]: 5
Great! We got our expected value: 5.
Notice that we didn’t use aprint()statement, but Jupyter Notebook wrote the result anyhow.
Jupyter Notebook will only write the result of the last line but will print anything contained in a print statement no matter where it occurs. This can be confusing at first, so let’s look at an example. In the next cell, enter:
x + yx - y
Copy to clipboard
x + yx - y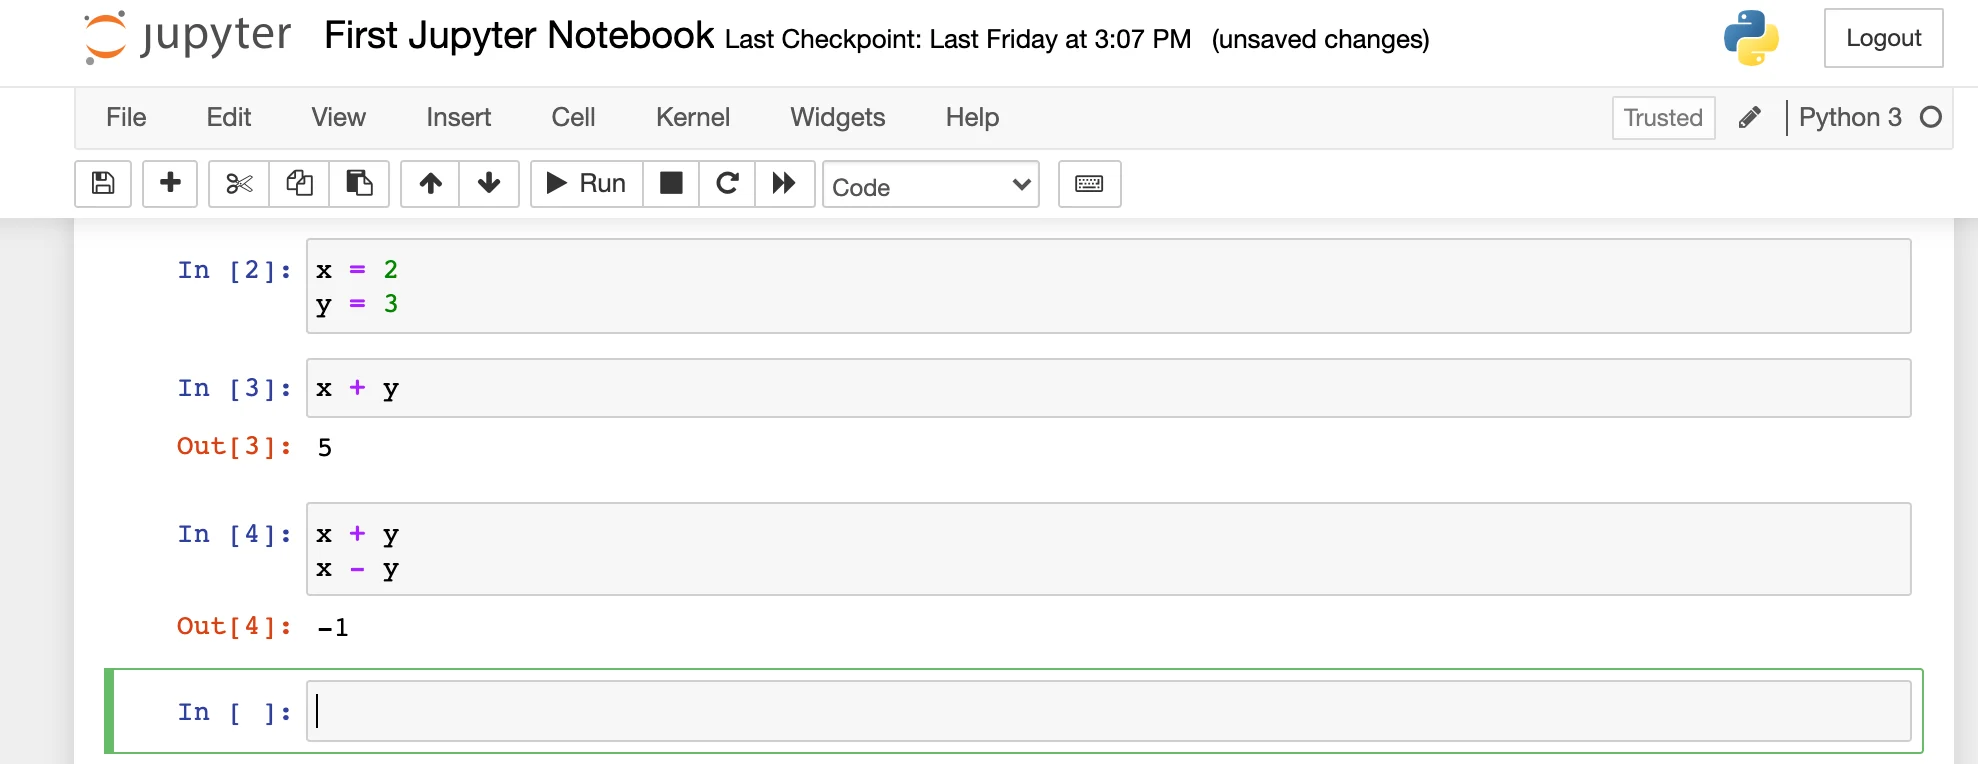
notebook showing output of x + y not being displayed
This time only-1was returned. This is because Jupyter Notebook only displays the last line. If you want to display both, you have to wrap the first one in aprint()statement.
print(x + y)x - y
Copy to clipboard
print(x + y)x - y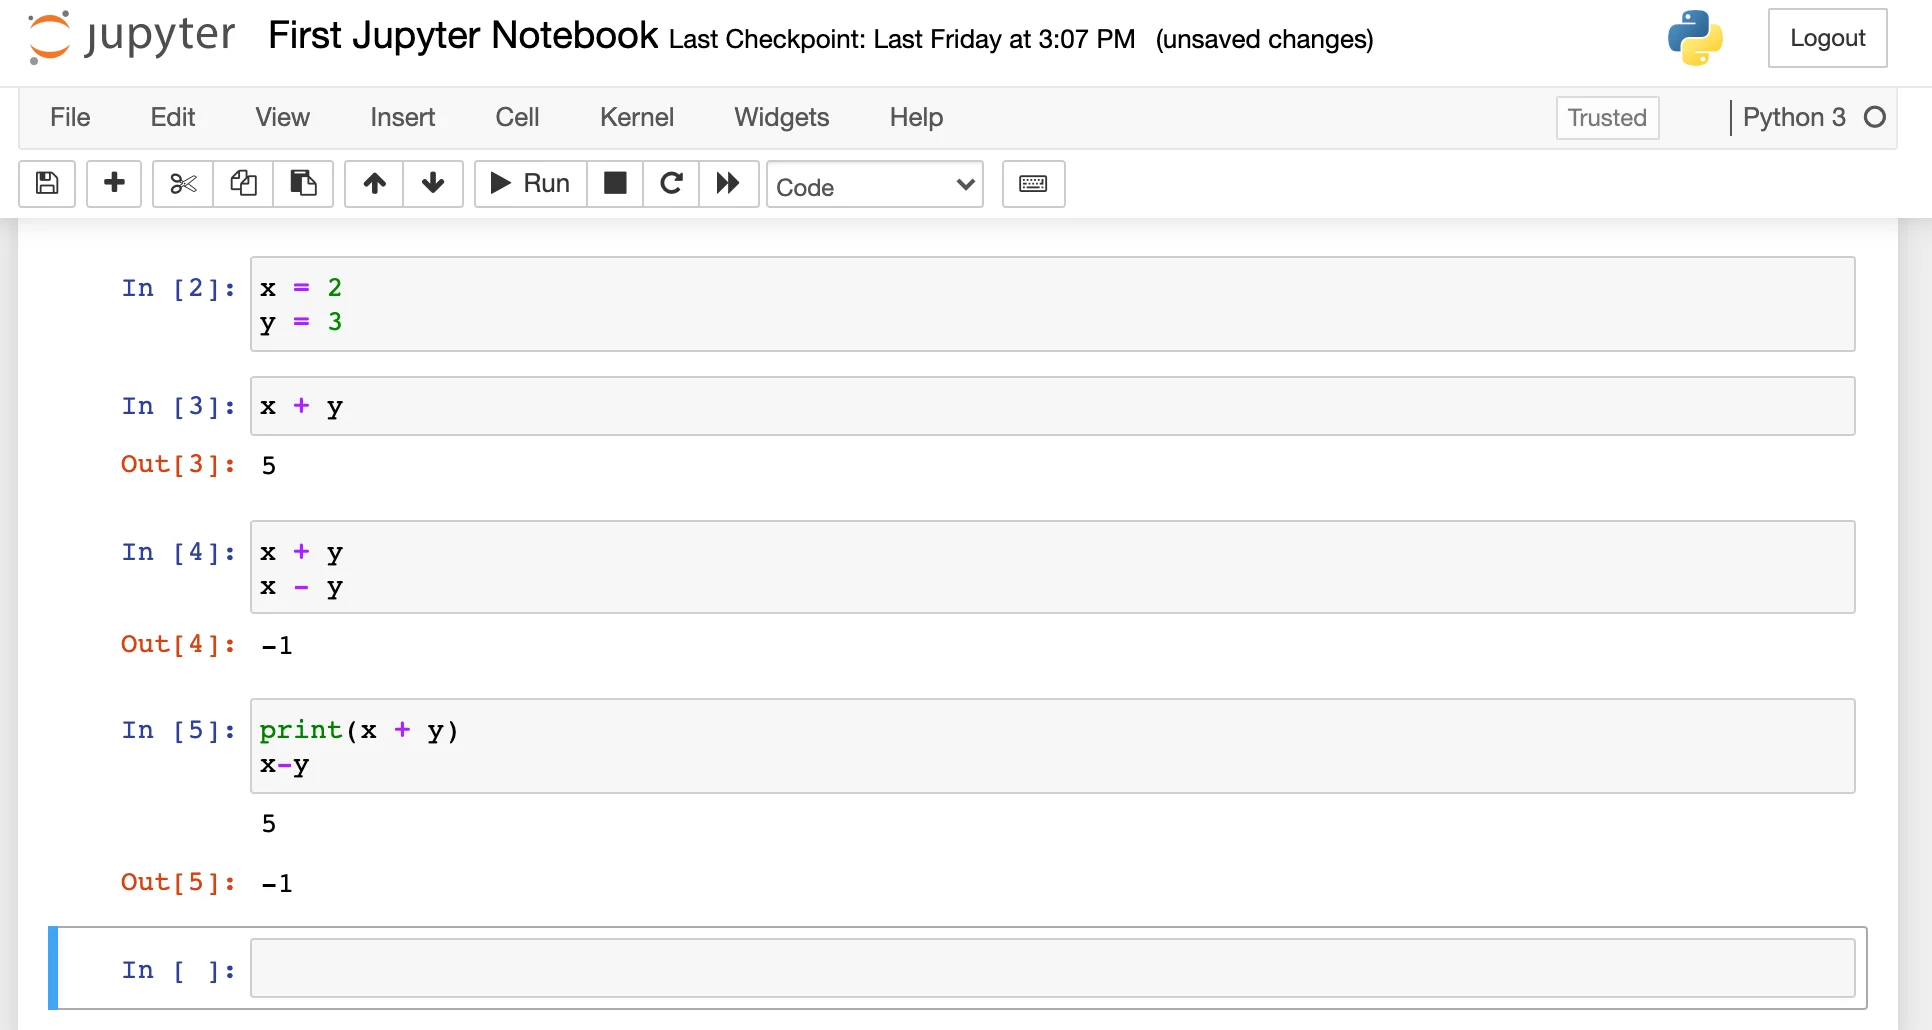
notebook showing x + y = 5 printing and output
Try printing both lines on your own.
Let’s work with some more complicated code. The purpose of this section is to try out some basic Jupyter Notebook features. If we use a function that you have not learned about yet, don’t worry, this section is only an example.
Let’s work with some data. We have a list of numbers:mynums = [1, 2, 3, 4, 5]
Input this list into a cell and return the output.
mynums = [1, 2, 3, 4, 5]mynums
Copy to clipboard
mynums = [1, 2, 3, 4, 5]mynums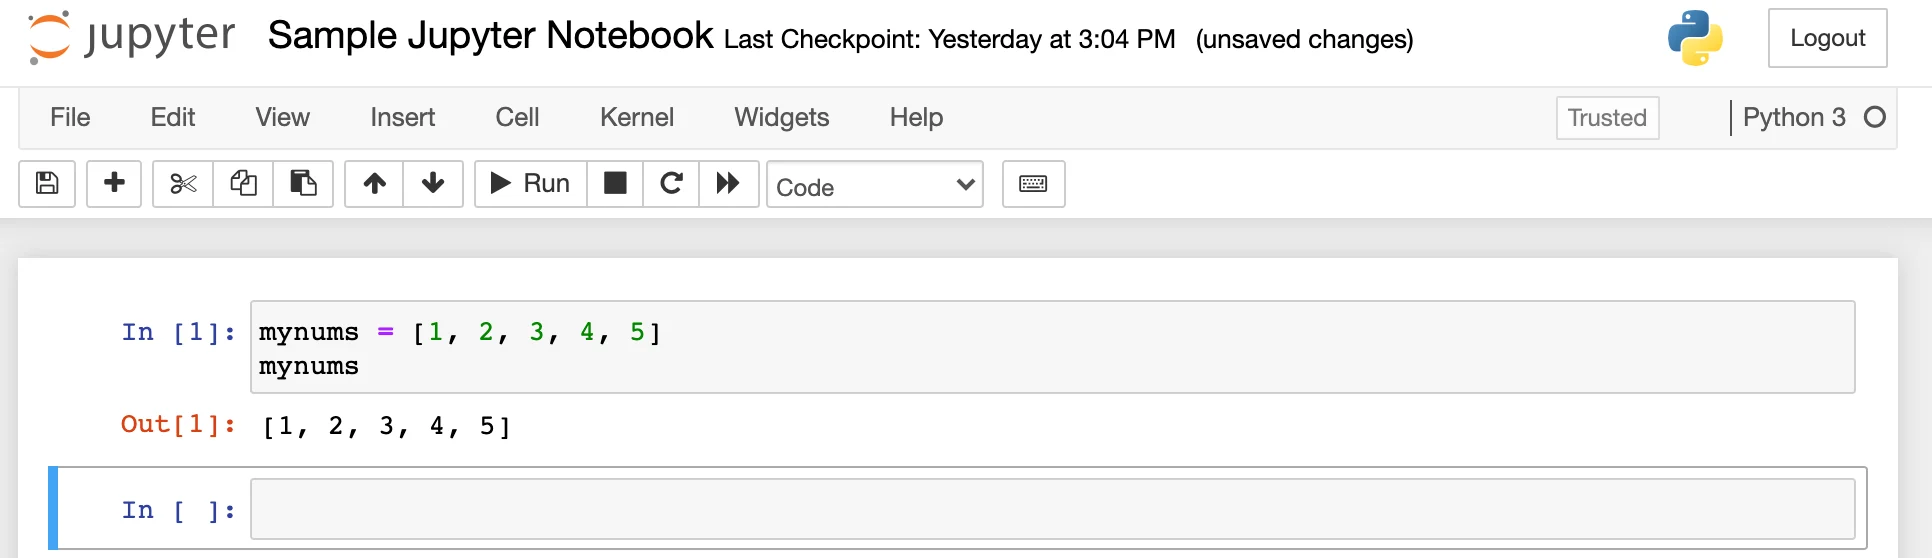
mynums listed in a notebook cell
Now let’s try printing each item to the console.
for n in mynums:    print(n+1)
Copy to clipboard
for n in mynums: print(n+1)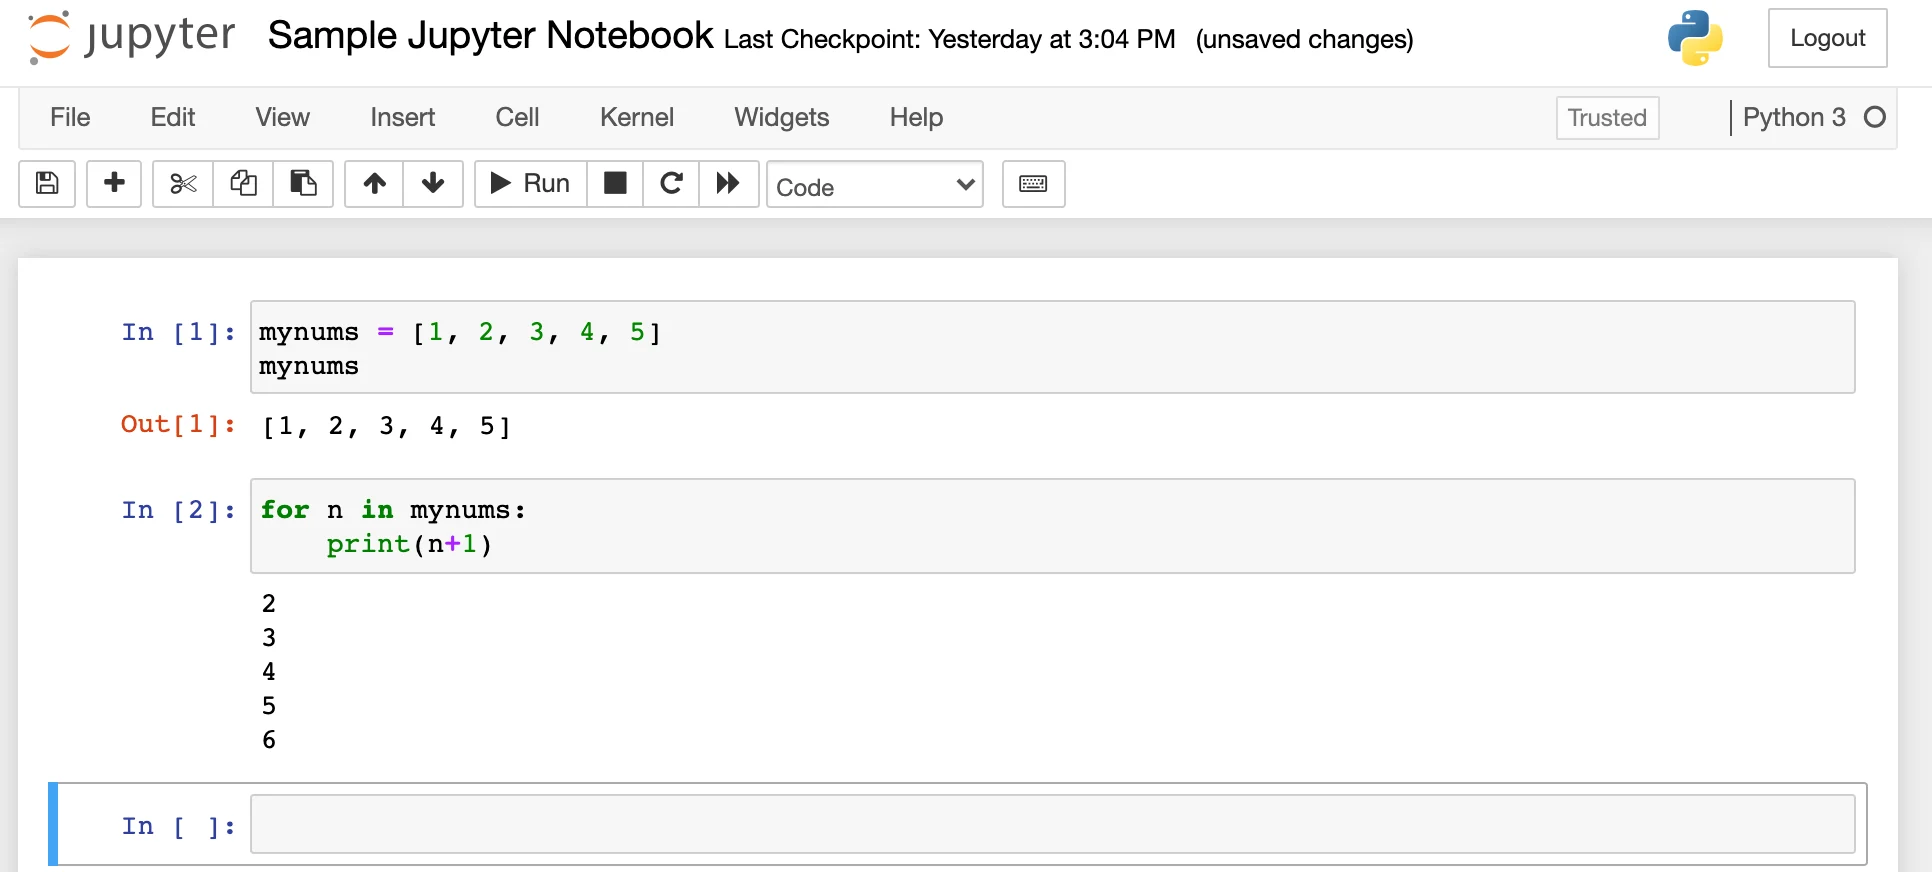
for n in mynums: print(n+1) loop displayed in a notebook cell with the output displayed below the cell
Congratulations!! You are ready to start working with data in Jupyter Notebook.
The remainder of this article will introduce debugging and accessing documentation. You don’t need to know about these to start using Jupyter Notebook on your own. However, these features will support you on your learning journey (and beyond).
Jupyter Notebook has lots of built-in tools to help you learn to code. We will explore three of them here (the help documentation with?, tab completion, and how to access the function arguments). This is just the beginning, check out this section of thePython Data Science Handbookfor more tools.
Jupyter Notebook has a generalized help function with the?character. Let’s say you want to know what object typemynumsis. You can use the?to get full documentation about it.
mynums?
Copy to clipboard
mynums?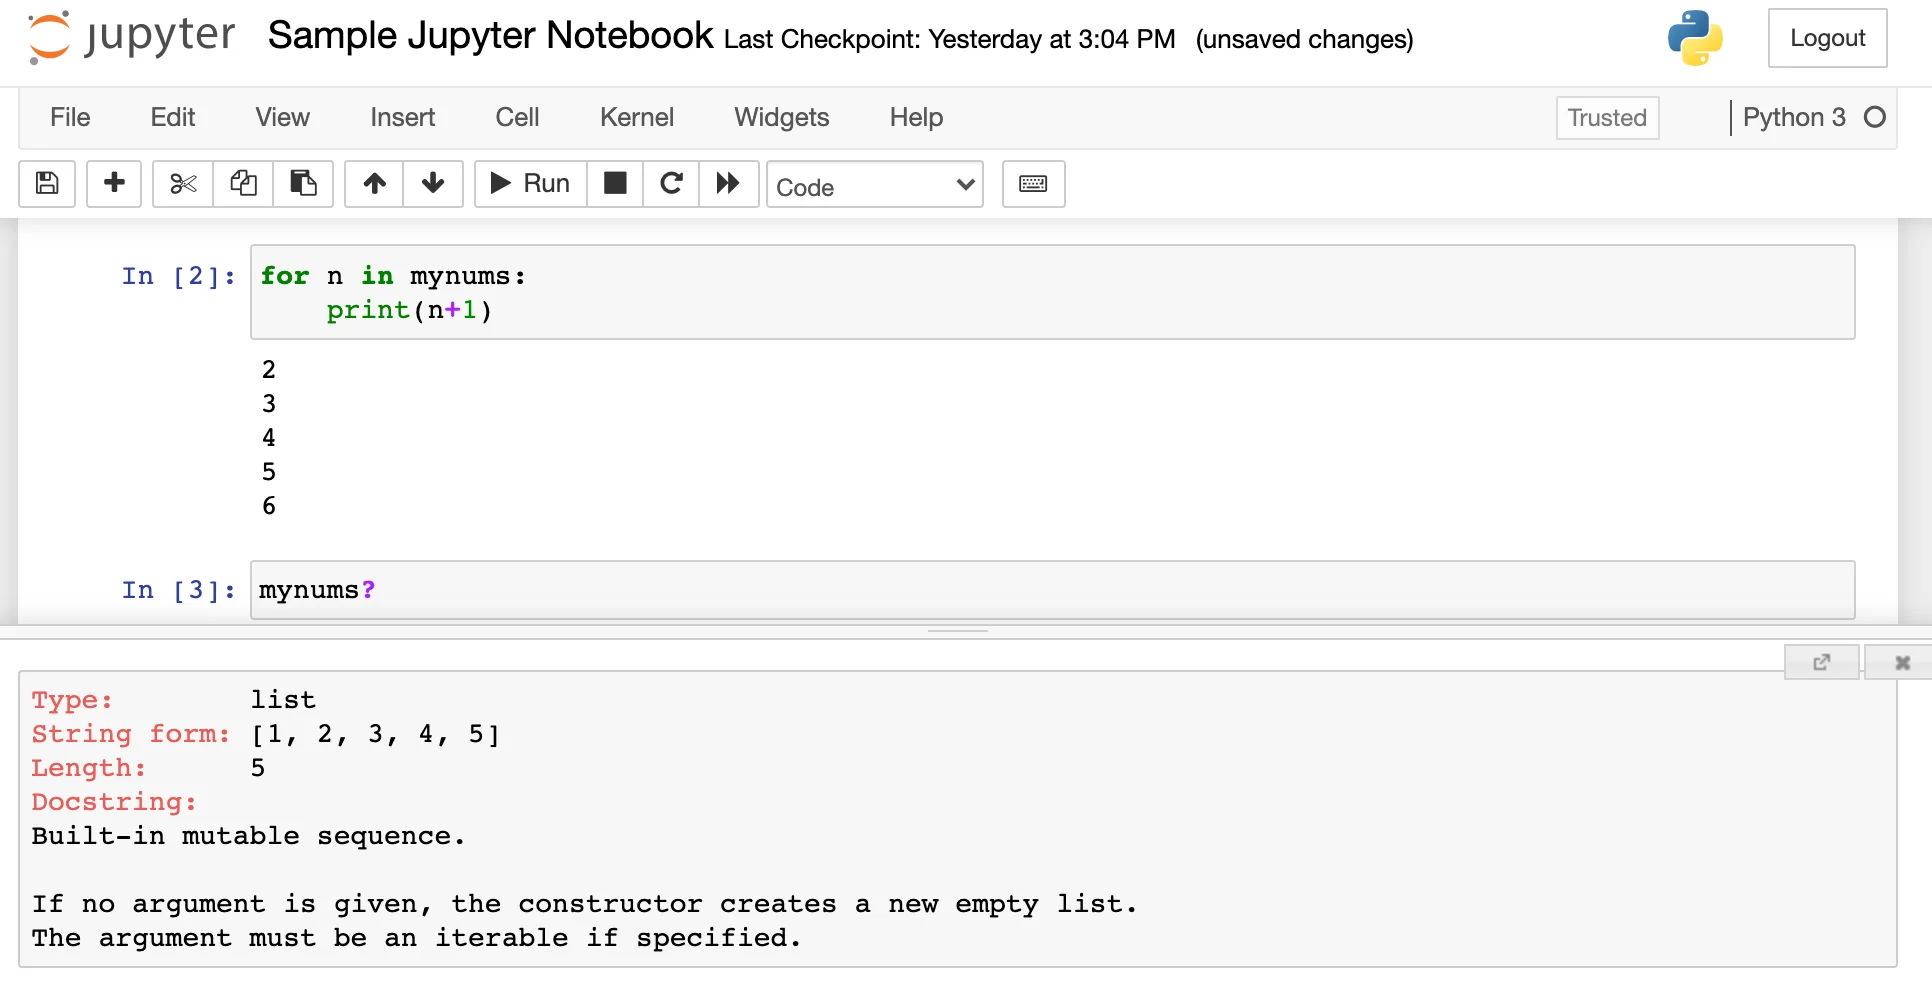
help '?' character used on mynums in a notebook cell, shows that mynums is a list with 5 objects
Here you can see the object type, a preview of the data, and general information. You can do the same for functions such aslenorsum. Go ahead and try it in your own Notebook.
Jupyter Notebook also offers tab completion. Tab completion means that you can start typing, hit theTabkey, and Jupyter Notebook will offer suggestions about what could come next. For example, to turn our list into apandasDataFrame, we can use the.DataFrame()function. But you might forget how it is spelled (i.e., is it ‘f’ or ‘F’?). The tab function to the rescue! Let’s try it out.
First, import pandas.
import pandas as pd
Copy to clipboard
import pandas as pdThen typeDand hit theTabbutton to see your options.
pd.D
Copy to clipboard
pd.D
tab completion showing pd.D and DataFrame, DataOffset, DatetimeIndex, and DatetimeTZDtype options
You can keep typing or selectDataFramefrom the list. Now let’s finish our function:
pd.DataFrame(mynums)
Copy to clipboardpd.DataFrame(mynums)That’s great, but sometimes you might know the function’s name but forget what arguments it needs.
Fortunately, Jupyter Notebook has a solution for that too. For example, you want to sort your list from largest to smallest. You know you need the.sort()function, but you forgot what arguments you need to call. Place your cursor between the( )and hit theShift+Tabkeys.
mynums.sort()
Copy to clipboard
mynums.sort()
docstring for the .sort() function, shows that .sort() takes an optional reverse=True argument
That’s right! Specify reverse = True. Go ahead and try it out. Remember to call your list at the end of the cell so you can see the output.
mynums.sort(reverse=True)mynums
Copy to clipboard
mynums.sort(reverse=True)mynums
reverse sorted list displays the mynums list sorted in reverse
Great job! As you code more, some functions will become second nature, but it can be helpful to know how to find the documentation until then.
Let’s move on to one more supportive feature in Jupyter Notebook: debugging.
Now let’s try to create an error. There is no package named ‘panda’, but it is an easy typo to make. Let’s make that typo to see how Jupyter Notebook handles errors.
import panda as pd
As expected, we got an error. Jupyter Notebook tries to be as helpful as possible. There is a lot of information in this message, let’s break it down starting at the bottom. Our bottom line says:
ModuleNotFoundError: No module named 'panda'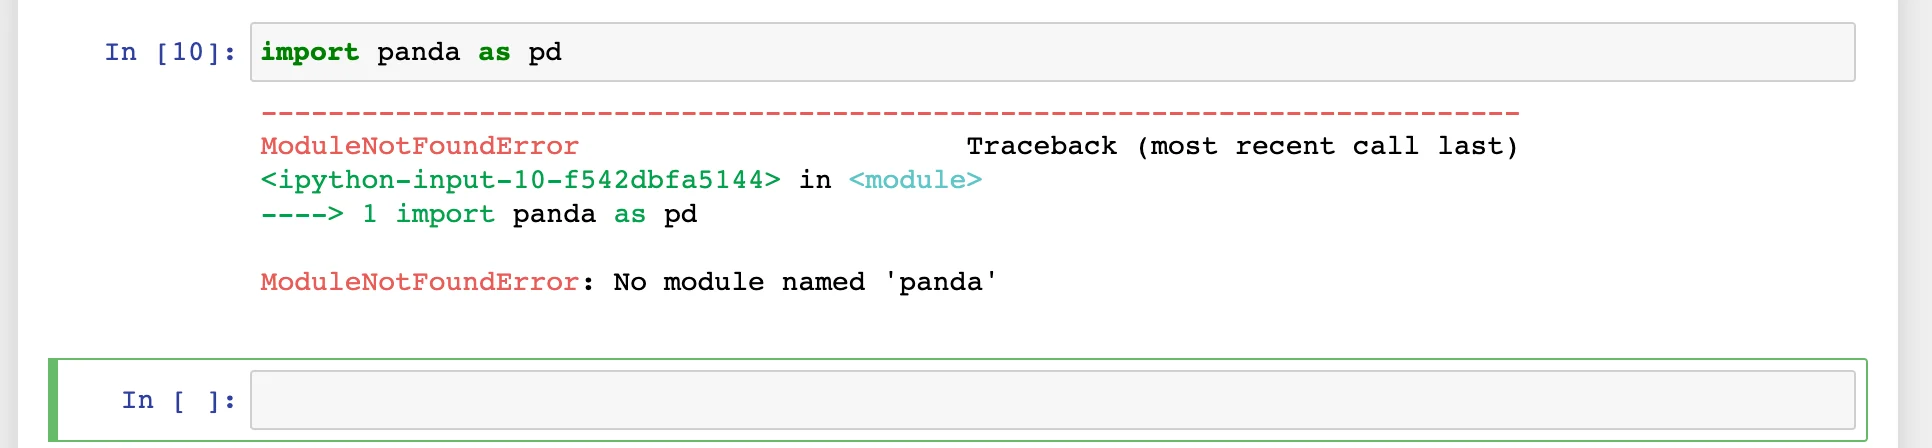
module not found error showing “ModuleNotFoundError: No module named 'panda'” and “----> 1 import panda as pd”
Great! This error was easy to understand - “panda” doesn’t exist. If we look above our error message, we see that Jupyter Notebook also shows where this error occurred.
----> 1 import panda as pdSometimes the errors are more complicated, and you may not understand what they are saying. In that case, it can be helpful to copy the last line of the error and go to the internet for help.
Let’s try another example with a “magic command.” Magic commands are a group of special commands that help with a variety of non-coding tasks. For a complete list of the IPython magic commands,check out the documentation.
First, create a more complicated error:
x = 1+1y = 1-1z = x/y
Copy to clipboard
x = 1+1y = 1-1z = x/yYou should get aZeroDivisionError.
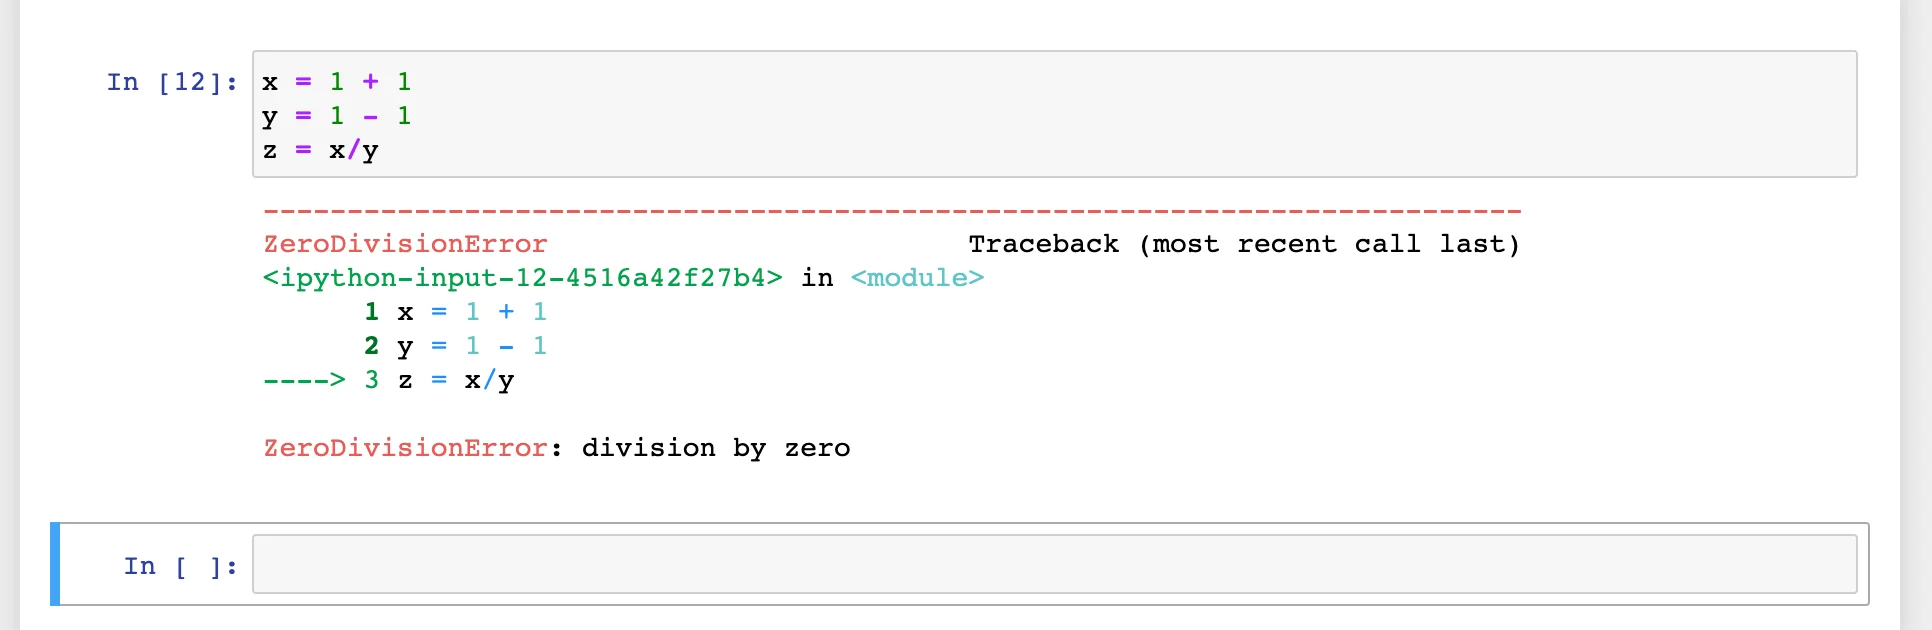
notebook showing zero division error
We want to debug this. In the next cell, type%debug. A dialog box will appear that will let you inspect your code without creating new cells. Anything you write here willnotbe saved in your notebook.
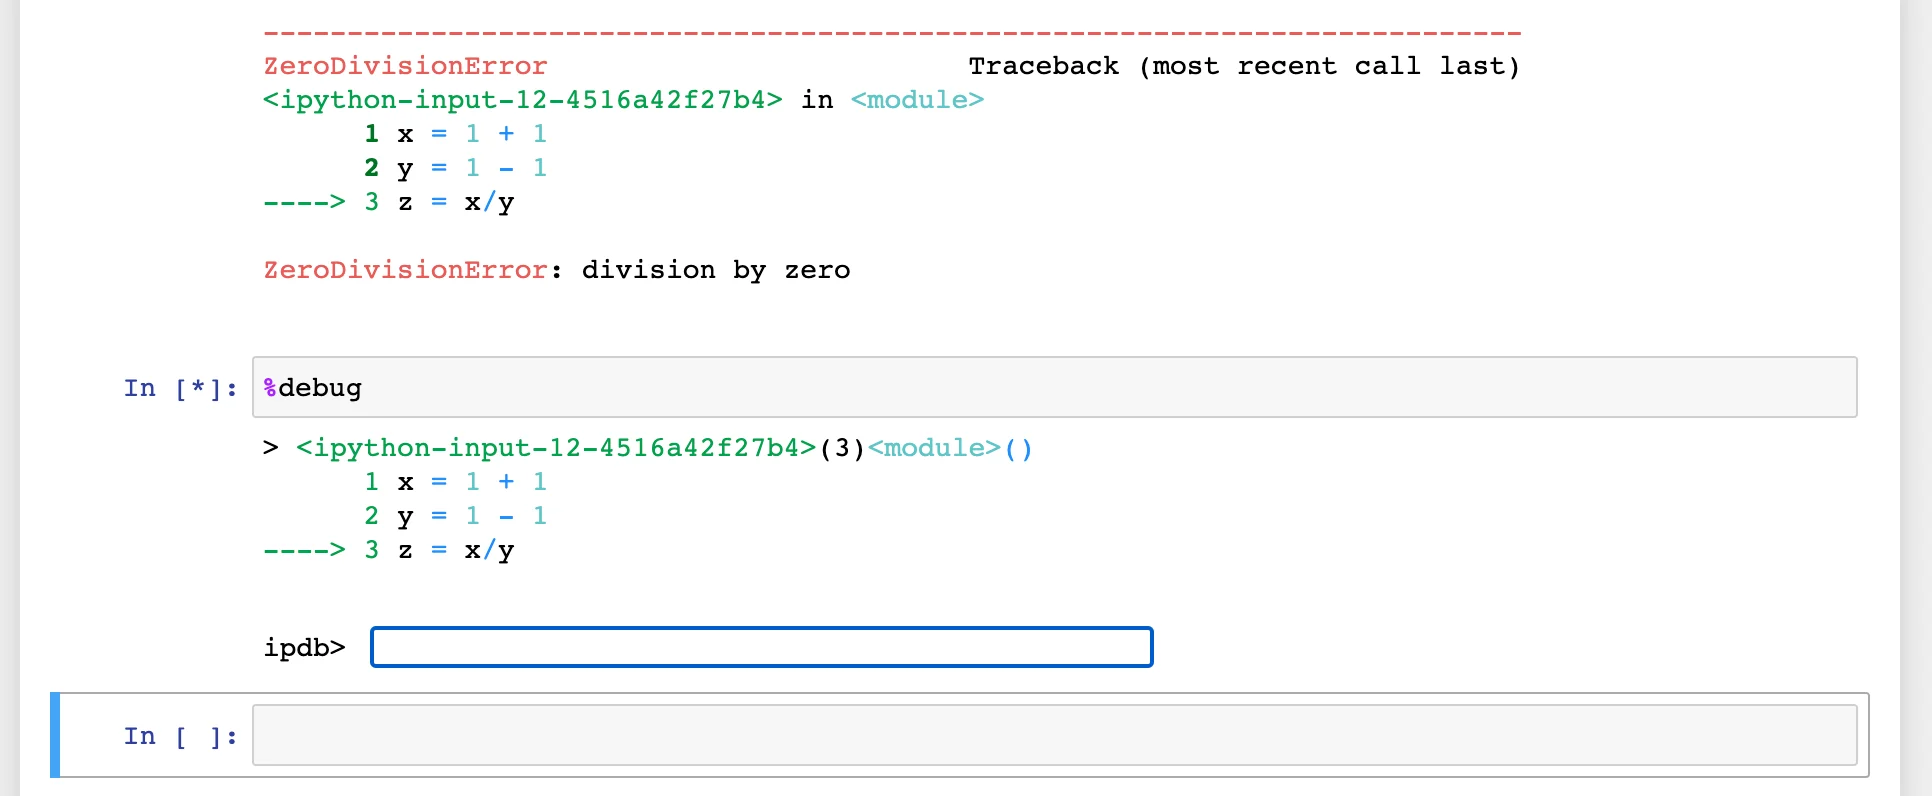
notebook debug interface with an empty ipdb> cell
A reminder of what did not work appears below. You can start by checking on each of those variables to figure out which one is causing a zero division error. In theipdb>cell, inspectxby typingx.
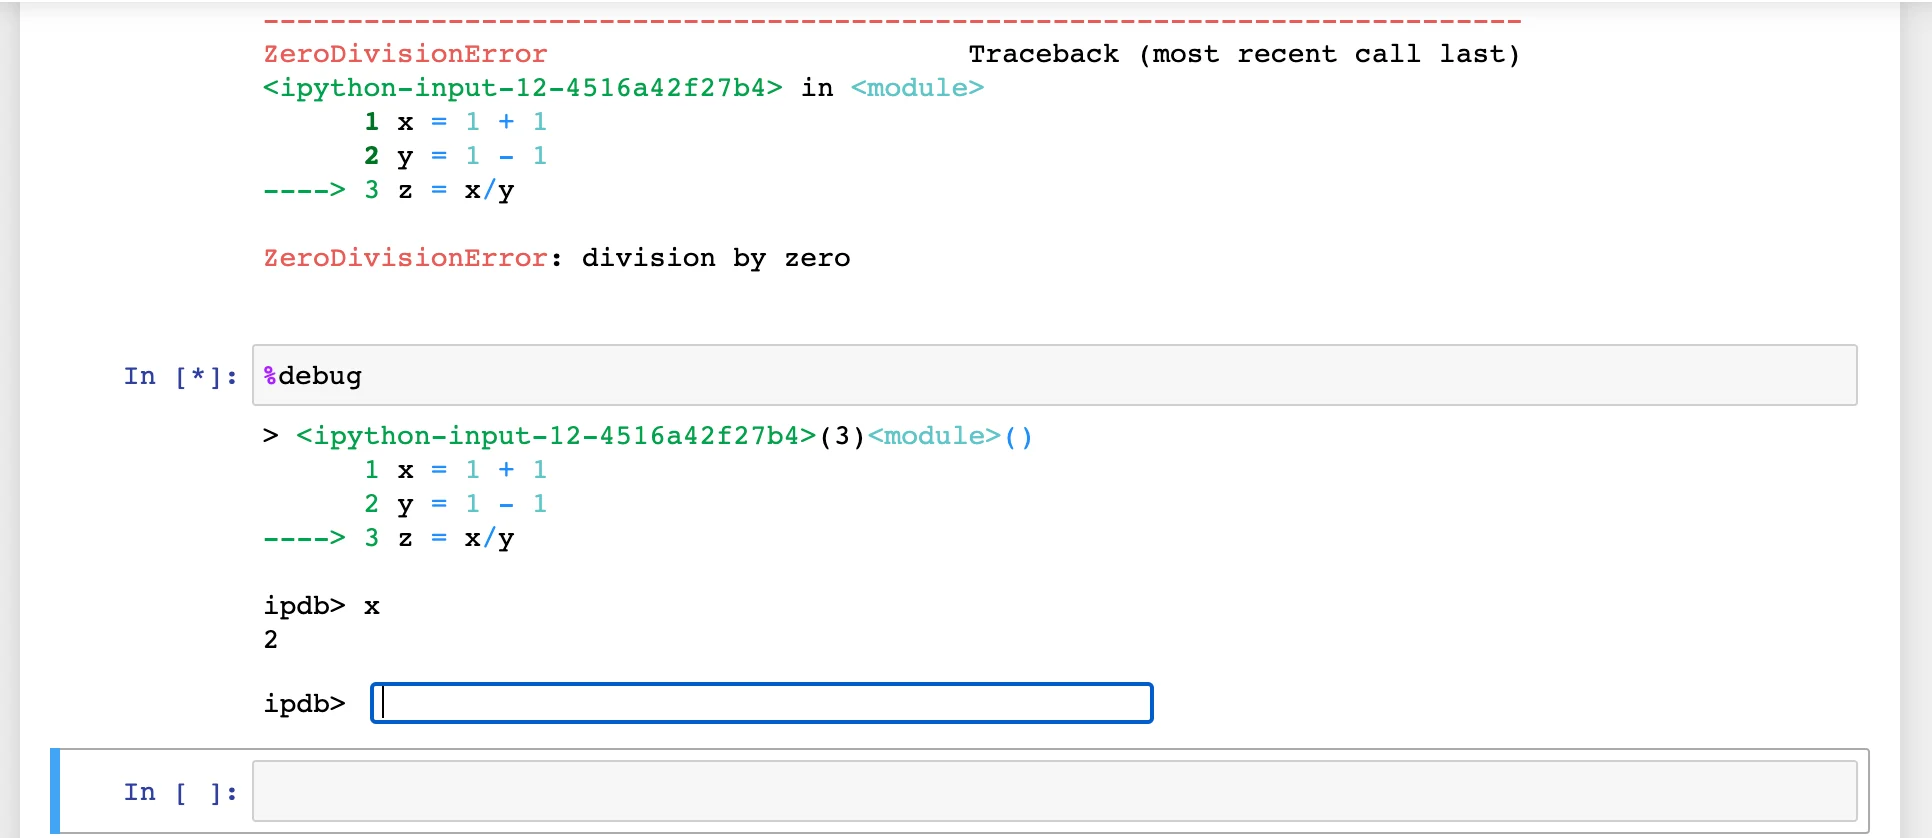
debug interface with x in debug field to evaluate x
Looks likex = 2, so that isn’t the problem. Tryyon your own.
The response should be0. Great! We found our bug. Now we need to close the debug cell and get back to our program. To get out of debug mode, typeexit()in theipdb>cell.
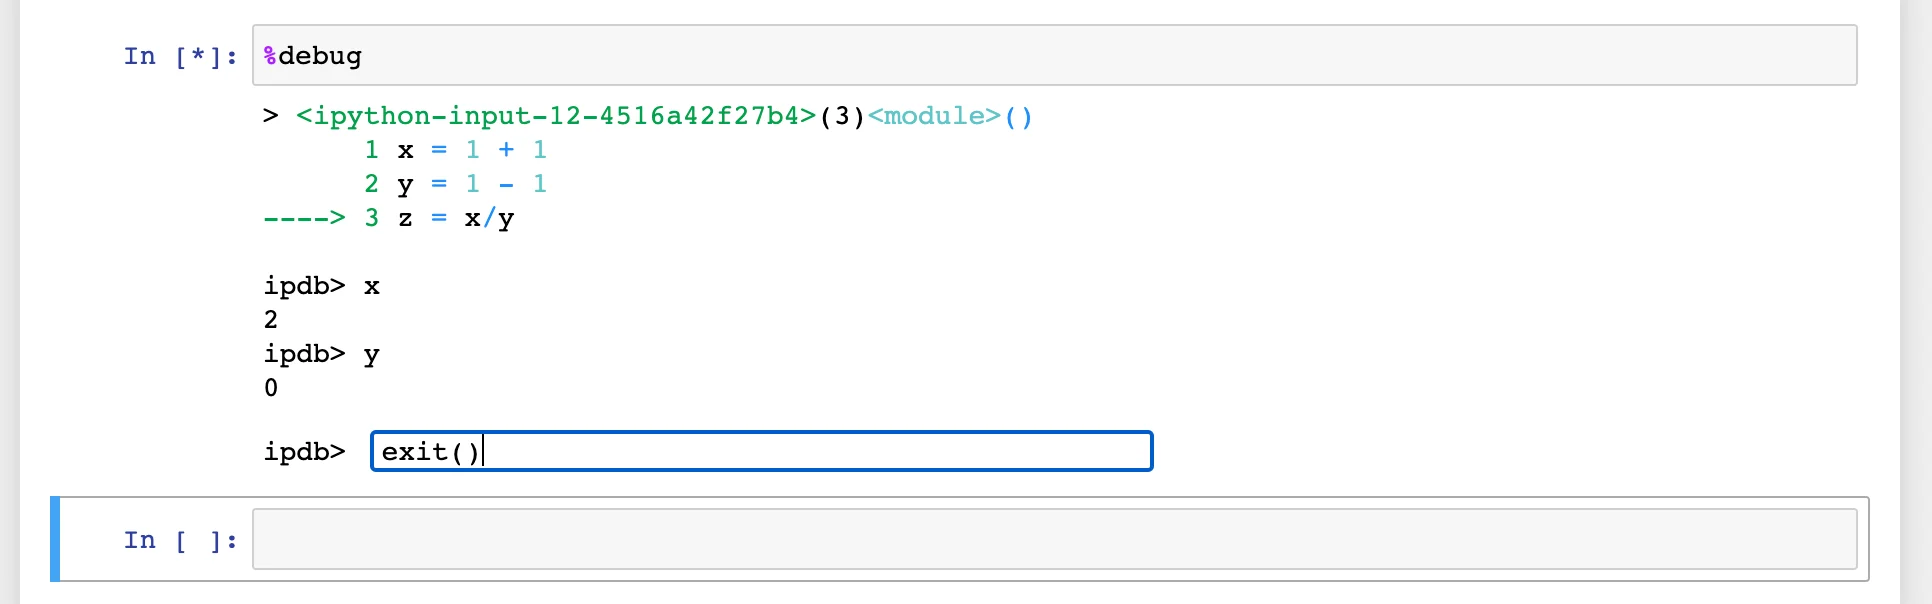
debig interface showing exit() debug to exit
Congratulations! You are now ready to write, run, and debug your own programs in Jupyter Notebook.
This is just the beginning of the functions that Jupyter Notebook has to offer. For many more helpful tools and features, check outthe documentation, and if you want to be inspired to do more with Jupyter notebook, check outA gallery of interesting Jupyter Notebooks.
Have fun coding with Jupyter Notebook!
'The Codecademy Team, composed of experienced educators and tech experts, is dedicated to making tech skills accessible to all. We empower learners worldwide with expert-reviewed content that develops and enhances the technical skills needed to advance and succeed in their careers.'
Complete Payment to Unlock Full Guide & Source Code
You are viewing the 30% preview. Join TopCourseAI Pro to unlock the remaining 70% of this article, unblur all code snippets, and gain full access to all 412 technical projects and guides.
Ready to access the complete step-by-step tutorial?
Gain full unhindered access to all 412 technical projects and guides, unblur all source code snippets, and download runnable scripts.
Write a Custom Bedtime Story Using ChatGPT
Next BlueprintiOS Development Change Log
Related Blueprints & Guides
View all 166 →Creating a Word Cloud With Python
In Data Visualization,word cloudsare used to display textual data in a specific shape. The more frequent a word is in a chunk of text, the larger it will appear in the word cloud. This can provide interesting insights in...
Data visualizationData Visualizations for Messy Data
Data visualization tutorials generally use pre-processed data. But what about datasets in the wild? What do we do about missing data? Or outliers that largely skew visualizations? What do we do when there are too many ob...
Data visualizationEDA Prior To Fitting a Regression Model
Before fitting any model, it is often important to conduct an exploratory data analysis (EDA) in order to check assumptions, inspect the data for anomalies (such as missing, duplicated, or mis-coded data), and inform fea...
Ready to build production-grade AI systems?
Enjoyed this guide? Continue exploring our library of 166+ production blueprints, multi-agent swarms, and autonomous agent systems with 100% unblurred, executable source code.