
Toolbars and Sheets
Toolbars and Sheets
Introduction
In this article, you will learn:
- What a toolbar inSwiftis
- How to create a toolbar
- What aToolbarItemis and how to add them to a toolbar
- To provide aToolbarItema specific placement
- What is a Sheet
- How to present a Sheet
- How to present a toolbar inside a sheet
Let’s begin by creating a project that will showcase the capabilities of toolbars and sheets. Your final project will resemble the following video.
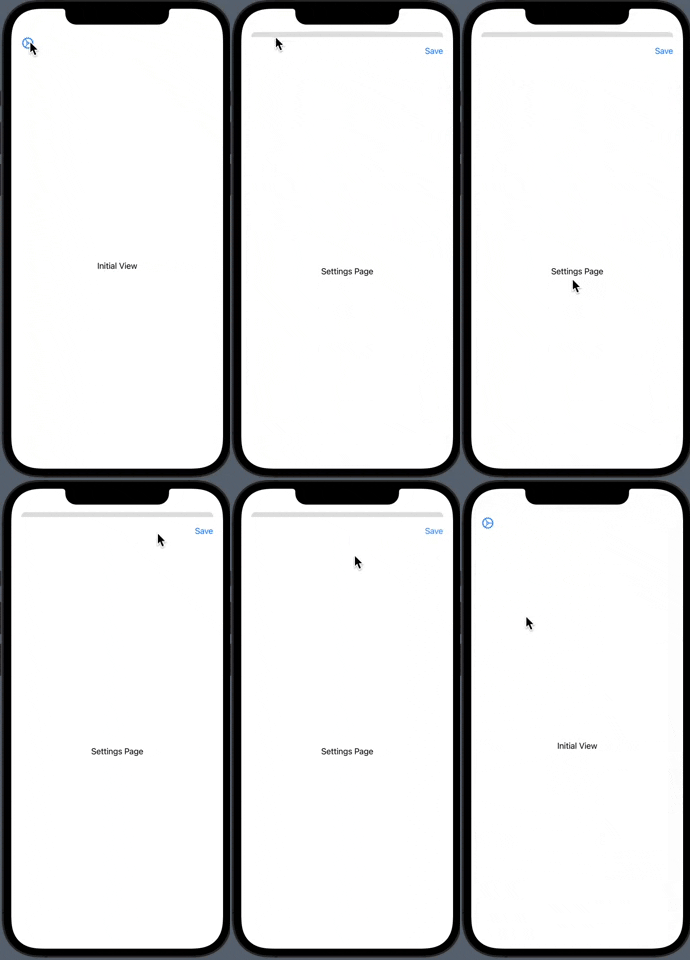
Final Project Video
Creating the project
To begin, open upXcode. You should get a window that resembles the image below.
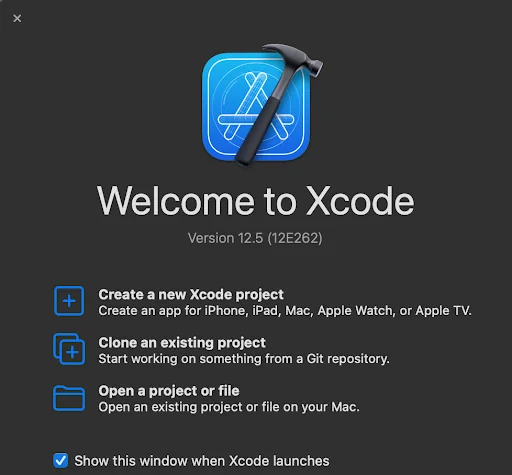
Xcode Window
In the center of the Xcode window, you will seeCreate a new Xcode project. Go ahead and click on this.
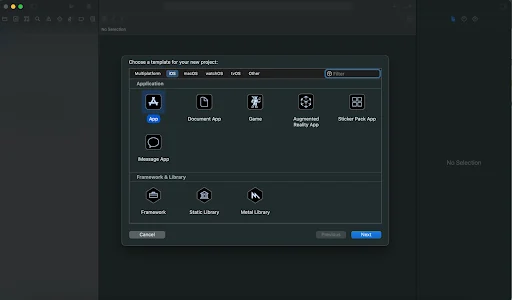
Project Type
Next, you should see project templates.Appshould already be selected; if not, go ahead and click that. At the bottom right, click onNext. You will now insert some information regarding the application.
- Product Name: ToolbarProject
- Team:Noneis acceptable here; If you have a team identifier, feel free to use it
- Organization Identifier: This is usually your reverse domain; for now,com.YourNameis appropriate
- Bundle Identifier: It should be automatically filled provided yourOrganization Identifier+Product Name.
- Interface: Be sure to selectSwiftUI
- Life Cycle:SwiftUI App
- Language:Swift
- Use Core DataisOFF
- Include TestsisOFF
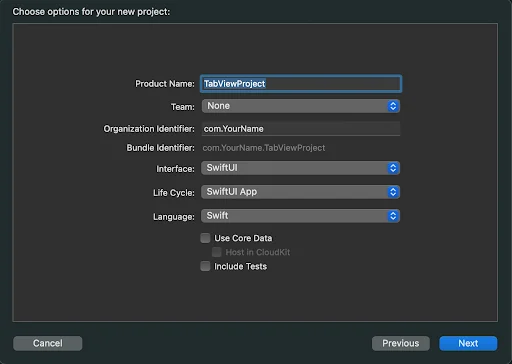
Project Settings
Now select where you would like to save the project. Do not selectCreate Git repository on my mac.Gitis a popular tool used for version control. If you do want to use Git for version control, select the option and learn more about Githere.
Once you select a location, click onCreate. Your project should look similar to the image below.
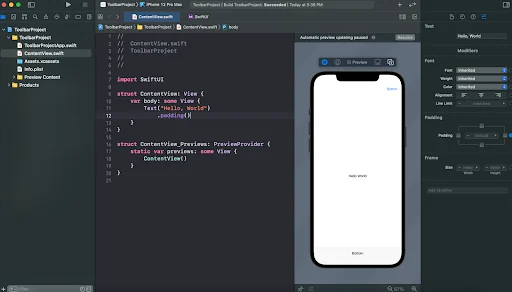
Created Project
Fantastic, you’re now ready to start building toolbars and displaying sheets in your project!
What is a toolbar?
SwiftUI’s toolbar modifier allows for placement of views along the top or bottom space of a view. For a toolbar to work properly, it must be embedded in aNavigationView.
Here is a view that contains a toolbar with two buttons at the top of the view.
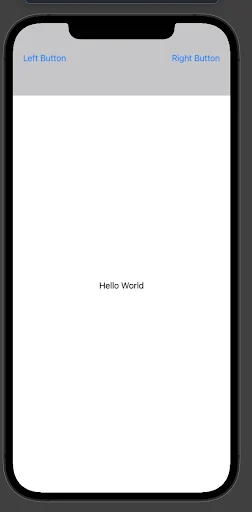
Example Toolbar
Create a toolbar
To properly attach a toolbar, first create aNavigationView. Within it, embedText("Hello World").
import SwiftUI
struct ContentView: View {    var body: some View {        NavigationView {            Text("Hello World")        }    }}
Copy to clipboard
import SwiftUI
struct ContentView: View { var body: some View { NavigationView { Text("Hello World") } }}According to the Apple docs, atoolbarwraps views just like aVStackorNavigationView. A toolbar is written as:
NavigationView {    Text("Hello World")    .toolbar {         // Views go here    }}
Copy to clipboard
NavigationView { Text("Hello World") .toolbar { // Views go here }}Let’s use the same methodology to create a toolbar in the project. Also, changeText("Hello World")toText("Initial View").
ContentView.swift
import SwiftUI
struct ContentView: View {    var body: some View {        NavigationView {            Text("Initial View")            .toolbar {             }        }    }}
Copy to clipboard
import SwiftUI
struct ContentView: View { var body: some View { NavigationView { Text("Initial View") .toolbar { } } }}Great work! You created your first toolbar. Your view should match the image here.
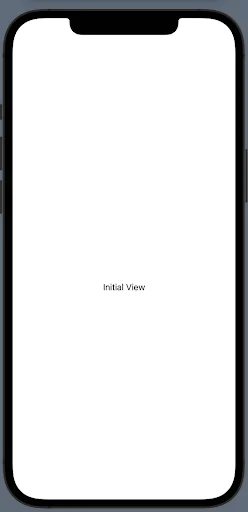
Transparent Toolbar
The view looks the exact same!? That’s because the toolbar is by default a transparent container.
Let’s add some buttons to the toolbar to make it useful. You can use aToolbarItemto display a button on the toolbar. Let’s take a look atToolbarItem.
What is aToolbarItem?
According to the Apple docs, SwiftUI’sToolbarItemrepresents a container for placing one item on a toolbar. If you want more than one item, you will have to use multipleToolbarItems.ToolbarItems usually contain aButton,Text, orImage. AToolbarItemis written as so:
NavigationView {    Text("Hello World")    .toolbar {         ToolbarItem {            // Items goes here        }    }}
Copy to clipboard
NavigationView { Text("Hello World") .toolbar { ToolbarItem { // Items goes here } }}Let’s use the same methodology to create aToolbarItemin the project. Inside theToolbarItem, place aButtonusing theButton(action:, label:)constructor with an empty action andImage(systemName: "gear")for the label.
import SwiftUI
struct ContentView: View {    var body: some View {        NavigationView {            Text("Initial View")            .toolbar {                ToolbarItem {                    Button(action: {                        // Action goes here                    }, label: {                        Image(systemName: "gear")                    })                }            }        }    }}
Copy to clipboard
import SwiftUI
struct ContentView: View { var body: some View { NavigationView { Text("Initial View") .toolbar { ToolbarItem { Button(action: { // Action goes here }, label: { Image(systemName: "gear") }) } } } }}Fantastic! You added aToolbarItemto your toolbar. TheToolbarItemcontains a button. Your preview should match the one here.
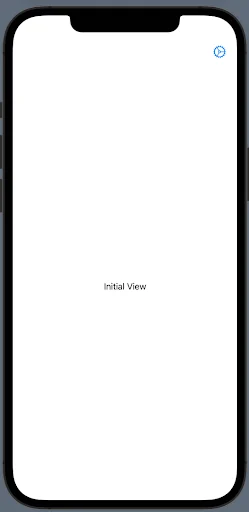
Initial view with gear without placement
But, what if you want to put the button on the other side of the toolbar? You can do so by providing a specific placement for your item. Let’s see how it’s done.
ToolbarItemplacement
AToolbarItemcan be given a specific placement onto the toolbar. The placement is determined by the optionalplacementparameter forToolbarItemwhich takes in a value of typeToolbarItemPlacement. If there is no placement given, it will default to the top right corner. You can place aToolbarItemin the top left corner by passing in.navigationBarLeadingwith the given code:
NavigationView {    .toolbar {         ToolbarItem(placement: .navigationBarLeading) {            // Button goes here        }    }}
Copy to clipboard
NavigationView { .toolbar { ToolbarItem(placement: .navigationBarLeading) { // Button goes here } }}Since Xcode can safely assume you will place an instance ofToolbarItemPlacementinside theplacementargument using type inference, you can type.in the argument and the full list ofToolbarItemPlacementoptions will display. Here is an example of that working (disregard the error as it will disappear on selection):
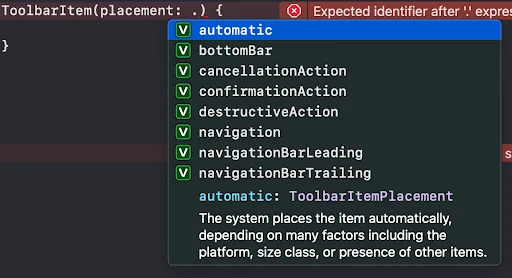
Type Inference
In your project, assign your currentToolbarItema placement of.navigationBarLeading.
import SwiftUI
struct ContentView: View {    var body: some View {        NavigationView {            Text("Initial View")            .toolbar {                ToolbarItem(placement: .navigationBarLeading) {                    Button(action: {                                                          }, label {	                            Image(systemName: "gear")                        })                }            }        }    }}
Copy to clipboard
import SwiftUI
struct ContentView: View { var body: some View { NavigationView { Text("Initial View") .toolbar { ToolbarItem(placement: .navigationBarLeading) { Button(action: { }, label { Image(systemName: "gear") }) } } } }}Great! You moved your gear button to the top left corner of the view using theplacement: ToolbarItemPlacementinput parameter.
Your preview should match the one here.
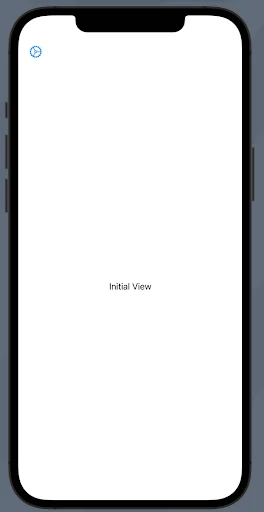
Gear image
Now, let’s present a new view on theButtontap.
What is a sheet?
SwiftUI sheets are used to present a new view over an existing one. Think of this as a stack of papers. You can have multiple sheets on top of one another, and the middle one can be accessed by removing the ones above it.
Here is an example of a sheet being displayed.
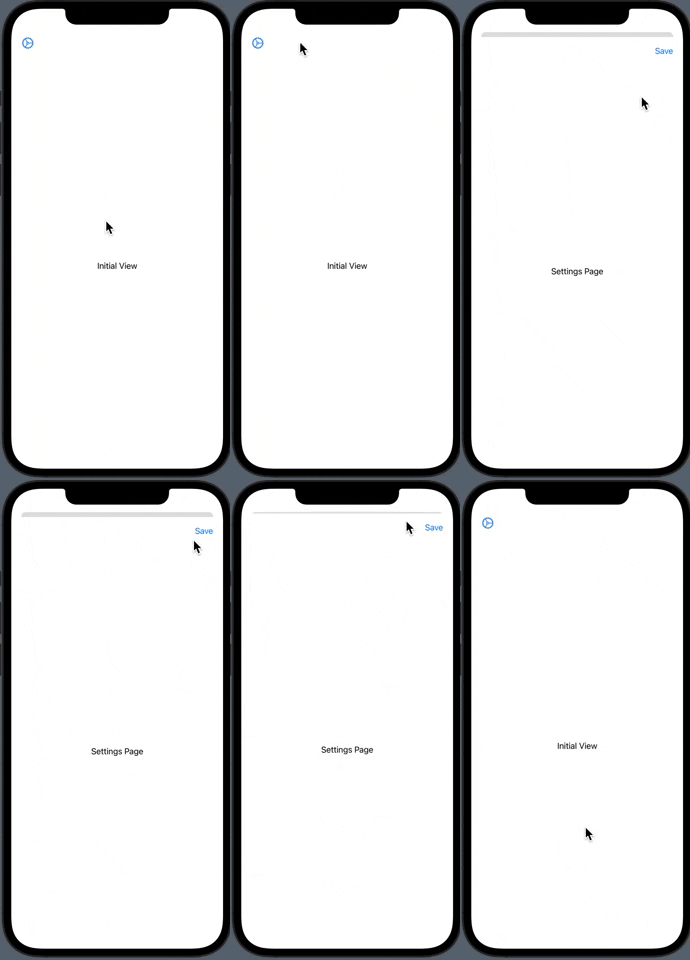
Sheet being displayed
How to present a sheet
A sheet, like the one above, is presented using a binding of aBool. As the boolean changes, the binding will change the view. If theBoolistrue, the sheet will be presented. When it is set tofalse, the sheet will dismiss. TheBoolis usually stored in the structure as an@Statevariable to be able to modify the view as it changes.
A sheet can be presented using the following:
@State var isPresenting: Bool = false
NavigationView {    .toolbar {         ToolbarItem(placement: .navigationBarLeading) {            Button("Some Button") {                isPresenting = true            }        }    }    .sheet(isPresented: $isPresenting) {        // View to display goes here    }}
Copy to clipboard
@State var isPresenting: Bool = false
NavigationView { .toolbar { ToolbarItem(placement: .navigationBarLeading) { Button("Some Button") { isPresenting = true } } } .sheet(isPresented: $isPresenting) { // View to display goes here }}The sheet takes inisPresented: $isPresentingwhich is the bindingBoolfor the view to keep track of. When theisPresentingis set totrueon the button tap, the sheet will display the view inside the sheet.
Let’s add a sheet to your project. Inside the sheet, display aNavigationView. Inside theNavigationView, display aText("Settings Page"). Don’t forget to set theisPresentingproperty totruewhen the button is tapped!
import SwiftUI
struct ContentView: View {    var body: some View {        NavigationView {            Text("Initial View")            .toolbar {                ToolbarItem(placement: .navigationBarLeading) {                    Button(action: {                                                          }, label {	                            Image(systemName: "gear")                        })                }            }            .sheet(isPresented: $isPresenting) {                NavigationView {                    Text("Settings Page")                }            }        }    }}
Copy to clipboard
import SwiftUI
struct ContentView: View { var body: some View { NavigationView { Text("Initial View") .toolbar { ToolbarItem(placement: .navigationBarLeading) { Button(action: { }, label { Image(systemName: "gear") }) } } .sheet(isPresented: $isPresenting) { NavigationView { Text("Settings Page") } } } }}Great work! You added asheetthat contains aText("Settings Page"). You are able to see the sheet when theButtonis tapped becauseisPresentingis set totrue. You can also dismiss the sheet by sliding the view downwards.
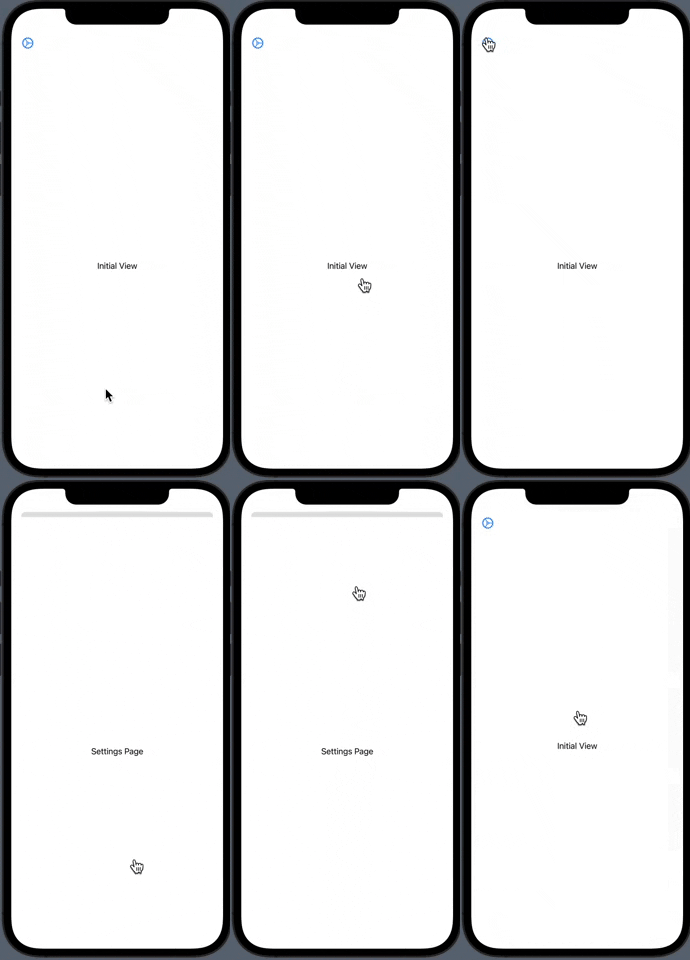
Sheet being Displayed After Completion
Toolbar within a sheet
But, what if you wanted to present a toolbar inside the sheet that you are displaying? You would implement the same strategy as you’ve done previously by adding aNavigationViewinside thesheetand then add atoolbarinside theNavigationView.
In your project, since there is already aNavigationViewinside the sheet, attach a toolbar that contains aToolbarItem. Place aButton("Save") {}inside theToolbarItemwith no specified placement.
import SwiftUI
struct ContentView: View {    var body: some View {        NavigationView {            Text("Initial View")            .toolbar {                ToolbarItem(placement: .navigationBarLeading) {                    Button(action: {                                                          }, label {	                            Image(systemName: "gear")                        })                }            }            .sheet(isPresented: $isPresenting) {                NavigationView {                    Text("Settings Page")                    .toolbar {                        ToolbarItem {                            Button("Save") {}                        }                    }                }            }        }    }}
Copy to clipboard
import SwiftUI
struct ContentView: View { var body: some View { NavigationView { Text("Initial View") .toolbar { ToolbarItem(placement: .navigationBarLeading) { Button(action: { }, label { Image(systemName: "gear") }) } } .sheet(isPresented: $isPresenting) { NavigationView { Text("Settings Page") .toolbar { ToolbarItem { Button("Save") {} } } } } } }}Fantastic! The toolbar displays a sheet that contains a toolbar. The second toolbar contains a button titled"Save"that doesn’t have an action, yet.
Toolbar inside sheet inside toolbar
Conclusion & review
Great work! In this article, you’ve covered toolbars and sheets. You created a miniature project that simulates an application that displays a settings page from a button tap on the toolbar.
Here’s a recap:
- A toolbar allows for placement of buttons along the top or bottom space of a view
- You create a toolbar using the following code snippet:
NavigationView {    Text("Hello World")    .toolbar {         // Views go here    }}
Copy to clipboard
NavigationView { Text("Hello World") .toolbar { // Views go here }}- AToolbarItemrepresents a container for placing one item on a toolbar
- AToolbarItemis created using the following code snippet:
NavigationView {    Text("Hello World")    .toolbar {        ToolbarItem {            Button("Toolbar Item Button")        }     }}
Copy to clipboard
NavigationView { Text("Hello World") .toolbar { ToolbarItem { Button("Toolbar Item Button") } }}- AToolbarItemplacement is indicated using theplacement: ToolbarItemPlacementparameter. The list of options are available on Xcode or on theApple docs.
- A sheet is used to present a new view over an existing one.
- A sheet is presented using the following code snippet:
@State var isPresenting: Bool = falseNavigationView {    Text("Hello World")    .toolbar { /* Toolbar */ }    .sheet(isPresented: $isPresenting) {            // Views go here    }}
Copy to clipboard
@State var isPresenting: Bool = falseNavigationView { Text("Hello World") .toolbar { /* Toolbar */ } .sheet(isPresented: $isPresenting) { // Views go here }}- A toolbar can be presented inside a sheet using the following code snippet:
@State var isPresenting: Bool = falseNavigationView {    Text("Hello World")    .toolbar { /* Toolbar */ }    .sheet(isPresented: $isPresenting) {        NavigationView {            Text("Settings Page")            .toolbar {                ToolbarItem {                    Button("Some Button")                }            }        }    }}
Copy to clipboard
@State var isPresenting: Bool = falseNavigationView { Text("Hello World") .toolbar { /* Toolbar */ } .sheet(isPresented: $isPresenting) { NavigationView { Text("Settings Page") .toolbar { ToolbarItem { Button("Some Button") } } } }}'The Codecademy Team, composed of experienced educators and tech experts, is dedicated to making tech skills accessible to all. We empower learners worldwide with expert-reviewed content that develops and enhances the technical skills needed to advance and succeed in their careers.'
Complete Payment to Unlock Full Guide & Source Code
You are viewing the 30% preview. Join TopCourseAI Pro to unlock the remaining 70% of this article, unblur all code snippets, and gain full access to all 412 technical projects and guides.
Ready to access the complete step-by-step tutorial?
Gain full unhindered access to all 412 technical projects and guides, unblur all source code snippets, and download runnable scripts.
The tsconfig.json File
Next BlueprintTransformer Architecture Explained With Self-Attention Mechanism
Related Blueprints & Guides
View all 166 →Best IDEs for Mobile App Development: A Complete Guide
AnIDE(Integrated Development Environment) combines essential development tools into a single application, making mobile app development more efficient and organized. Rather than juggling separate tools for coding, debugg...
Mobile developmentBuilding Lists in SwiftUI
Presenting textual and graphical information in a column is a very familiar and natural way to visually organize data. Almost all modern apps utilize some sort of columnar data display. Think of popular social media apps...
Mobile developmentGrids in SwiftUI
The grid layout has become a familiar paradigm for mobile user experiences. The canonical example of grid layout is in the built-in camera roll app for iOS. It can also be found on an extremely popular social photo-shari...
Ready to build production-grade AI systems?
Enjoyed this guide? Continue exploring our library of 166+ production blueprints, multi-agent swarms, and autonomous agent systems with 100% unblurred, executable source code.