
Installing Jupyter Notebook on a Chromebook
Installing Jupyter Notebook on a Chromebook
If you haven’t set up your local Linux environment on your Chromebook yet, please read theProgramming Locally on a Chromebookarticle first. And if you’re using a Mac or Windows computer, learnhow to install Jupyter Notebook on your device.
Installing Jupyter Notebook on Chromebooks
Many of our Codecademy off-platform projects use Jupyter Notebooks, so that’s what we’ll teach you to set that up here. We’ll be using your terminal for most of this process!
We show you two ways to install Jupyter Notebook in this article, but we suggest you usepipto install Jupyter Notebook.
Option 1: Usingpip
pipis a useful command we can use to download Python packages.
- In order to install some packages, we’ll need to install their dependencies. There are a lot of packages that can assist us as we install cool packages in the future, so we’ll download some of the common dependencies. The following command is long, but it’s doing a lot! When the installation pauses, type “y” to answer “yes”.yourusername@penguin:~$ sudo apt install build-essential libssl-dev libffi-dev python3-dev libhdf5-devCopy to clipboard
- Next, we’ll installpipusing theapt installcommand. We’ll add the-yflag to automatically say “yes” to the prompt we know occurs partway through installation.yourusername@penguin:~$ sudo apt install -y python3-pipCopy to clipboard
- Now, we can usepipto install Jupyter Notebook. Since we’re using Python 3, we’ll actually need to use the commandpip3instead ofpip.yourusername@penguin:~$ sudo pip3 install jupyterCopy to clipboard
yourusername@penguin:~$ sudo apt install build-essential libssl-dev libffi-dev python3-dev libhdf5-dev
Copy to clipboard
yourusername@penguin:~$ sudo apt install build-essential libssl-dev libffi-dev python3-dev libhdf5-devyourusername@penguin:~$ sudo apt install -y python3-pip
Copy to clipboardyourusername@penguin:~$ sudo apt install -y python3-pipyourusername@penguin:~$ sudo pip3 install jupyter
Copy to clipboardyourusername@penguin:~$ sudo pip3 install jupyterOnce complete, we can check that Jupyter Notebook was successfully installed by runningjupyter notebookfrom a Terminal. This will start up the Jupyter Notebook server, print out some information about the notebook server in the console, and open up a new browser tab tohttp://localhost:8888.
Option 2: Miniconda (Optional Advanced Method)
Miniconda is a helpful package manager that can help you install useful packages. Miniconda can also be used to install Jupyter Notebook, but,unfortunately, we can’t install it on all Chromebooks.
If you have already usedpipto install Jupyter Notebook, you can skip this section.
To see if you can install Miniconda, we’ll use the commanddpkg --print-architecture.
yourusername@penguin:~$ dpkg --print-architecturearm64
Copy to clipboard
yourusername@penguin:~$ dpkg --print-architecturearm64If your system printsarm64, then you cannot install Miniconda. Skip to the “Usingpip“ section below.
- To know what version of Miniconda we’ll need to download, we’ll need to check your Chrome OS version. Open your “Settings” and navigate to “About Chrome OS”. You should see an image that will a version and if your computer is “32-bit” or “64-bit”. Remember that bit number!
- Next, we’ll download the Miniconda installer from the“Linux installers” section of the Miniconda website. My computer was listed as “32-bit”, and I want an installer compatible with Python 3, so I’ll click the second link that says “Miniconda3 Linux 32-bit”. Choose the link that matches your Python version and the number of bits you saw on your computer in step 1.
- Now, we’ll need to move the installer we downloaded from our “Downloads” folder into our “Linux files” folder so we can access it in our terminal. Start by opening your “Downloads” folder and finding the installer file.
- Click on the installer file and drag it onto the “Linux files” folder. This will move the file into “Linux files” and make it accessible to us in our terminal.
- Now, we’ll need to open our terminal. If we type inlsto list the contents of the folder, we should see our installer.yourusername@penguin:~$ lsMiniconda3-latest-Linux-x86.shCopy to clipboardRun the installer using thebashcommand:yourusername@penguin:~$ sudo bash Miniconda3-latest-Linux-x86.shWelcome to Miniconda3 4.5.12In order to continue the installation process, please review the license agreement.Please, press ENTER to continue>>>Copy to clipboardIf you see an error message instead of this greeting, you installed the wrong version of the installer. Please double-check your Python version and if your computer is 32 or 64-bit.
- Press ENTER until you see the prompt to accept the license terms. You will type “yes”.Do you accept the license terms? [yes|no][no] >>> yesCopy to clipboard
- The installer will ask you where you want to install Miniconda3. You can press ENTER to accept the default location.Miniconda3 will now be installed in this location/root/miniconda3- Press ENTER to confirm the location- Press CTRL-C to abort the installation- Or specify a different location below[root/miniconda3] >>>Copy to clipboardIf you have attempted this installation already and it failed, you might need to remove the already existing/root/minicondadirectory. You can do this with the commandrmcommand. Be very careful with this command - you don’t want to accidentally delete yourrootdirectory!yourusername@penguin:~$ sudo rm -rf /root/miniconda3Copy to clipboard
- Continue following the prompts until the installation is complete! If the installation failed after you typed in the directory name, it’s possible you cannot install Miniconda system. Return to the “Usingpip“ section to install Jupyter Notebook.
- If the installation completes successfully, you can now install Jupyter Notebook using thecondacommand.yourusername@penguin:~$ sudo conda install jupyterCopy to clipboard
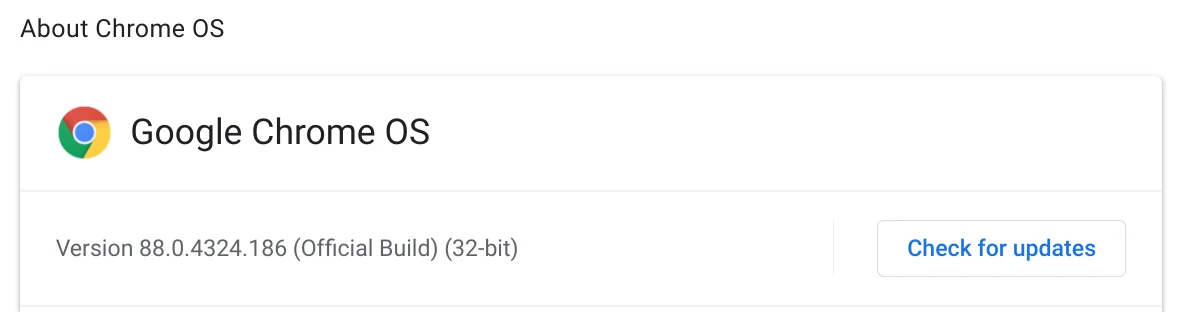
An image showing that this computer is Version 88.0.4324.186 (Official Build)(32-bit)
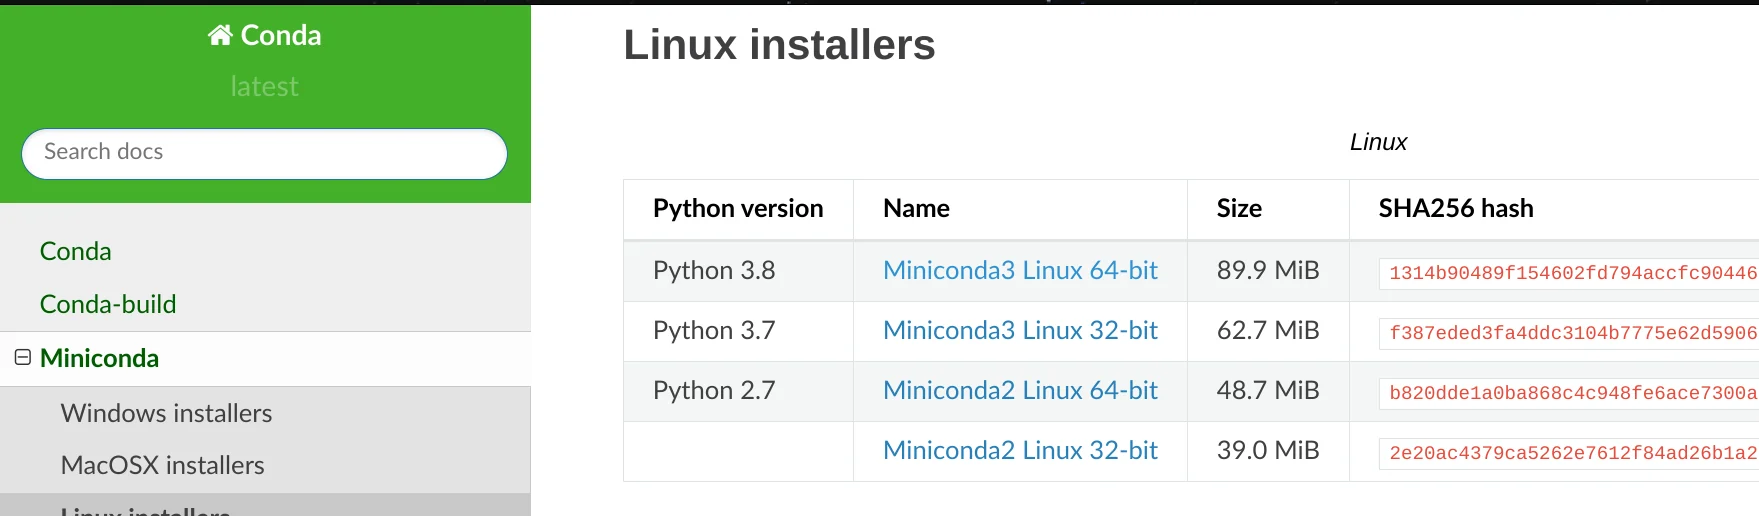
The image show a table from the miniconda website that lists different miniconda installer files
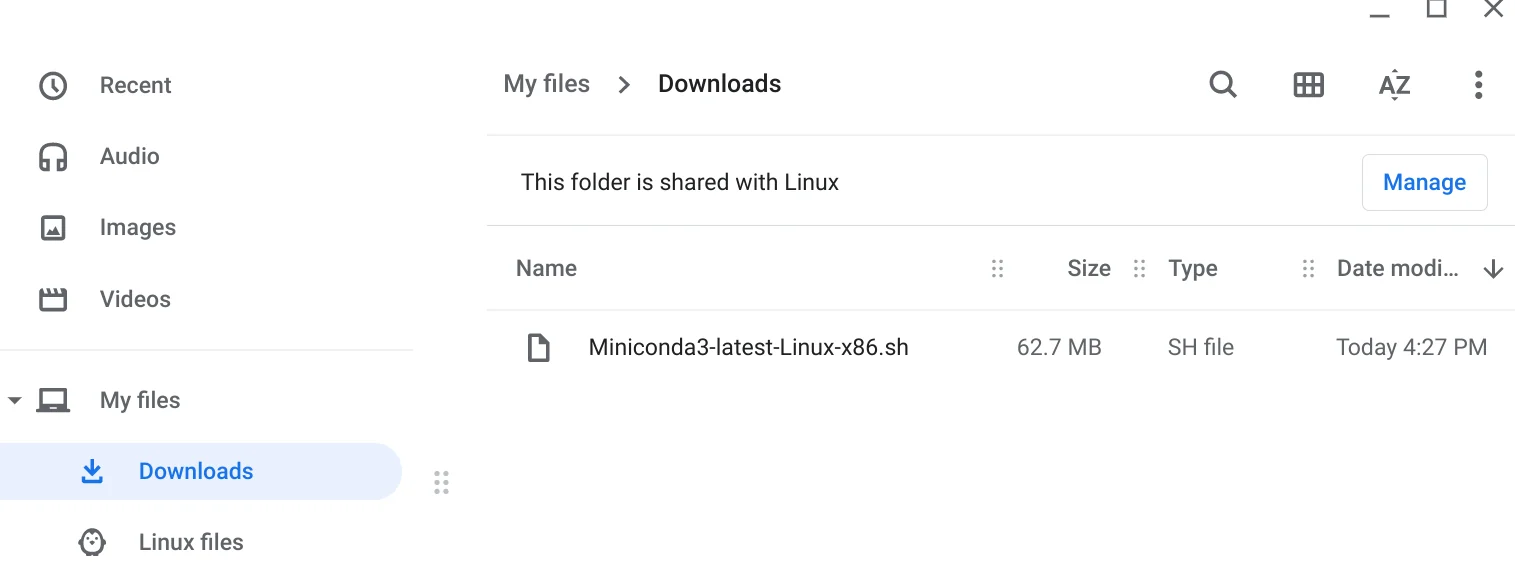
An image showing the installer titled "Miniconda3-latest-Linux-x86.sh" in the Downloads folder
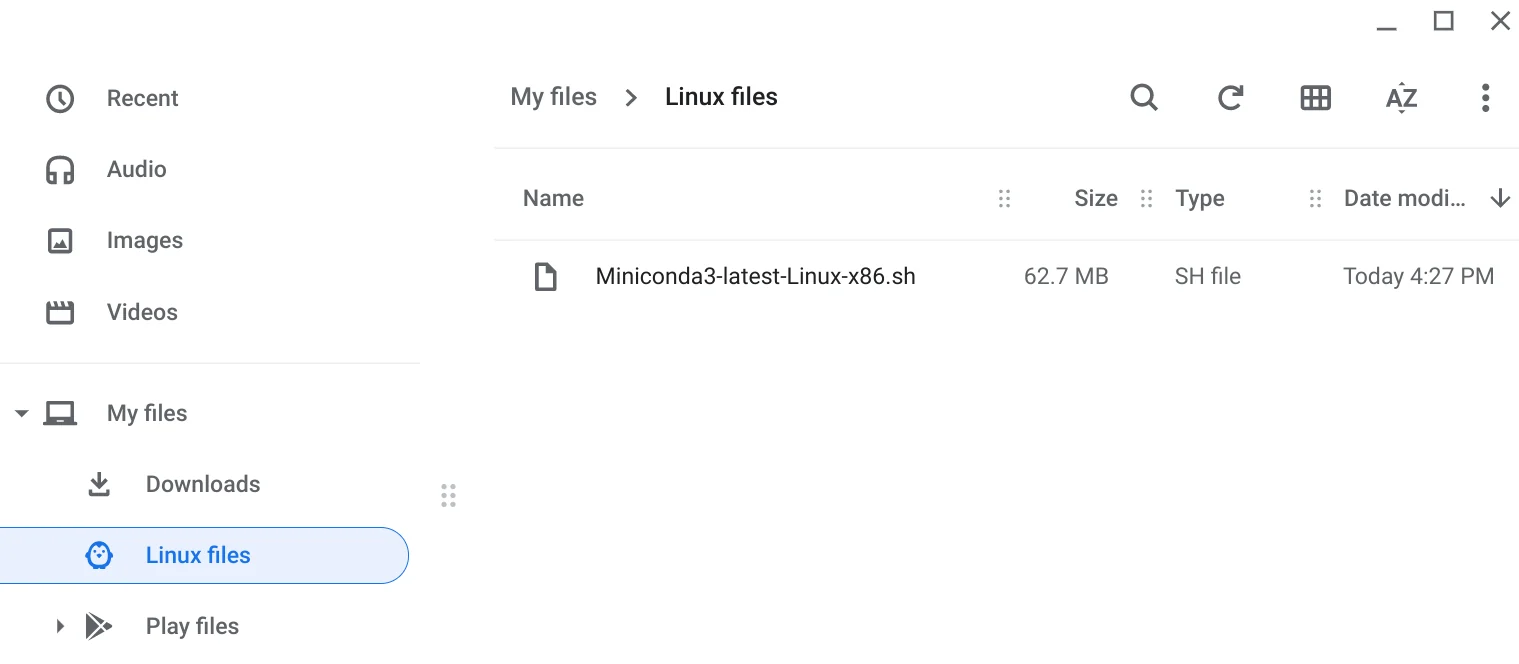
An image showing the installer titled "Miniconda3-latest-Linux-x86.sh" in the Linux files folder
yourusername@penguin:~$ lsMiniconda3-latest-Linux-x86.sh
Copy to clipboard
yourusername@penguin:~$ lsMiniconda3-latest-Linux-x86.shyourusername@penguin:~$ sudo bash Miniconda3-latest-Linux-x86.sh
Welcome to Miniconda3 4.5.12
In order to continue the installation process, please review the license agreement.Please, press ENTER to continue>>>
Copy to clipboardyourusername@penguin:~$ sudo bash Miniconda3-latest-Linux-x86.sh
Welcome to Miniconda3 4.5.12
In order to continue the installation process, please review the license agreement.Please, press ENTER to continue>>>Do you accept the license terms? [yes|no][no] >>> yes
Copy to clipboardDo you accept the license terms? [yes|no][no] >>> yesMiniconda3 will now be installed in this location/root/miniconda3
- Press ENTER to confirm the location- Press CTRL-C to abort the installation- Or specify a different location below
[root/miniconda3] >>>
Copy to clipboardMiniconda3 will now be installed in this location/root/miniconda3
- Press ENTER to confirm the location- Press CTRL-C to abort the installation- Or specify a different location below
[root/miniconda3] >>>yourusername@penguin:~$ sudo rm -rf /root/miniconda3
Copy to clipboardyourusername@penguin:~$ sudo rm -rf /root/miniconda3yourusername@penguin:~$ sudo conda install jupyter
Copy to clipboardyourusername@penguin:~$ sudo conda install jupyterNow you’ve successfully installed Jupyter Notebook on your Chromebook! Next, read our article onhow to use it.
Programming Locally
While there are some limitations toprogramminglocally on your Chromebook, you can still program in many languages.
The following articles will help you set up a specific language or tool on your Chromebook:
- Programming in Python on a Chromebook
- Installing IDLE on a Chromebook
- Web Programming on a Chromebook
'The Codecademy Team, composed of experienced educators and tech experts, is dedicated to making tech skills accessible to all. We empower learners worldwide with expert-reviewed content that develops and enhances the technical skills needed to advance and succeed in their careers.'
Complete Payment to Unlock Full Guide & Source Code
You are viewing the 30% preview. Join TopCourseAI Pro to unlock the remaining 70% of this article, unblur all code snippets, and gain full access to all 412 technical projects and guides.
Ready to access the complete step-by-step tutorial?
Gain full unhindered access to all 412 technical projects and guides, unblur all source code snippets, and download runnable scripts.
Installing IDLE on a Chromebook
Next BlueprintInstalling Python 3 and Python Packages
Related Blueprints & Guides
View all 166 →Android Studio Quick-Start Guide
Android Studio often intimidates beginners, but by learning a few handy shortcuts and getting the lay of the land, we can navigate this powerful development environment with ease.
Developer toolsApache Kafka Tutorial: A Complete Guide for Beginners
Apache Kafkais a well-known distributed event streaming platform designed to efficiently manage real-time data feeds. It was originally developed by LinkedIn in 2011 and later open-sourced. Apache Kafka has gained immens...
Developer toolsBuilding Websites with Wix
Creating a website has never been easier. Previously, making a presentable website meant learning HTML, CSS, andJavaScript. The whole process could take weeks, months, or even years before creating a website that you’re...
Ready to build production-grade AI systems?
Enjoyed this guide? Continue exploring our library of 166+ production blueprints, multi-agent swarms, and autonomous agent systems with 100% unblurred, executable source code.