
Getting Started with IntelliJ
Getting Started with IntelliJ
In this tutorial, we’ll walk through the process of installing and setting up the IntelliJ IDEA on your local machine. We’ll cover the installation process for both Mac and Windows and also set up the necessary configuration to get you up and running with IntelliJ IDEA.
What is IntelliJ IDEA?
IntelliJ IDEA is anIntegrated Development Environment (IDE)created by JetBrains. It’s built on Java and provides a consistent experience on Windows, macOS, and Linux for many different languages.
IntelliJ IDEA has a multitude of functionalities available and is designed to keep your focus on the code with features like code completion, inline debugging, quick fixes, and a variety of keyboard shortcuts.
Installation
In order to install IntelliJ IDEA, you will first need to navigate tojetbrains.com/idea. From here, you can click on the “Download” button, and you’ll be redirected to the download page.
You’ll be provided with two available editions to download: The freeCommunityedition and the paidUltimateedition. We’ll be installing theCommunityedition.
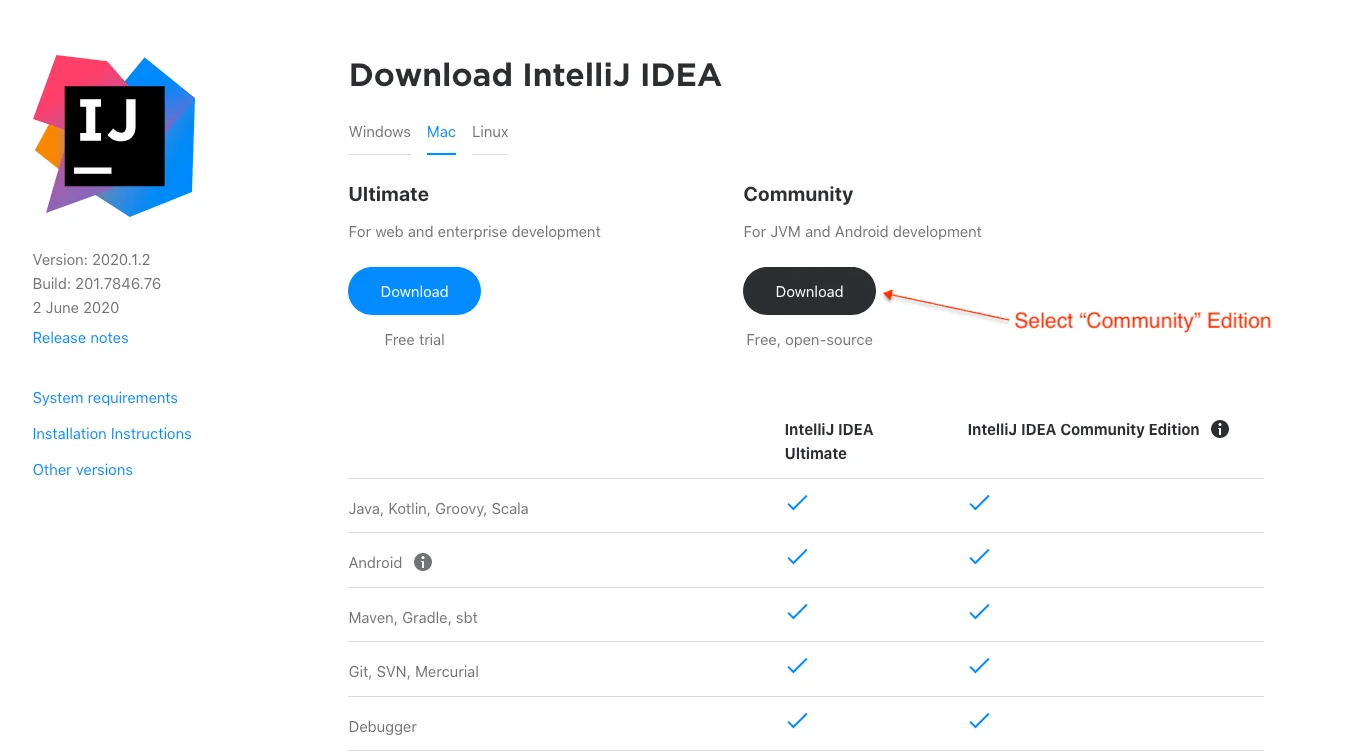
Download page
Next, we’ll continue the installation process for Mac and Windows respectively. Make sure the correct operating system has been selected prior to downloading.
MAC USERS
1.Click on the Download button. If an “Open and Save” dialog appears, select the option, “Open with”, to open the disk image once the download is complete. If it opens automatically, move on to the next step.
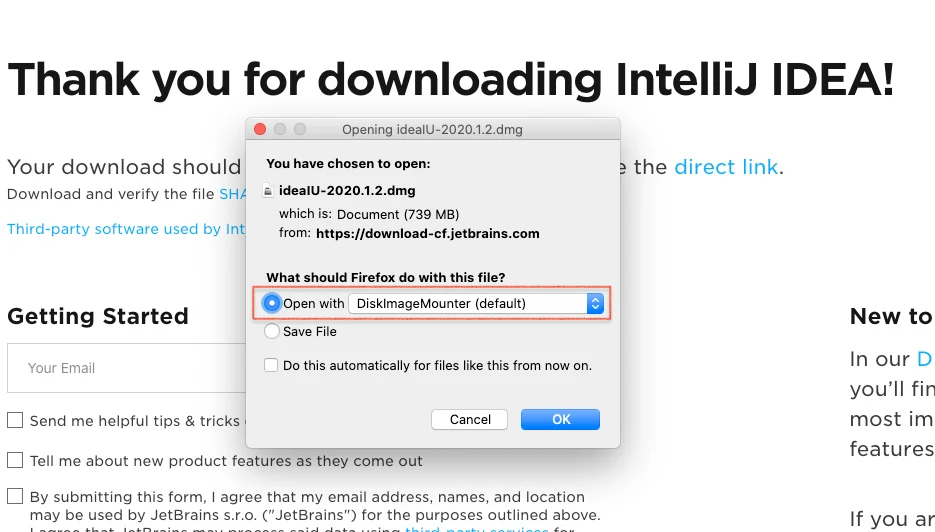
Open Disk Image option
2.Drag the IntelliJ IDEA to your Applications folder:
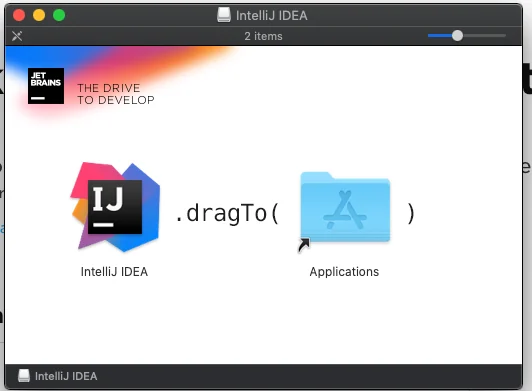
Disk Image
3.Once the copying process is done, open IntelliJ by browsing for it in the “Applications” folder in your finder and double-clicking on it.
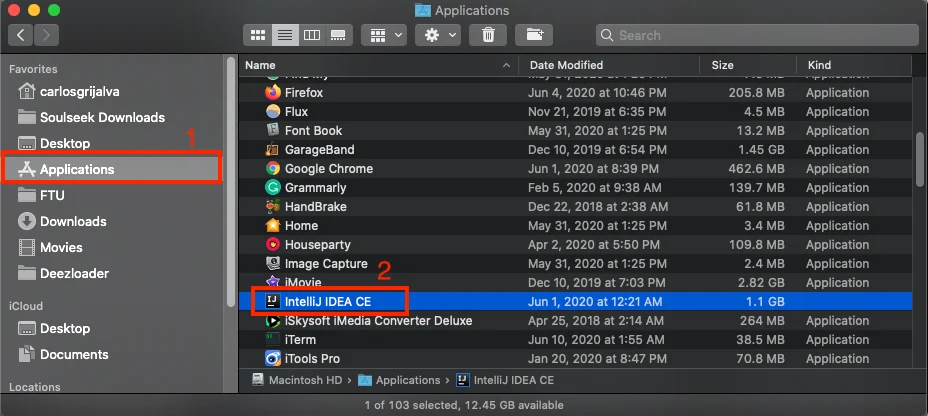
IntelliJ in Finder
Alternatively, you can use the spotlight search by pressing Command(⌘) + Space, then searching for “IntelliJ” and pressingEnter.
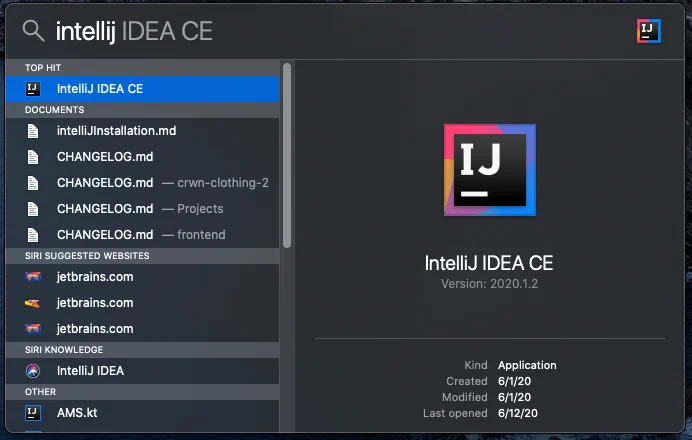
Spotlight search
Accept the Privacy Policy and the option to send data. You will then be prompted with a window to customize IntelliJ.
4.Select your Default UI Theme and then click “Skip Remaining and Set Defaults”. The UI theme and other settings can always be changed later:
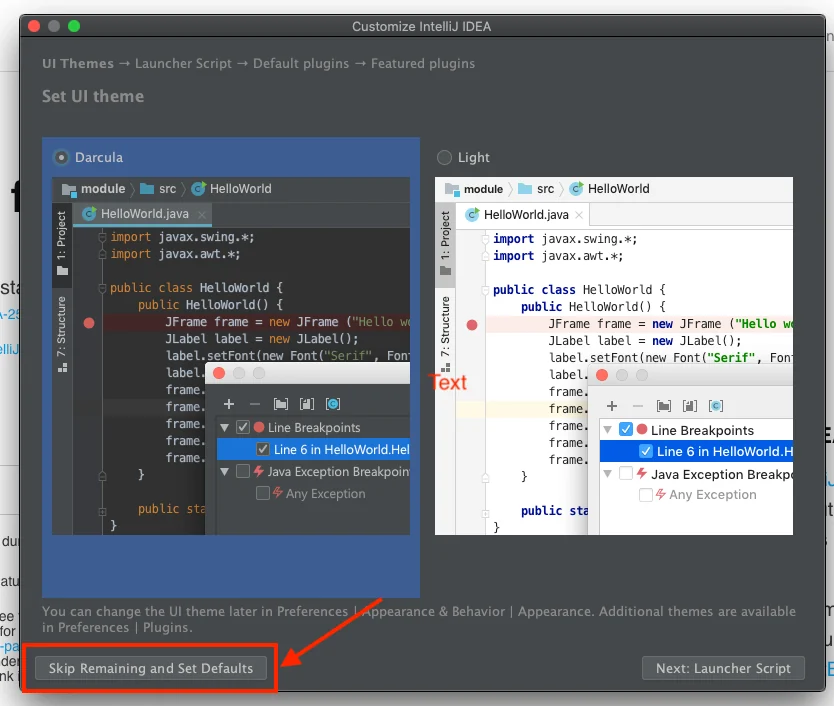
IntelliJ IDEA Config
You should now have IntelliJ IDEA installed on your Mac!
WINDOWS USERS
1.Download and run the installer (.exe) from the download page.
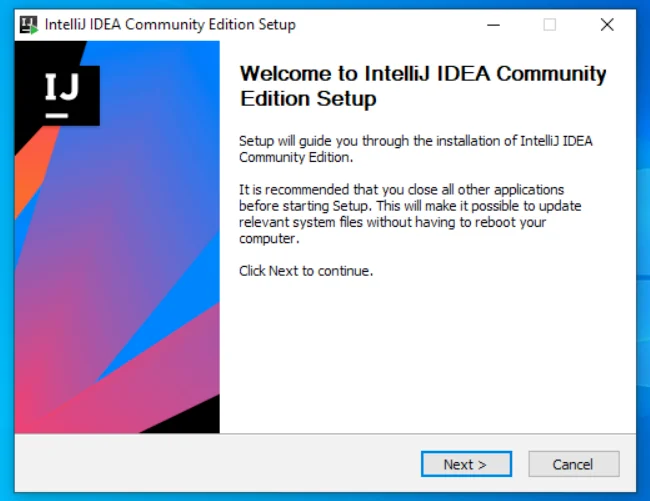
IntelliJ IDEA Config
2.Choose the default install location and menu.
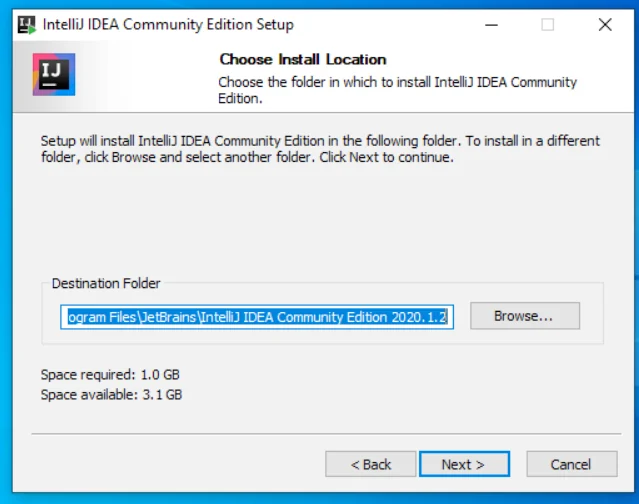
IntelliJ IDEA Install Location
3.Configure associations and Desktop shortcuts.
- Desktop Shortcut: You can either create a shortcut for both launchers or each one individually. A 64-bit launcher is advisable if you’re working on multiple and/or large scale projects since it allocates moreRAM.
- Update Path Variable: Updating the PATH variable will allow you to use the command line to run projects in IntelliJ.
- Update context menu: This will allow you to choose your directory with all your Java files.
- Associations: These options will associate the files with the IDE in the system so that when you click on the files with these extensions in your file manager (Windows Explorer), they will open in the IDE. We’ll be creating associations with.java,.kt, and.kts.
- Install 32-bit Jetbrains Runtime: This installs the runtime and must be checked if you’re creating a 32-bit launcher. Otherwise, the runtime comes bundled with the 64-bit launcher.
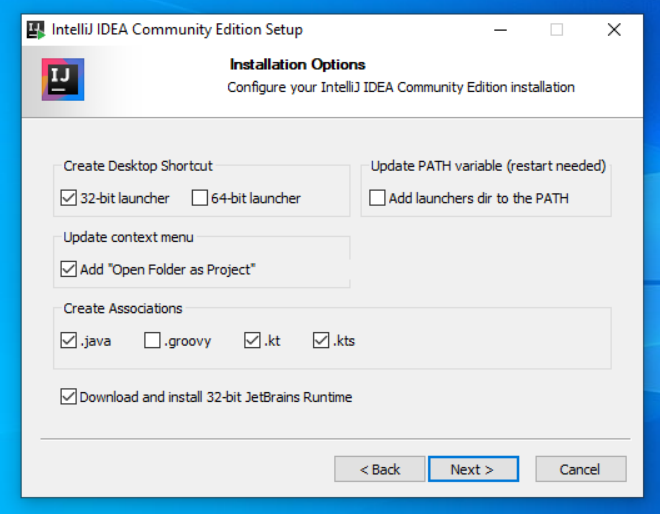
IntelliJ IDEA associations
4.Choose your start menu folder. The default option will create a JetBrains folder in your start menu.
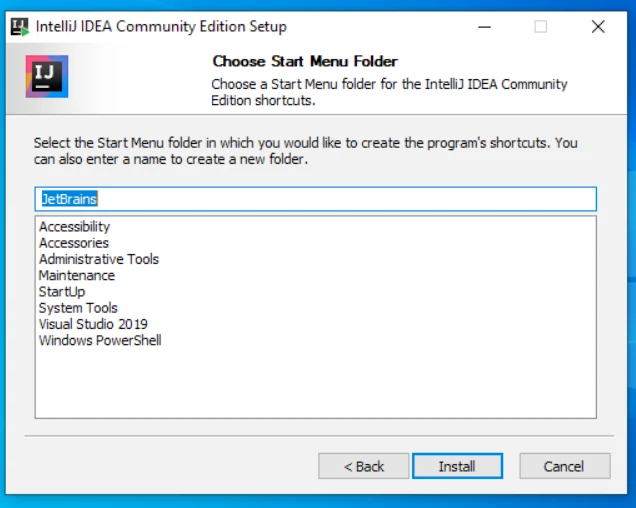
IntelliJ IDEA Start Menu Folder
5.Complete your installation 🎉
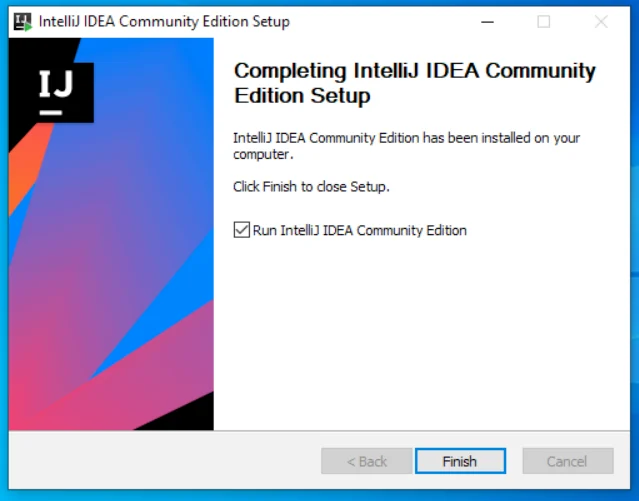
IntelliJ IDEA Complete Installation
6.Select your default UI Theme and then “Skip Remaining and Set defaults”.
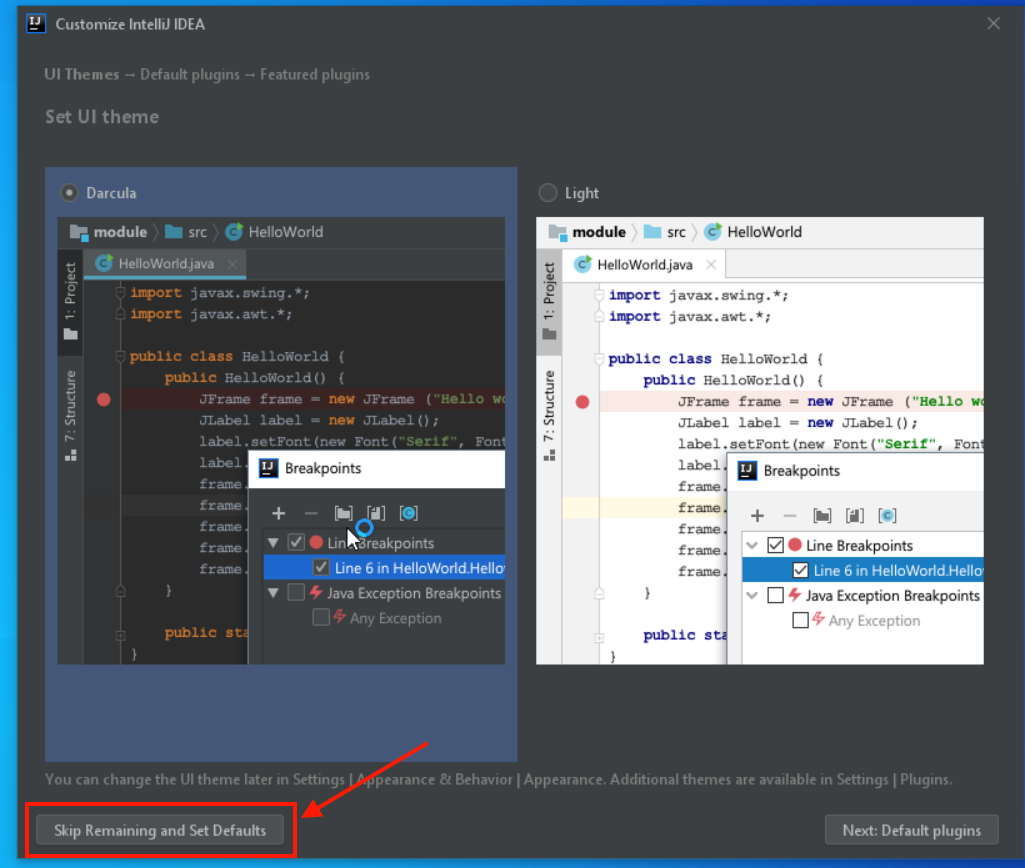
IntelliJ IDEA Customize
You should now have IntelliJ IDEA installed on your Windows machine!
Creating your first Kotlin project
1.After installation, launch IntelliJ and you’ll see a Welcome dialog with a few options to create a new project or open an existing project. Click on “Create New Project”:
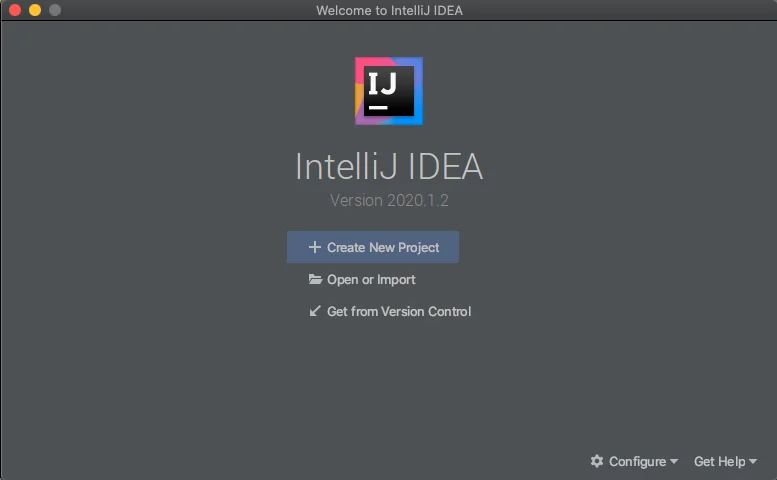
Welcome dialog
2.The new Project window will have a few languages on the left panel. Make sureJavais selected. You will need the Java SDK in order to create the project; if you don’t have it downloaded, you can click on the dropdown and select “Download JDK”:
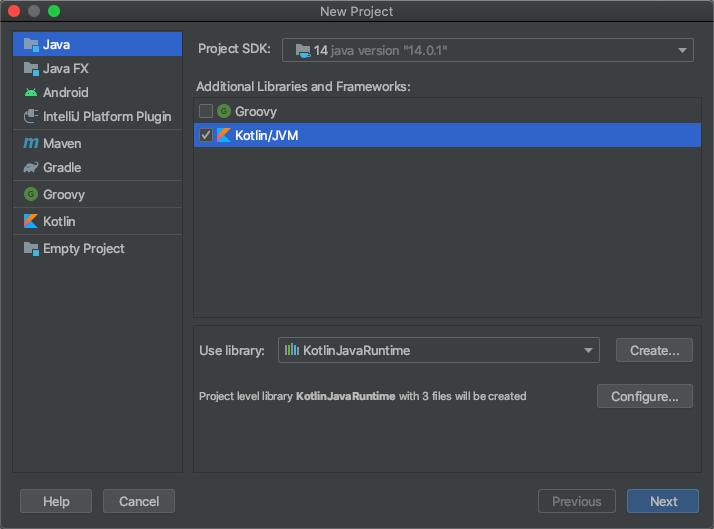
Download JDK
3.Under “Additional Libraries and Frameworks”, selectKotlin/JVMand clickNext:
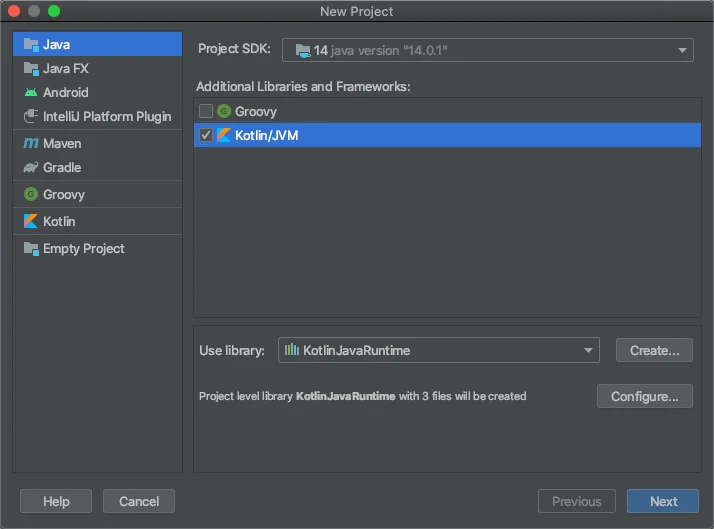
Additional Frameworks
4.Name the projectHelloWorldand clickFinish:
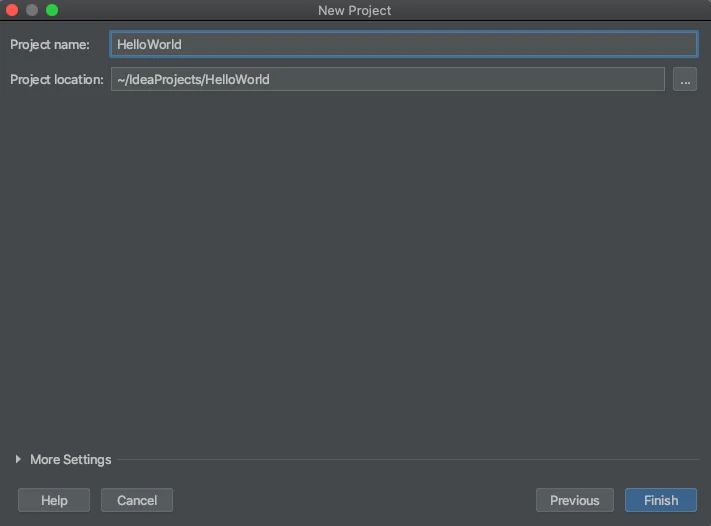
Project Name
5.On the left-hand panel, expand theHelloWorldfolder and right-click on thesrcfolder. Navigate toNewand thenKotlin file/Class:
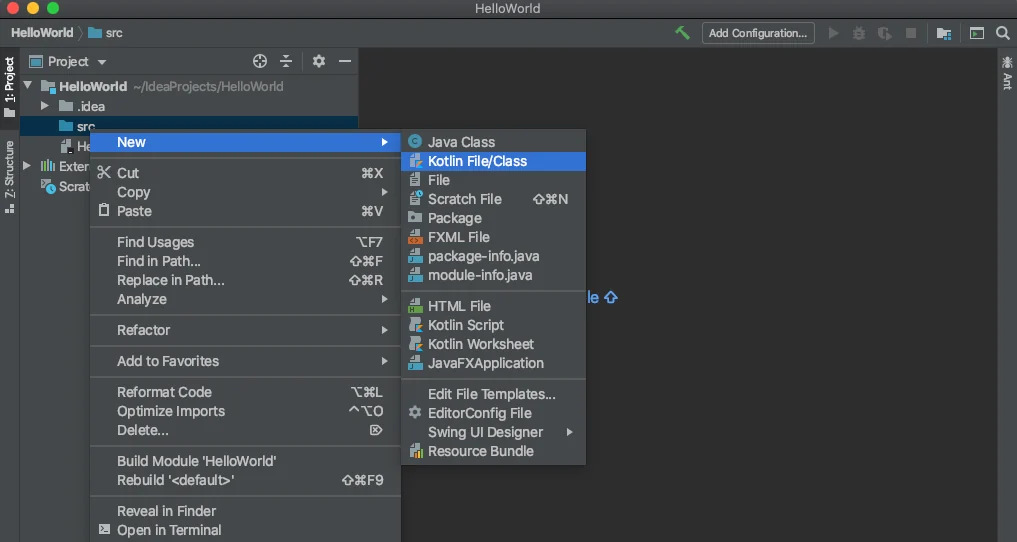
Create a new Kotlin file
6.Name the new fileHelloWorld:
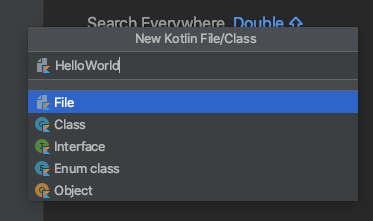
New file name
7.In the newly created file, insert the following code snippet:
fun main () {   println("Hello, world!")}
Copy to clipboard
fun main () { println("Hello, world!")}8.In order to run the file, click on the green arrow on the left side of code snippet and selectRun HelloWorldKt. Alternatively, you can use the keyboard shortcut, Control(⌃) + Shift + R:
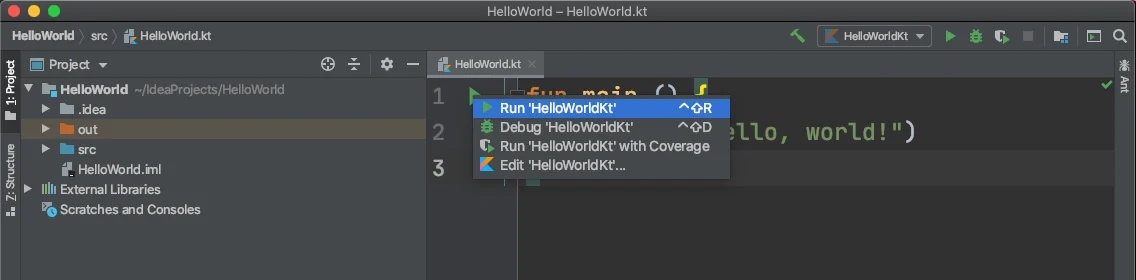
Run the program
9.Once compiled successfully, the output of the program should appear at the bottom of the screen:
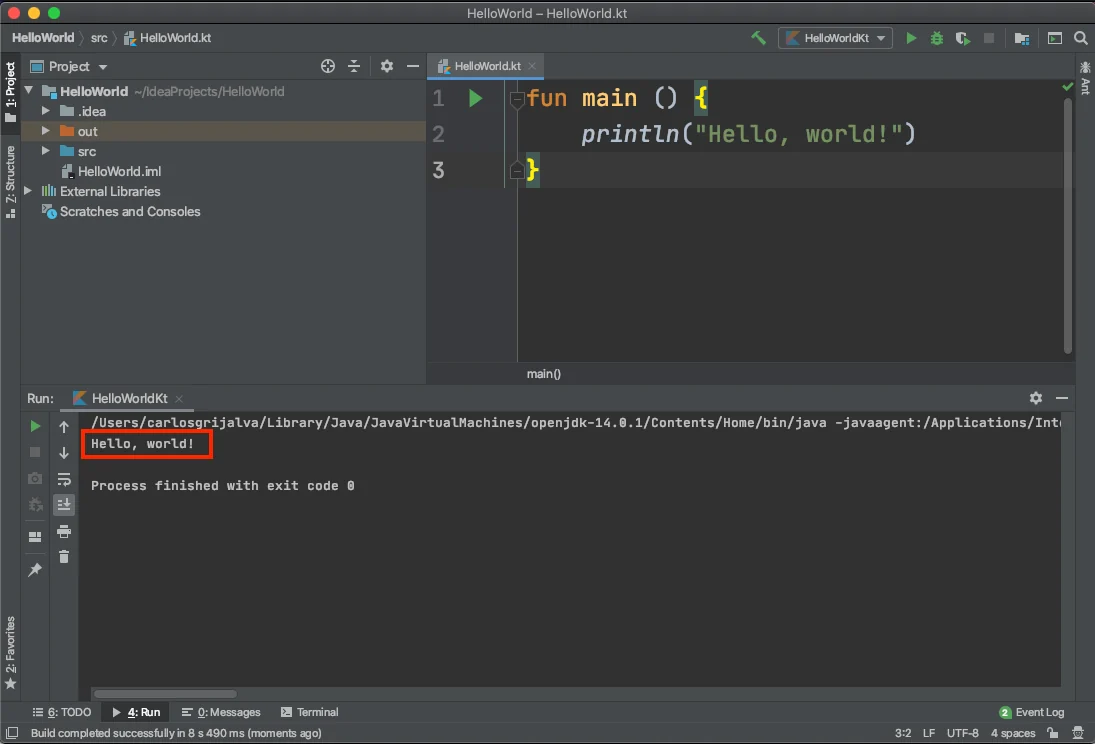
Program output
Congratulations! You now have your first Kotlin application running with IntelliJ.
While IntelliJ is aimed for Javaprogramming, the IDE has extensive assistance for a variety of languages such as Python, SQL,Javascript, HTML, Kotlin, and many more. With IntelliJ, your software development process will be more streamlined, and less error-prone. The main coding principle that IntelliJ focuses on is writing code with the least amount of distractions as possible. With dedicated shortcuts and features, you’ll be able to code in a much more efficient and faster way.
'The Codecademy Team, composed of experienced educators and tech experts, is dedicated to making tech skills accessible to all. We empower learners worldwide with expert-reviewed content that develops and enhances the technical skills needed to advance and succeed in their careers.'
Complete Payment to Unlock Full Guide & Source Code
You are viewing the 30% preview. Join TopCourseAI Pro to unlock the remaining 70% of this article, unblur all code snippets, and gain full access to all 412 technical projects and guides.
Ready to access the complete step-by-step tutorial?
Gain full unhindered access to all 412 technical projects and guides, unblur all source code snippets, and download runnable scripts.
Getting Started with Heroku
Next BlueprintGetting Started with LangChain Prompt Templates
Related Blueprints & Guides
View all 166 →Android Studio Quick-Start Guide
Android Studio often intimidates beginners, but by learning a few handy shortcuts and getting the lay of the land, we can navigate this powerful development environment with ease.
Developer toolsApache Kafka Tutorial: A Complete Guide for Beginners
Apache Kafkais a well-known distributed event streaming platform designed to efficiently manage real-time data feeds. It was originally developed by LinkedIn in 2011 and later open-sourced. Apache Kafka has gained immens...
Developer toolsBuilding Websites with Wix
Creating a website has never been easier. Previously, making a presentable website meant learning HTML, CSS, andJavaScript. The whole process could take weeks, months, or even years before creating a website that you’re...
Ready to build production-grade AI systems?
Enjoyed this guide? Continue exploring our library of 166+ production blueprints, multi-agent swarms, and autonomous agent systems with 100% unblurred, executable source code.