
Deploying a Static Site with Netlify
Deploying a Static Site with Netlify
Deploying a static site
If you want to share a site that doesn’t have a backend and provides the same information to all visitors, then deploying a static site would be perfect. As you know, the most efficient way to deploy these static sites is through Netlify.
To do so, you’ll need to have the following:
- A Netlify account, which can be created step-by-step in“Getting Started with Netlify”.
- AGitHubaccount that you’ll be using toforkan existing repository. If you don’t know how to fork a repository, check out ourcourse on GitHub.
Forking the repository
For the purpose of this article, we’ll be using Codecademy’s“deploying-a-static-site-with-netlify-sample” repository. You can use your own repository if you wish, but you’ll have to modify the following steps accordingly.
To fork the repository to your personal GitHub account, click theForkbutton on theoriginal repository’s page:

Screenshot of the GitHub "Fork" button
You should then have your own copy of the “deploying-a-static-site-with-netlify-sample” repository, which you’ll soon deploy.
Using Netlify
Let’s get started with deploying the GitHub repository — it only takes a few simple steps! First, make sure you’re logged in to your Netlify account and then go to yourdashboard.
Creating a site from Git
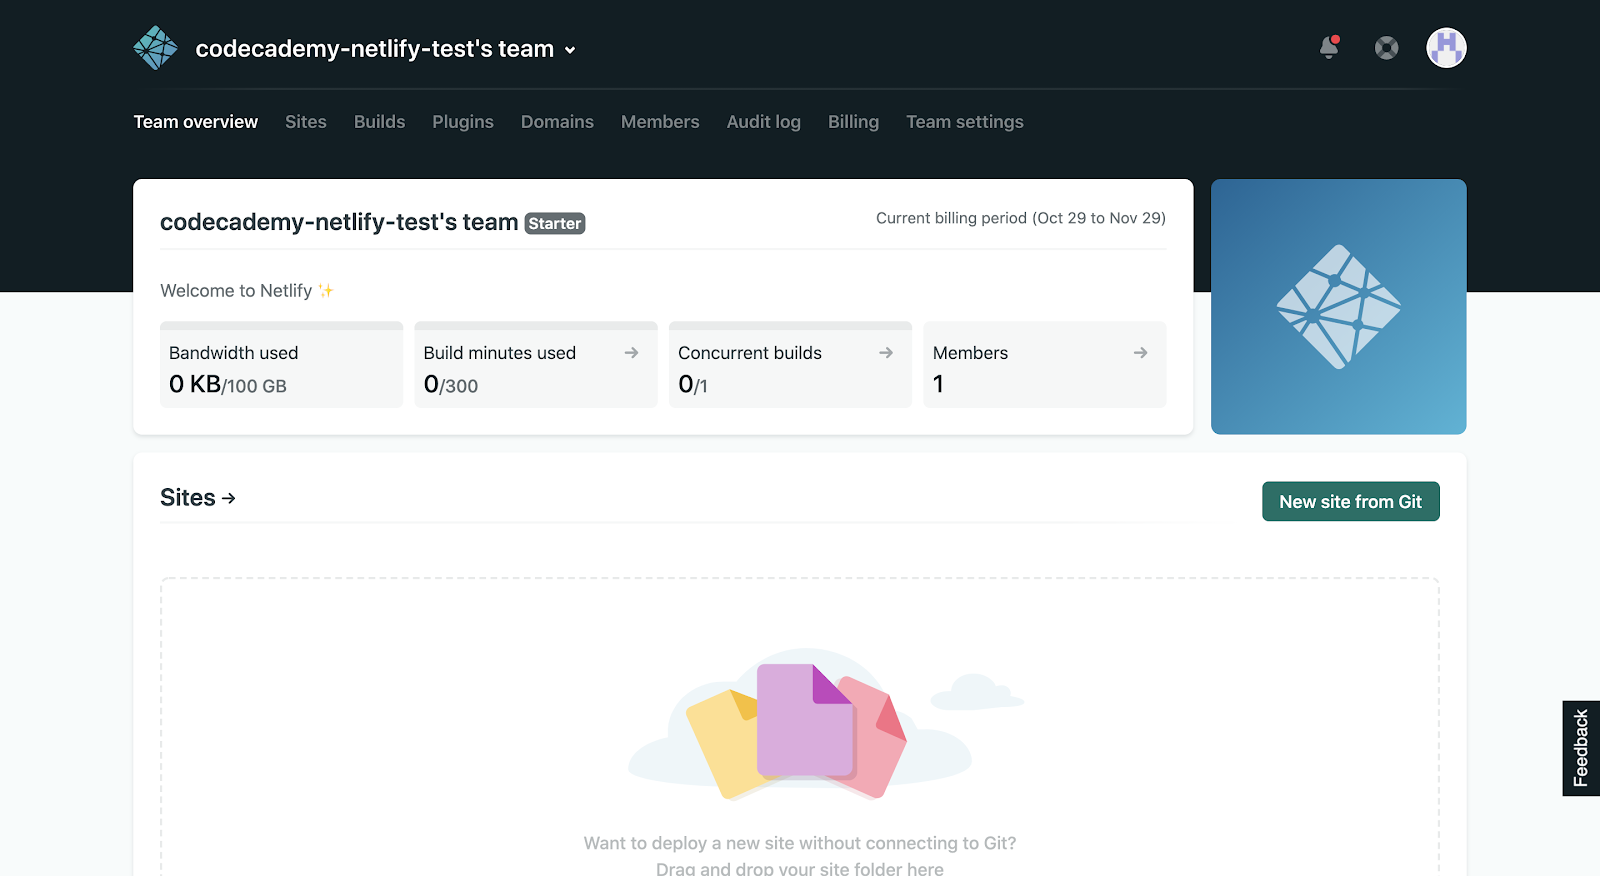
Screenshot of the Netlify dashboard
In your Netlify dashboard, clickNew site from Gitto start the deployment process. You’ll be directed to a page that shows the first step, which is connecting to your Git provider:
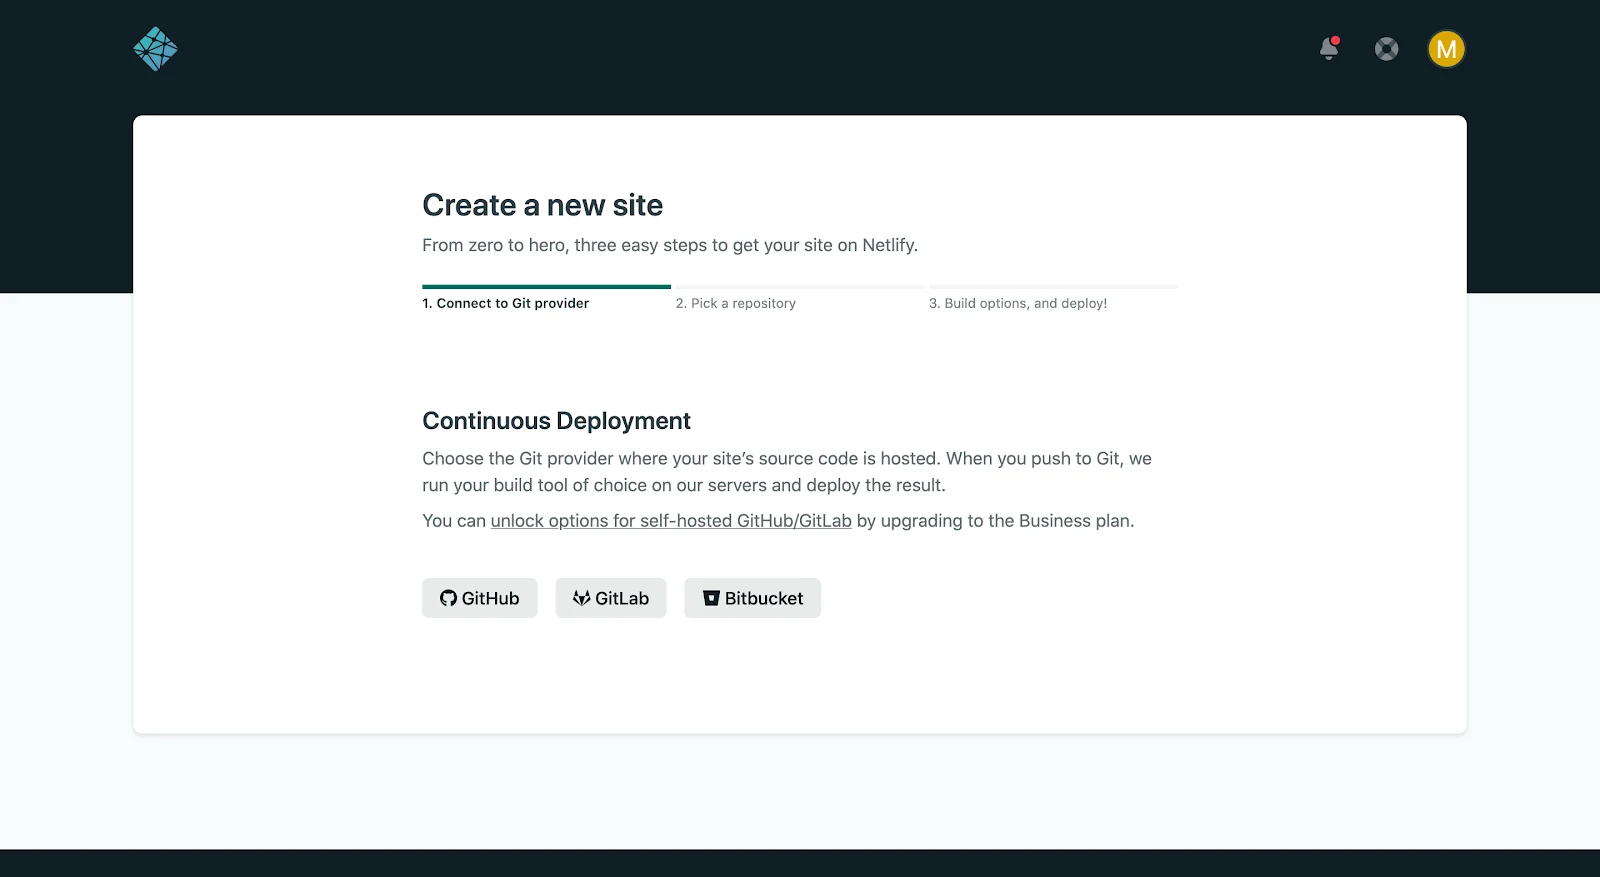
Screenshot of connecting to the Git provider
You should select theGitHuboption because that is where your forked repository is hosted. However,GitLabandBitbucketare available if you want to use those for other projects.
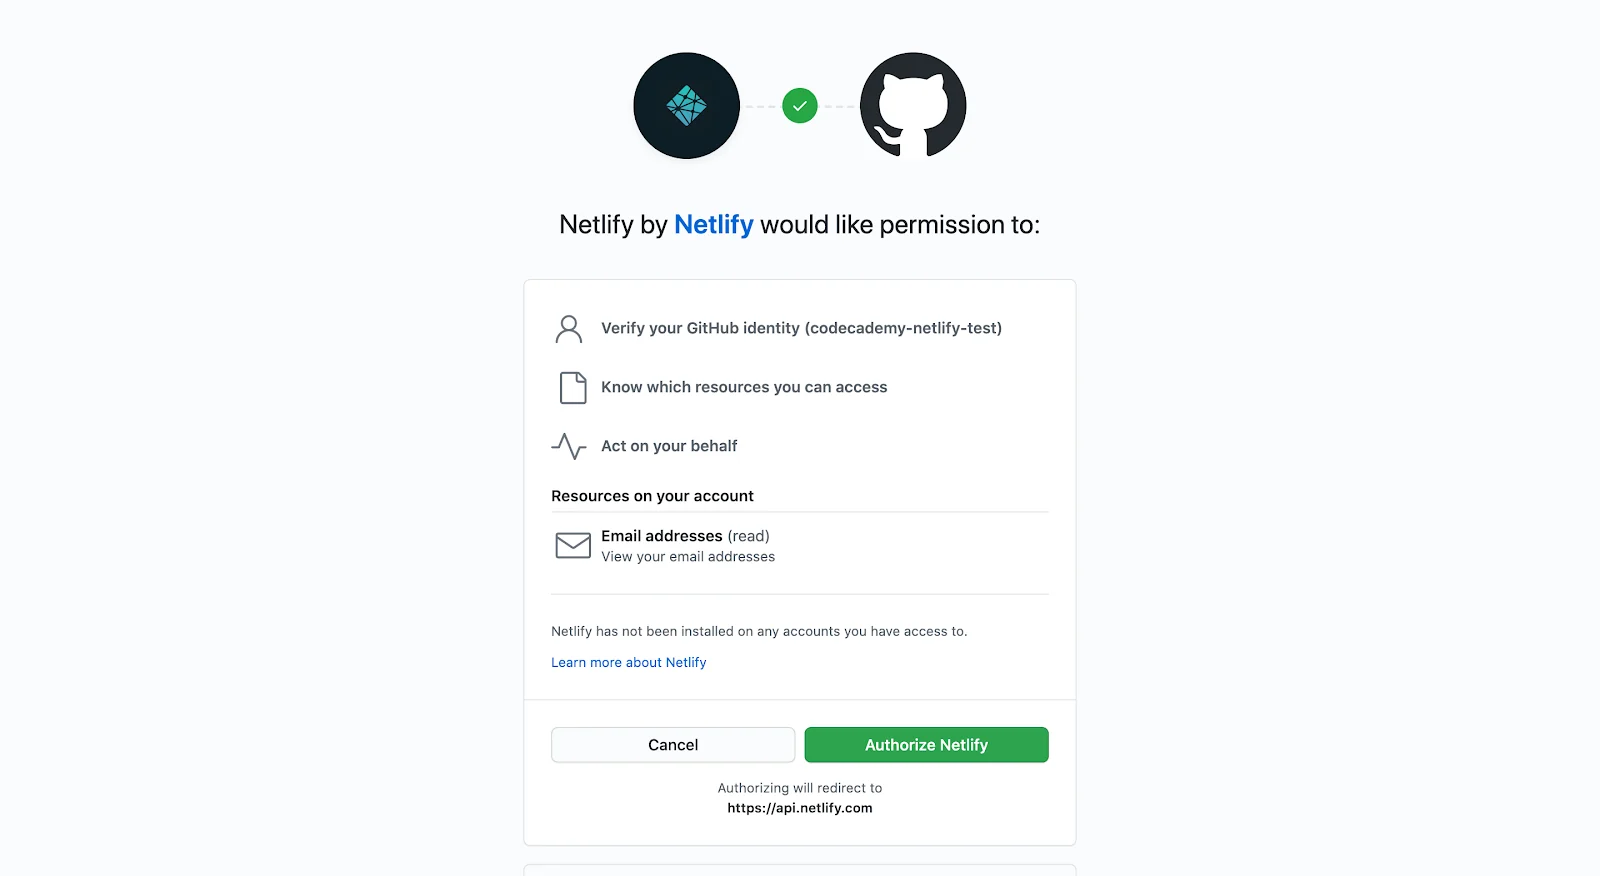
Screenshot of authorizing Netlify to connect with GitHub
If you didn’t create your Netlify account using GitHub, you’ll need to provide connection permissions by clickingAuthorize Netlify. Doing so will eventually allow Netlify to connect with the GitHub repository that you want to deploy.
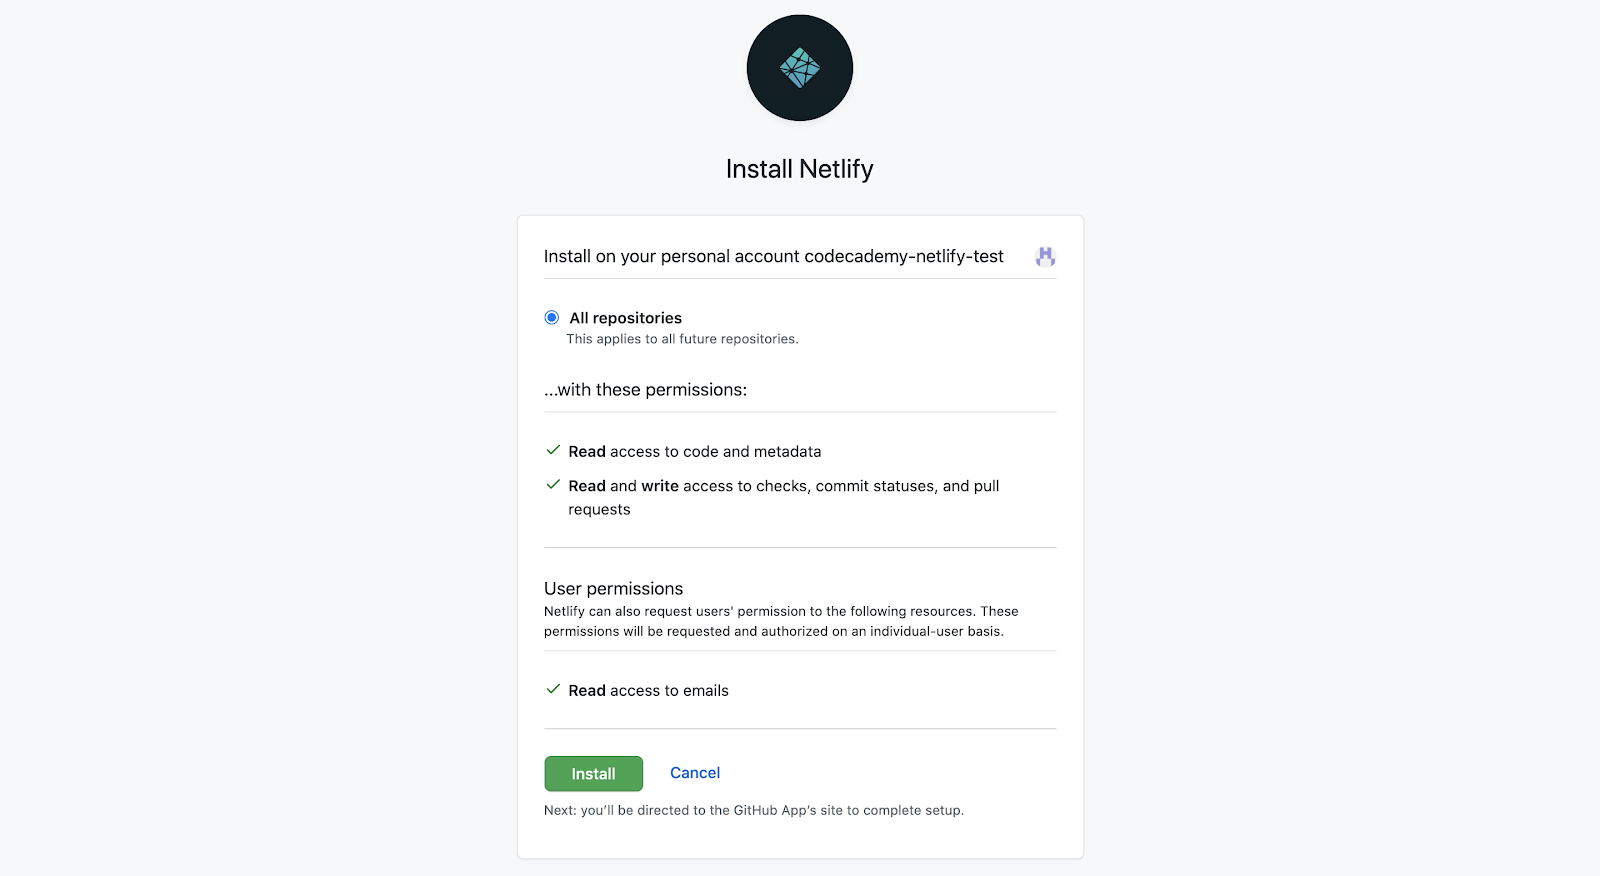
Screenshot of installing Netlify on GitHub
You also need to install Netlify to your GitHub account by clickingInstall. Note that you may have to enter your GitHub password again.
If you successfully connected your GitHub account to Netlify, you should see your GitHub username and forked “deploying-a-static-site-with-netlify-sample” repository under “Continuous Deployment: GitHub App”, somewhat like:
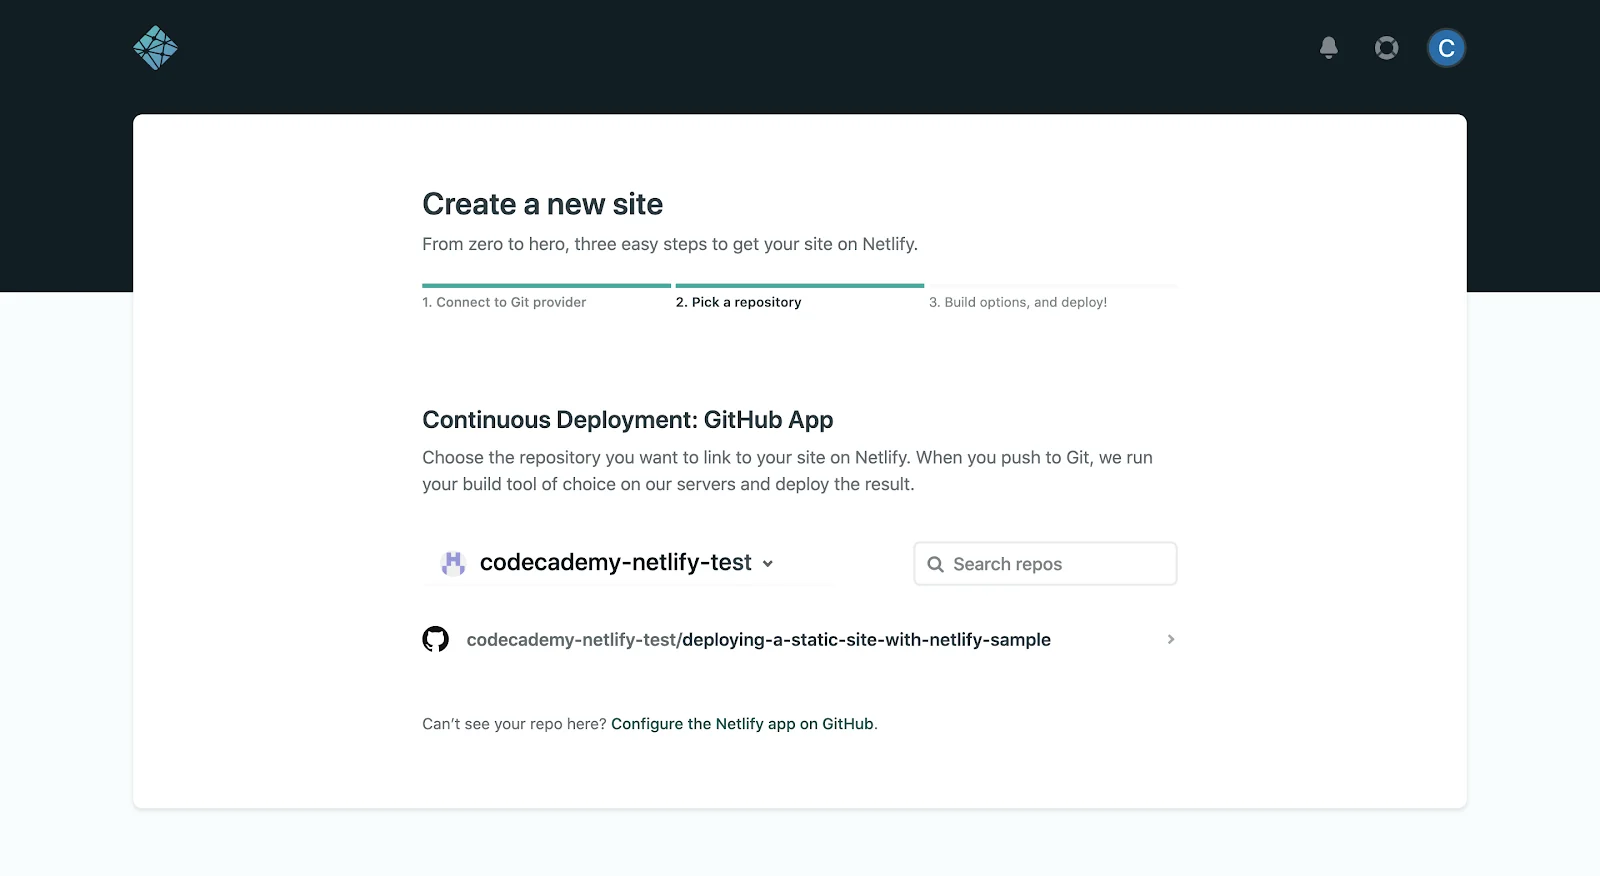
Screenshot of picking a GitHub repository
Choose the “deploying-a-static-site-with-netlify-sample“ repository to link it with Netlify.
In the next step, check that the “Owner” dropdown is set to the correct team (your Netlify account name in this case) and “Branch to deploy” is set tomain, like:
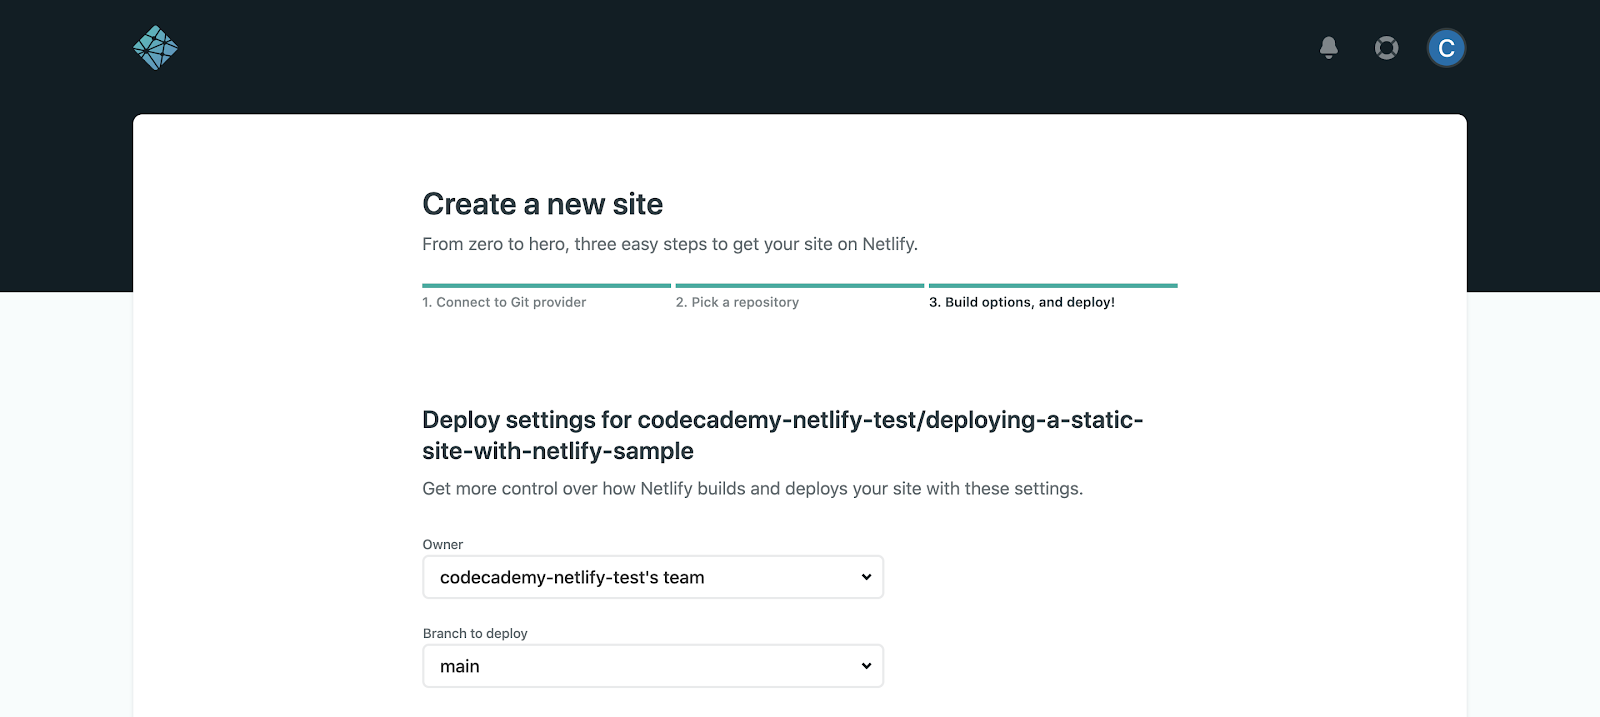
Screenshot of the top part of the build options
Scrolling down, you’ll see options for “Basic build settings”:
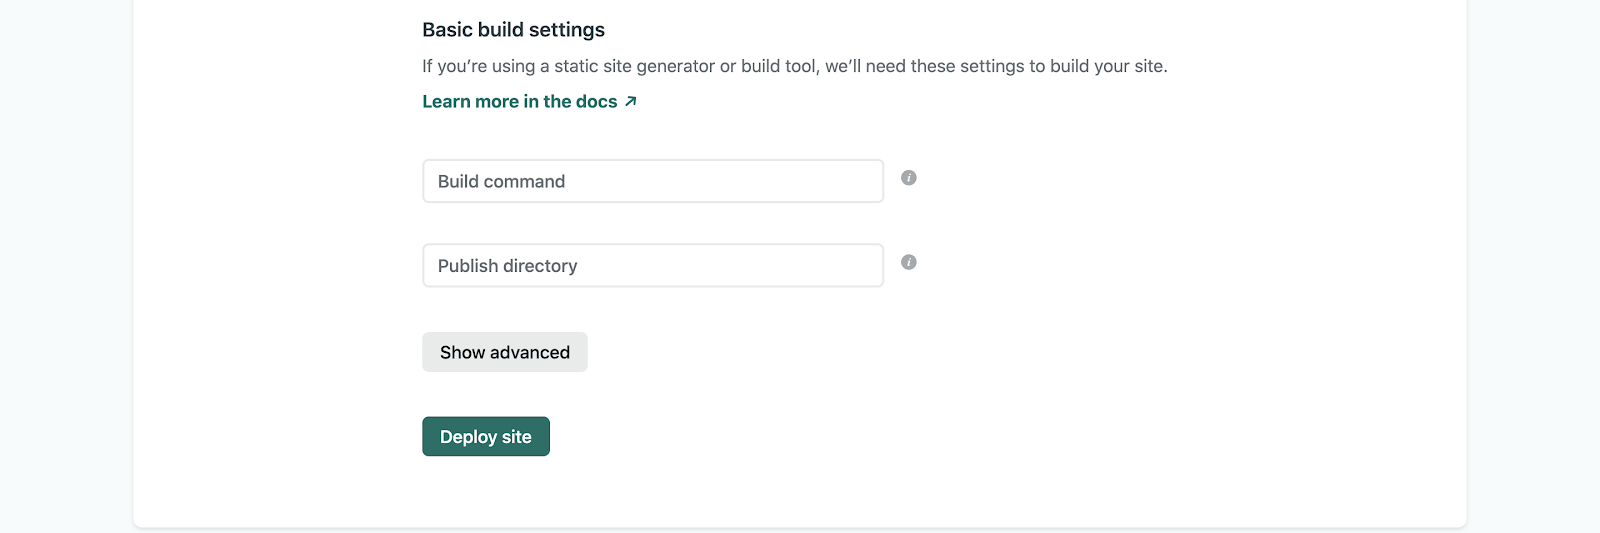
Screenshot of the bottom part of the build options
Regarding the “Build command” and “Publish directory”, note the following:
- Because this is an HTML, CSS, andJavaScriptbuild, there is no need forbuild commands, which are instructions that Netlify uses to build certain types of sites like those from frontendframeworksandstatic site generators.
- Since no build commands are used for this site, you also don’t need apublish directory, which would contain deploy-ready HTML files and assets generated by the build.
You’re now ready to deploy, so clickDeploy site! You’ll then be directed to the site’s dashboard:
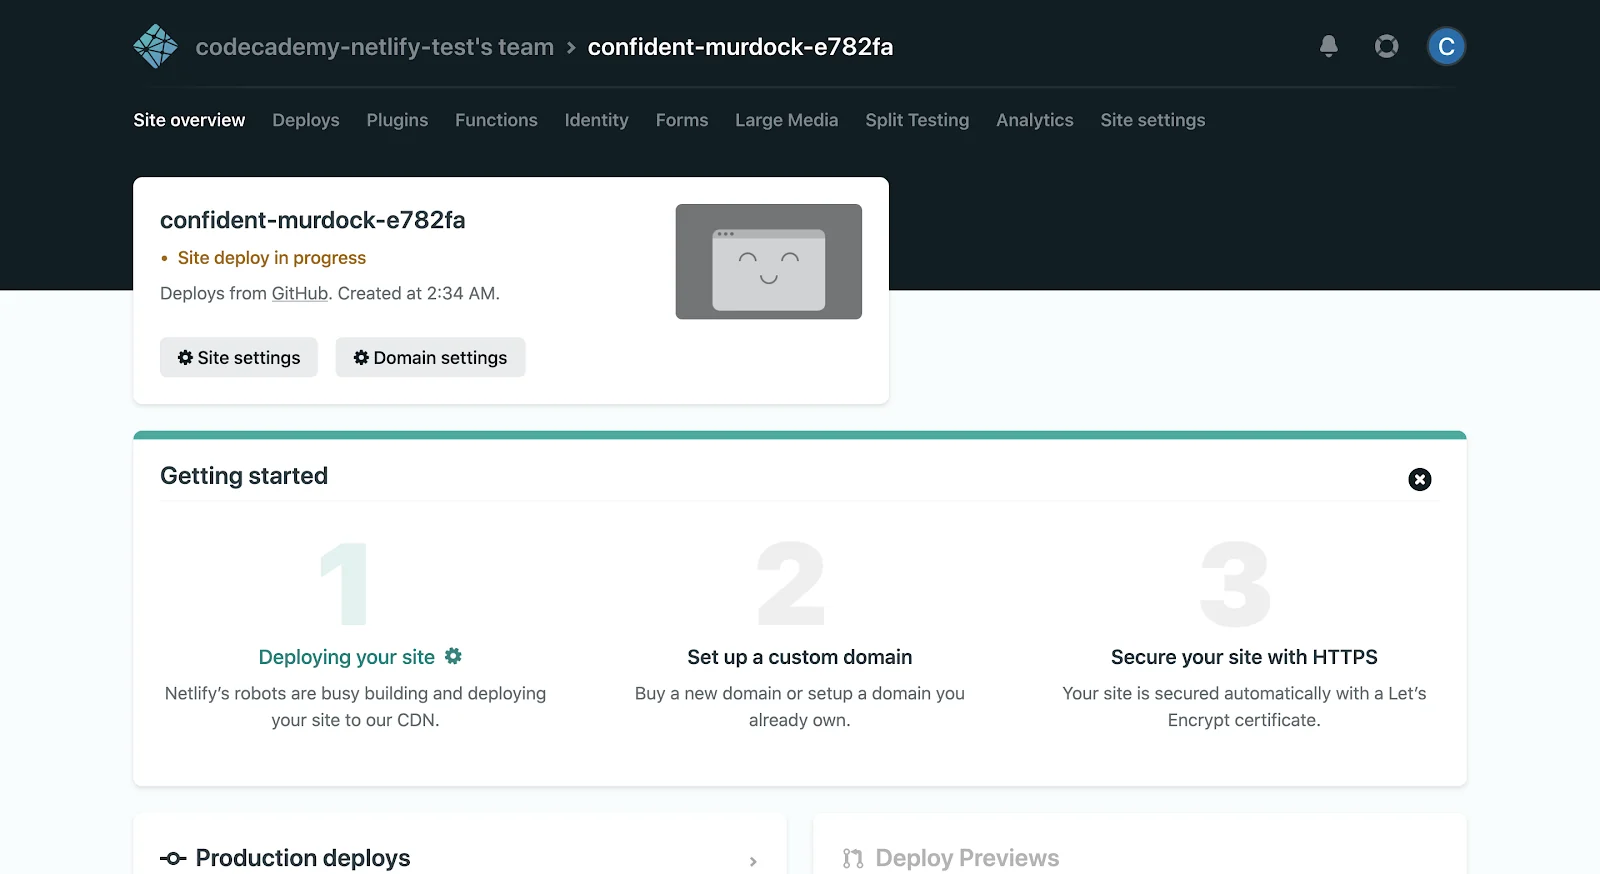
Screenshot of the site dashboard with deployment in progress
The build status should continue to show “Site deploy in progress” and “Deploying your site” until the site has been successfully deployed. At that point, the status will change to “Your site is deployed” and you’ll see a link to your deployed site:
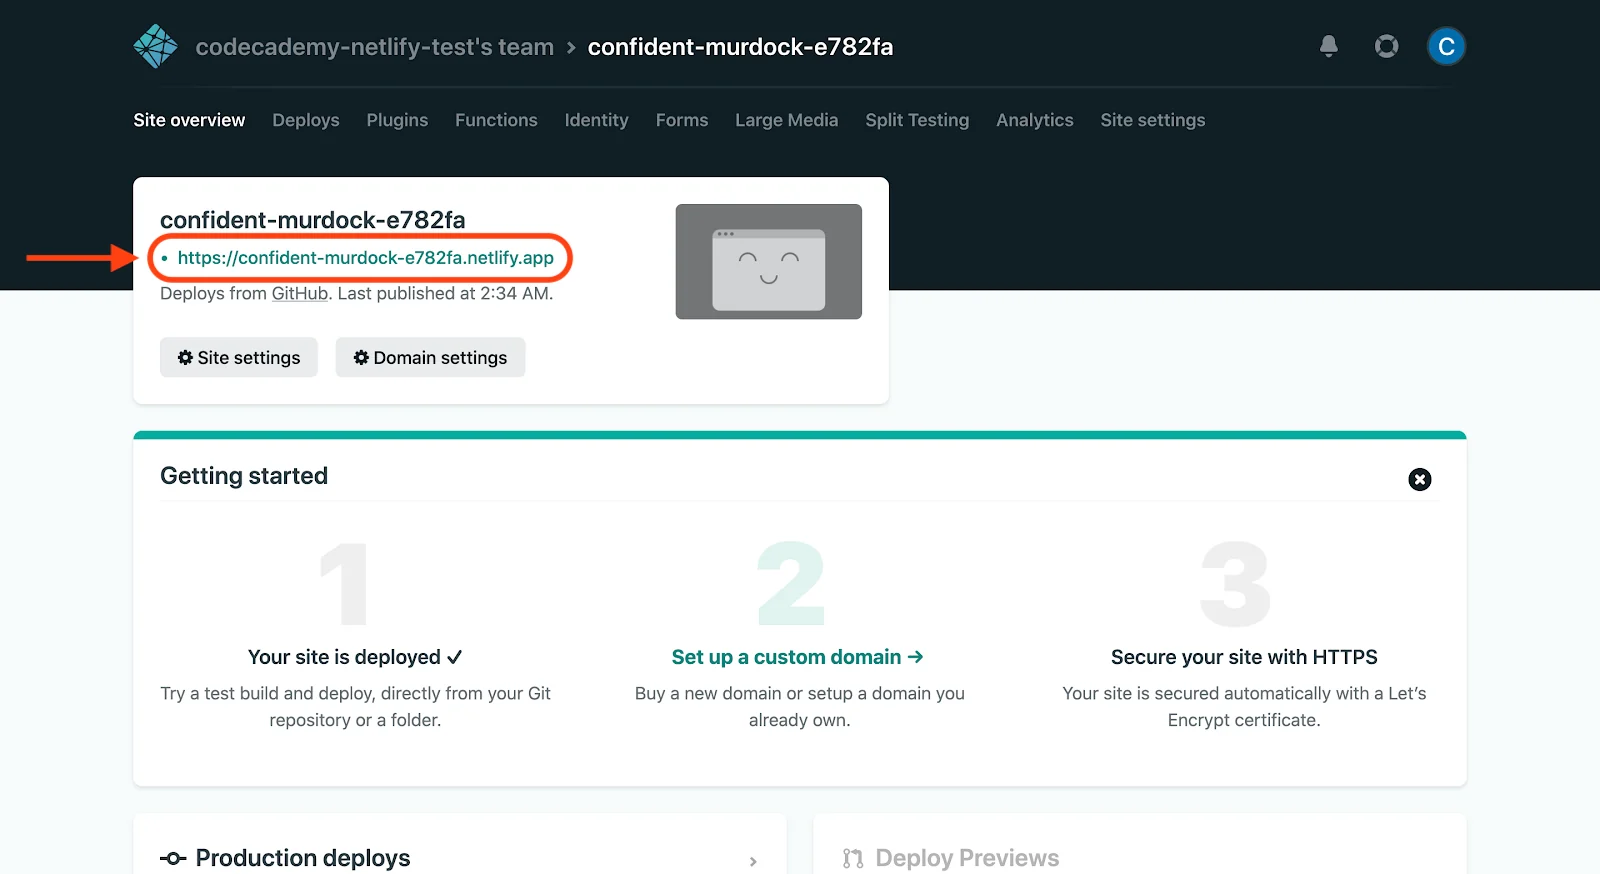
Screenshot of the site dashboard with deployment completed
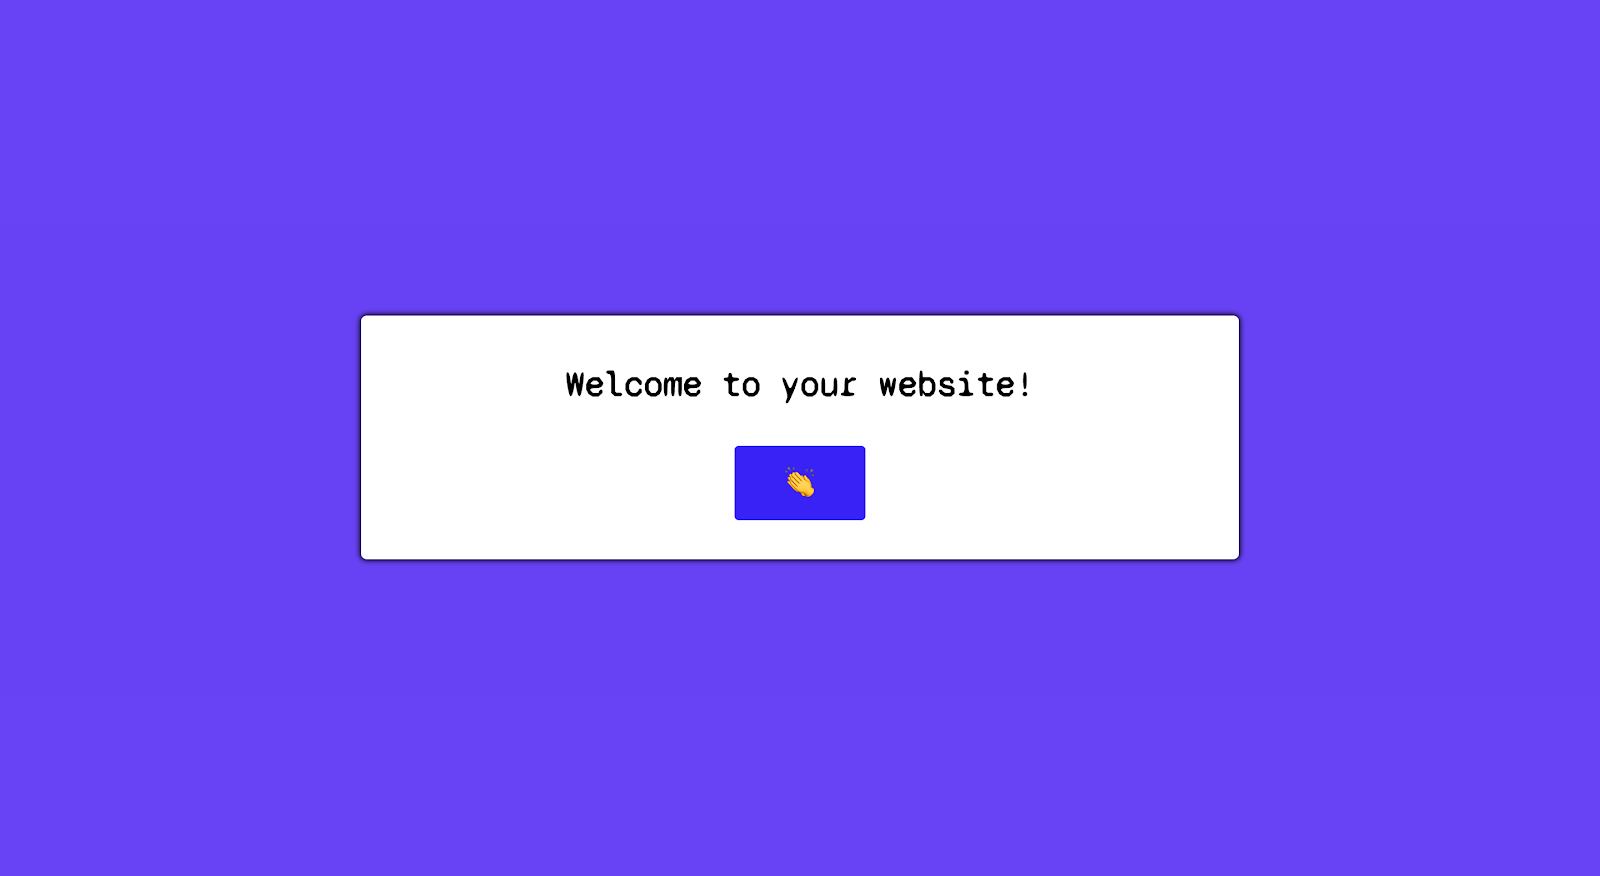
Click the link, and you’ll be directed to your deployed site:
Screenshot of the deployed site
Notice that the page’s background color changes every time you click the 👏 (clap) button!
Production deploys
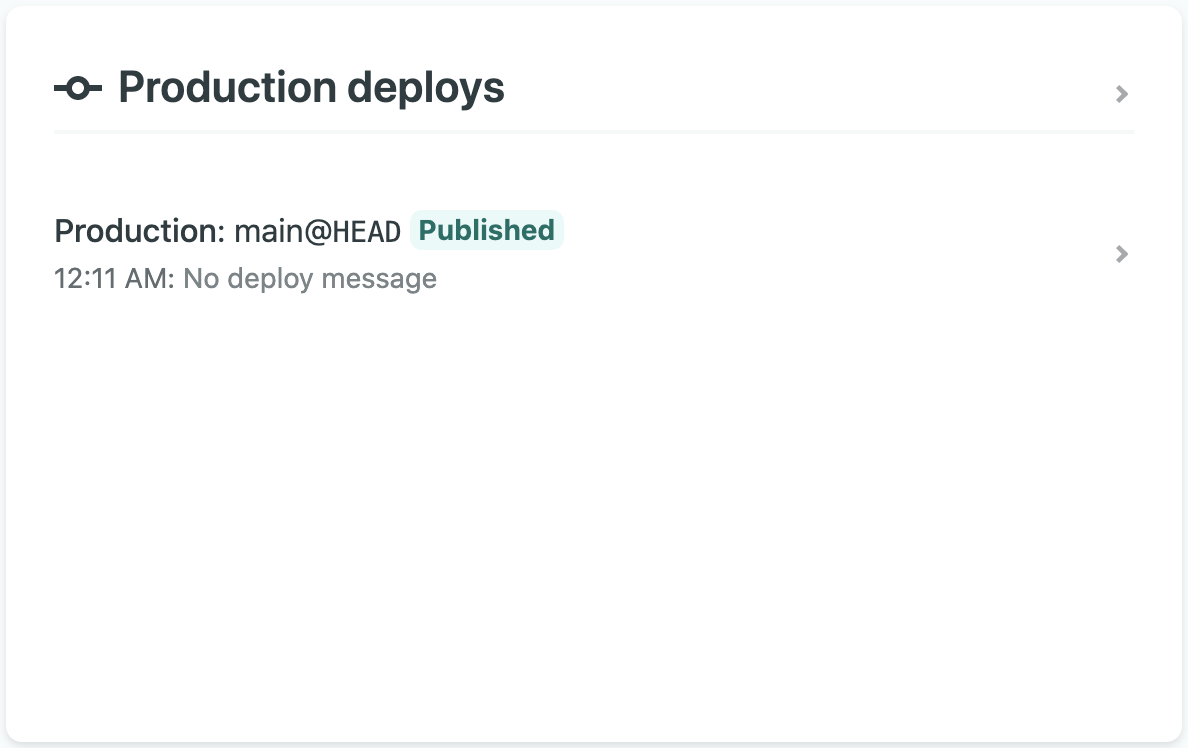
You can check the ongoing log that contains in-depth information about the site’s build status, which is especially useful for debugging any errors that may arise. To see these logs, scroll down to the “Production deploys” section of theSite overviewtab:
Screenshot of the "Production deploys" section
In the logs, you should specifically look for “Published” or “Failed” statuses:
- A “Published” status means that your site has been successfully deployed.
- A “Failed” status means that something went wrong in the deployment process.
Since every project is unique, the best way to fix a “Failed” deployment is to either google the error or browse throughNetlify’s documentation. With that being said, you may find the following resources from Netlify to be helpful:
- Build troubleshooting tips
- Netlify Community forum
- Frequently encountered problems during builds guide
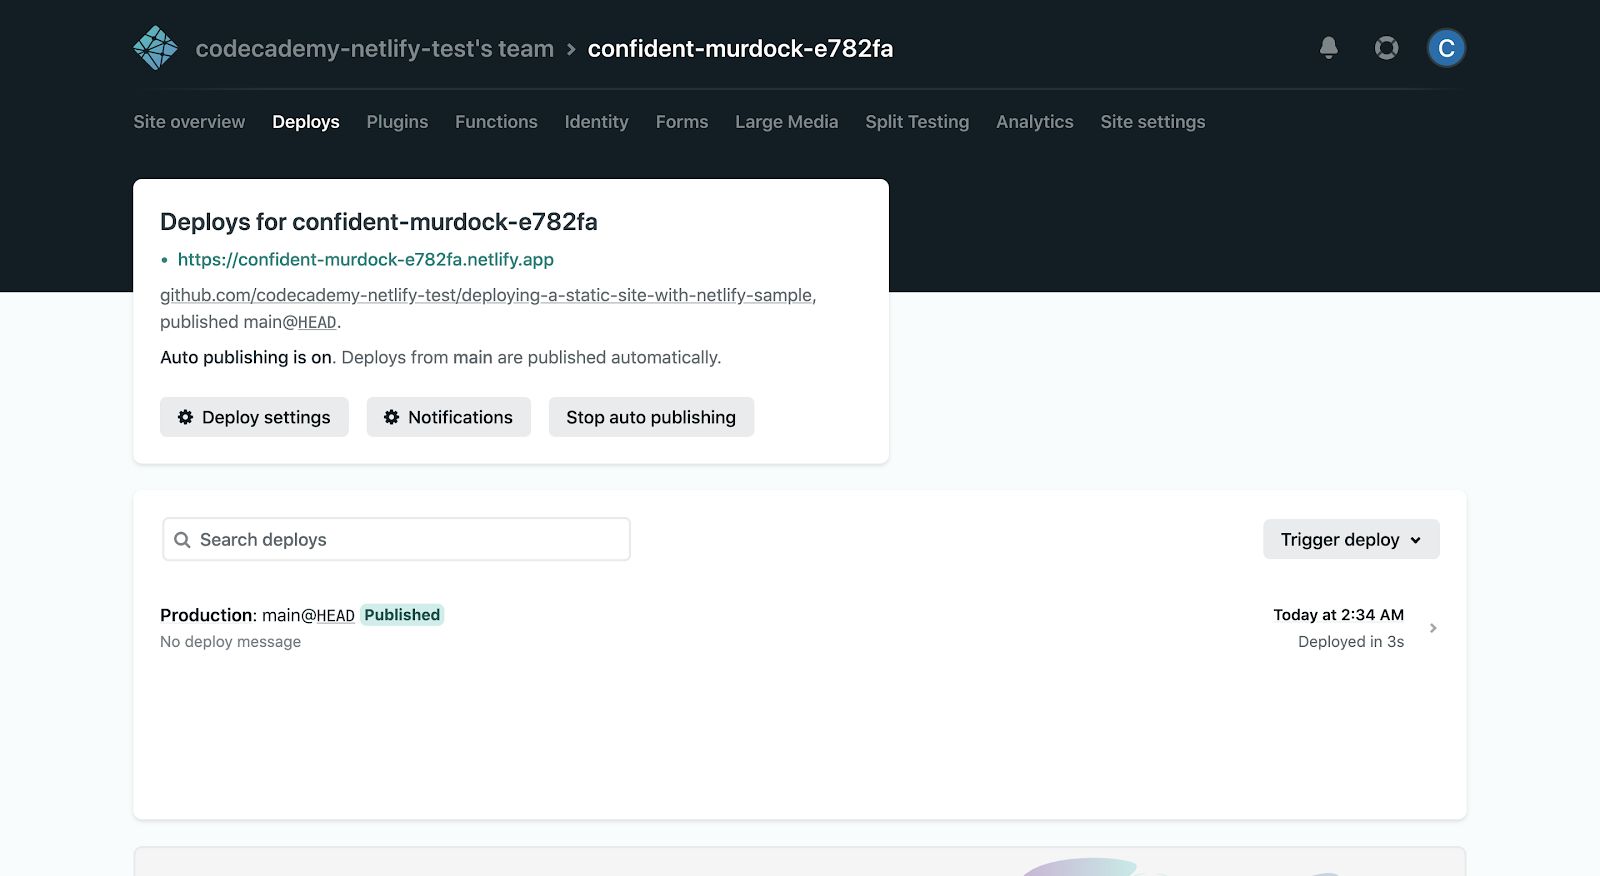
Next, select theDeploystab located at the top of the site dashboard:
Screenshot of the "Deploys" tab
Notice that “Auto publishing is on”, meaning that your site automatically deploys each time you push a commit on GitHub (continuous deployment). Although not recommended, you can turn this setting off by clickingStop auto publishing.
To make changes to your site, update your forked GitHub repository. Here’s a simple example for changing the site’s heading (note that these steps are specific to the GitHub website interface):
- Navigate back to your forked “deploying-a-static-site-with-netlify-sample” repository and make an edit to the<h1>text (e.g., you could change the text inside the<h1>element from “Welcome to your website!” to “Welcome to Jane’s website!”).
- Commit your changes and wait a few moments for Netlify to update the build.
- Like before, you can monitor the build status through the site’s dashboard in your Netlify account.
- After the build is complete, you should notice a difference in your published site’s heading — it’s that easy to make changes to your Netlify site!
Site settings
Let’s now explore theSite settingstab, also at the top of the site dashboard:
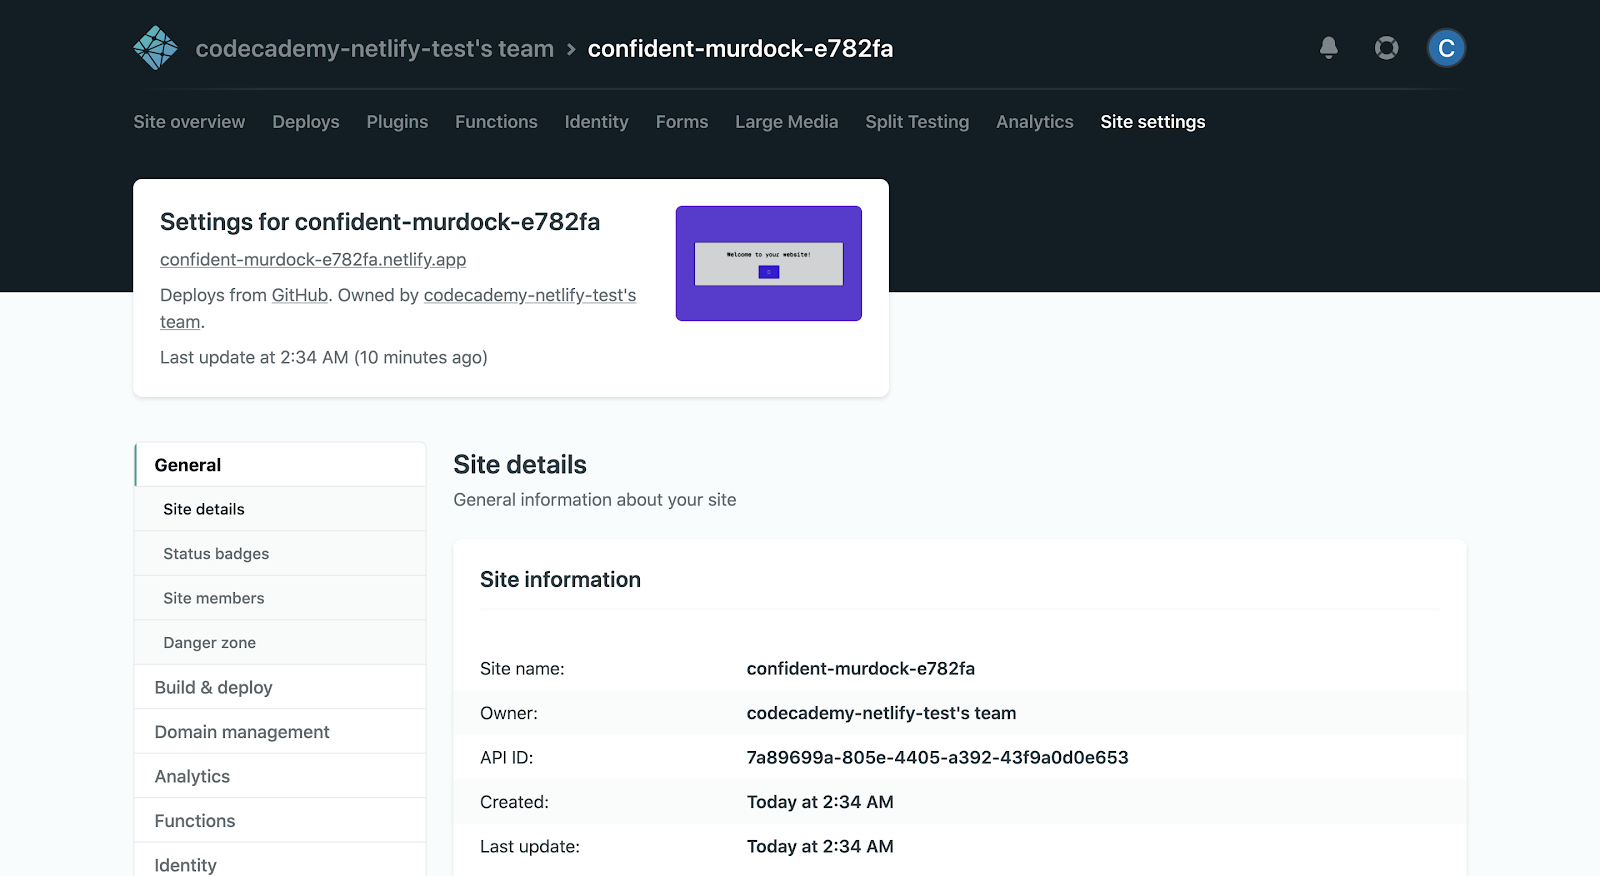
Screenshot of the "General" section of the "Site settings" tab
Notice that the name of your site is randomly generated by Netlify. To rename your site to something more appropriate, click theChange site namebutton located in the “Site information” panel. From there, you canSavea new unique name, which also determines the site’s default URL, like so:
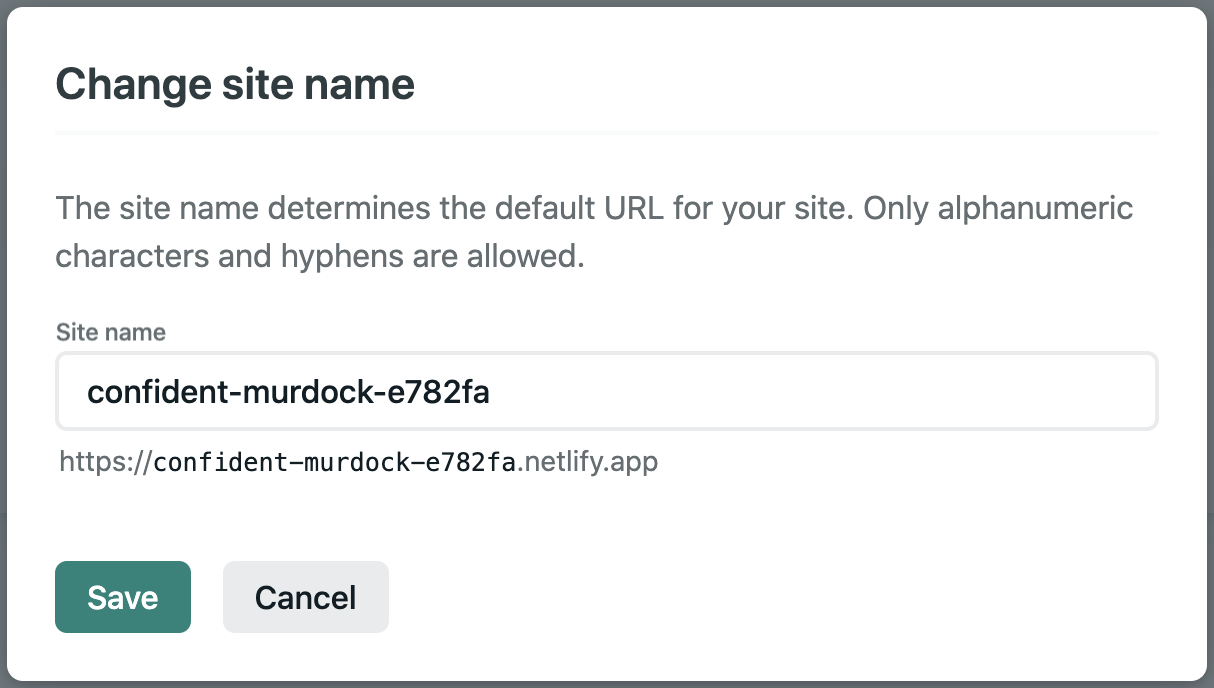
Screenshot of changing the site's name
Next, click theBuild & deploytab on the left to see even more settings that you can manipulate:
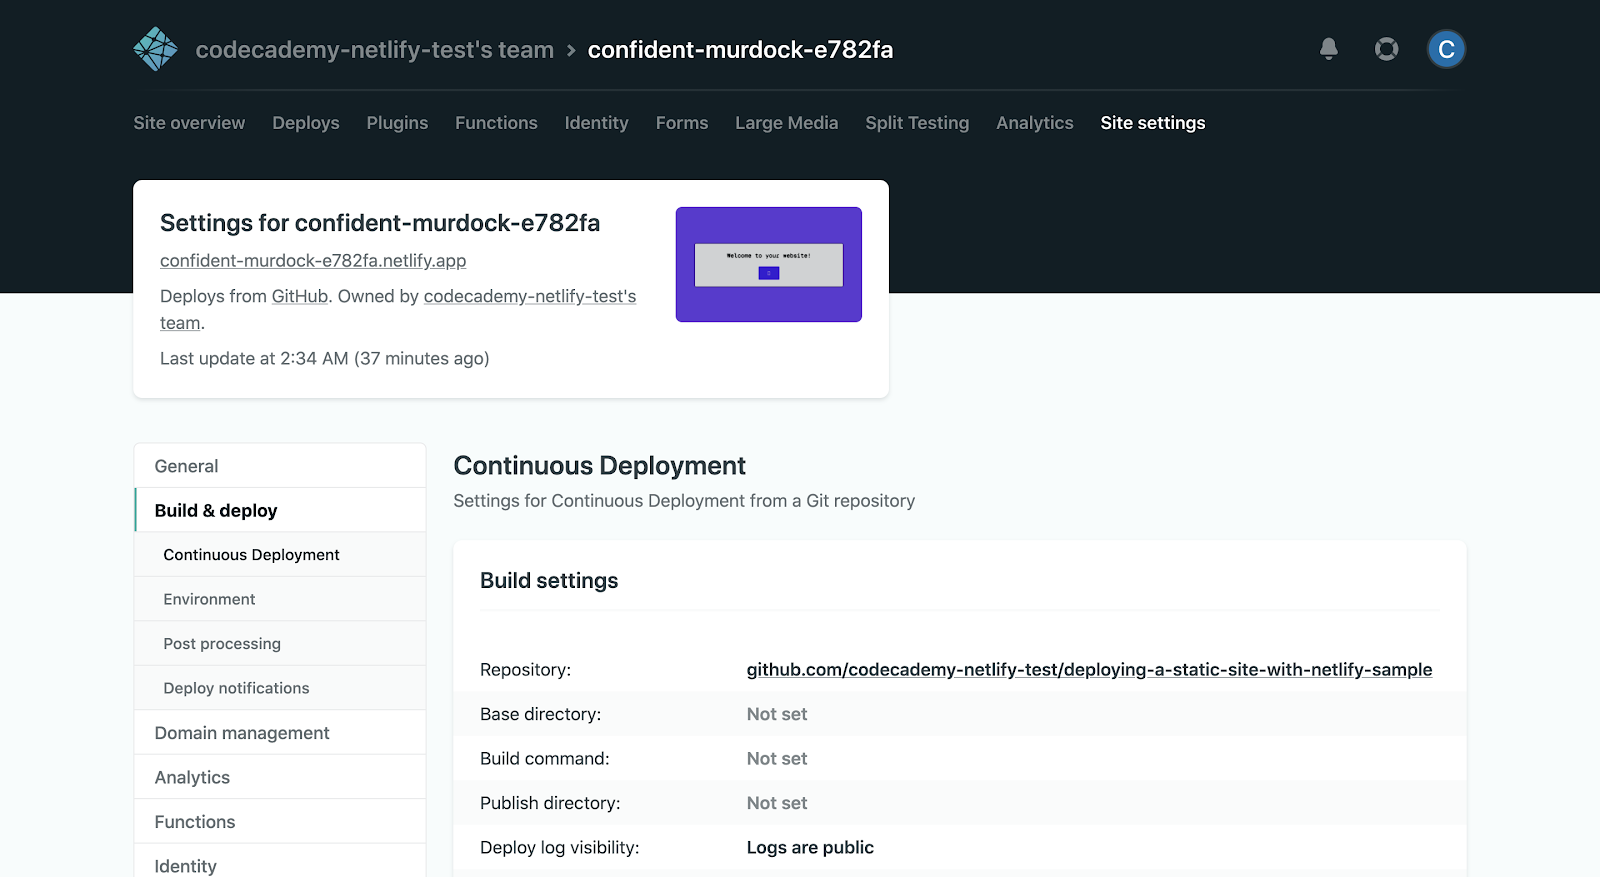
Screenshot of the "Build & deploy" section of the "Site settings" tab
You’ll first notice a panel for“Build settings”. As touched upon before, many frontend frameworks likeReactand static site generators likeJekyllrequirespecial build commandsthat tell Netlify how to build your specific site. Build commands weren’t used in this case because it’s only a JavaScript, HTML, and CSS site without any frontend frameworks or static site generators.
While still in theBuild & deploytab on the left, jump down to theDeploy notificationssection:

Screenshot of the "Deploy notifications" section of the "Site settings" tab
Here you can configuredeploy notifications, which can inform you or external services about your site’s deploy activity. For example, the various types ofGitnotifications can do things likeadd a comment to your GitHub pull requestsindicating the status of the associated deploy.
Note that some types of notifications are only available with paidNetlify plans.
Wrapping up
Congrats! You’ve just deployed your very own static site using Netlify, and you now know how to share your websites with the world. Specifically, you learned about:
- The use-case of static sites.
- Deploying a static site through Netlify’s GitHub integration.
- Analyzing the site logs and debugging “Failed” deployments.
- Using auto publishing to make changes to the site.
- Various site settings like build commands and deploy notifications.
Most importantly, notice how many configurations Netlify handled throughout the process — deploying an entire site only took a few clicks!
Although you’ve used Netlify to deploy a static site, there’sso much morethat it can do! Features like pre-built forms, in-depth analytics, and built-in user authentication can take your websites even further.
'The Codecademy Team, composed of experienced educators and tech experts, is dedicated to making tech skills accessible to all. We empower learners worldwide with expert-reviewed content that develops and enhances the technical skills needed to advance and succeed in their careers.'
Complete Payment to Unlock Full Guide & Source Code
You are viewing the 30% preview. Join TopCourseAI Pro to unlock the remaining 70% of this article, unblur all code snippets, and gain full access to all 412 technical projects and guides.
Ready to access the complete step-by-step tutorial?
Gain full unhindered access to all 412 technical projects and guides, unblur all source code snippets, and download runnable scripts.
Deploying a Simple Python Script With Flask
Next BlueprintDeploying to GitHub Pages
Related Blueprints & Guides
View all 166 →Accessibility on the Platform
Codecademy is committed to providing a high-quality learning experience for all learners. That includes accommodating different usage forms such as auditory, motor, or visual restrictions, limited hardware, or other acce...
Web developmentAffordances, Signifiers, and Clickability
For users on the web, the mouse click is perhaps the most fundamental human-computer interaction. The webbecamethe web partially through the power ofhypertext, or text in one document that links to other documents or res...
Web developmentAuthentication and OAuth
Authenticationis the process used by applications to determine and confirm identities of users. It ensures that the correct content is shown to users. More importantly, it ensures that incorrect content is secured and u...
Ready to build production-grade AI systems?
Enjoyed this guide? Continue exploring our library of 166+ production blueprints, multi-agent swarms, and autonomous agent systems with 100% unblurred, executable source code.