
Deploying a Full-Stack App with Heroku
Deploying a Full-Stack App with Heroku
Note: This article is currently teaching deployment usingHerokuwhich no longer offers a free tier plan.
Deploying a Full-Stack App
A full-stack app is an app that includes a front-end that allows visitors to see and interact with the page, as well as a back-end, where code is executed to handle those interactions, and store long-term data. In theDeploying a Back-End with Herokuarticle you learned how to deploy a simple back-end app using Heroku’s Graphic User Interface (GUI) and GitHub. The app made a request toThe Bored APIand sent the results to the browser. All of this was done through a Node.js back-end, and did not include any front-end code.
In this article, you’ll deploy another back-end app, similar in function to the previous app, but this time it will include a front-end to make it a true full-stack app. And to top it off, you’ll provision a database to store the calls returned from the The Bored API into your own Heroku Postgres database!
Thestackyou’ll be working with consists of:
- PostgreSQL- for the database.
- Express.js- to simplify requests and routing.
- React.js- as the front-end.
- Node.js- for the web server.
This is commonly referred to as the PERN stack.
You will use Heroku’s GUI to create a new app, and deploy it from a forked GitHub repo, just like in theDeploying a Back-End with Herokuarticle. You’ll then see how easy it is to add theHeroku Postgres add onto your app, and create a table using theHeroku Command Line Interface (CLI).
Prerequisites
Before starting, you’ll need to have:
- aHerokuaccount.
- aGitHubaccount.
- TheHeroku CLIinstalled.
- andPostgreSQL, installed on your computer.
Set Up
To get started, login to yourHeroku, andGitHubaccounts in the browser.
Next, check your Heroku CLI installation by opening your terminal and running the following command:
heroku --versionIf an error is returned, double check yourHeroku CLI installationand follow any necessarytroubleshootingsteps. If the command returns a version, continue by running theheroku logincommand:
heroku loginThe heroku login command will initiate a login process by prompting you to press any key to open a new page in your web browser. After verifying your credentials in the browser, the CLI will log you in automatically. Next, use the command:
Finally, check that PostgreSQL is installed by typing:
which psqlThis command will return the local directory containing the PostgreSQL installation. If you get an error, try following Heroku’sinstallationsteps again, or take a look at the officialPostgreSQL docsto troubleshoot further.
Having these prerequisites in place beforehand will help to prevent any diversions later on.
Fork the Repo
The app you’ll be deploying to Heroku can be found at thisdeploying-fullstack-with-heroku-sampleGitHub repo. You’re free to use your own project, but be sure to modify the steps as needed.Forkthe repository to your own GitHub account by clicking theForkbutton in thesource repository.

Heroku GitHub Fork Button
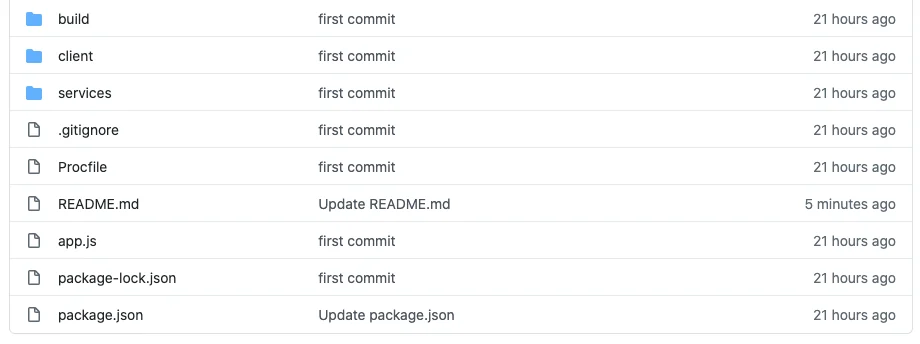
You’ll now have a copy of the app in your own GitHub account. Take a look at the provided code. There are a few files to explore further:
GitHub repo showing the files in the root directory
- Procfile- A text file that is used by Heroku to tell it what commands to run on startup. Your Procfile contains a process type:webthat lets Heroku know that this app will receive web traffic, and a command to start the process:node app.jswhich starts the server (just like if you were to typenode app.jsto start a server on your local host).
- app.js- The app’s entry point. This file defines the port for your web server, and contains all of the logic for the app.Expressis used to route requests, send and receive data from the front front-end, and render a page. It also usesnode-postgresto interface with the PostgreSQL database you will be setting up later on. Specifically thepoolconstant, where the connection to the Heroku Postgres database is made. Be sure to read over the comments in this file to gain a better understanding of what all of the code does.
- /client- Which contains theReactfront-end to create the views of this full-stack application.
- /build- Contains theproduction ready codethat Node is communicating with to establish a back-end to front-end connection.
Here is a preview of the app’s front-end.

Heroku Full-Stack App
When the page loads, a new activity is fetched from The Bored API, and a suggestion is made to do that activity today. The user can then press theSounds Funbutton to add it to the “Today’s Activities” list, as well as store it in the Postgres database, or they can press theNo Thanksbutton to fetch another activity.
Create a New App in Heroku
The process for creating and deploying a full-stack app in Heroku is identical to the steps used to deploy a back-end app.
1 - Create New App

Heroku New App
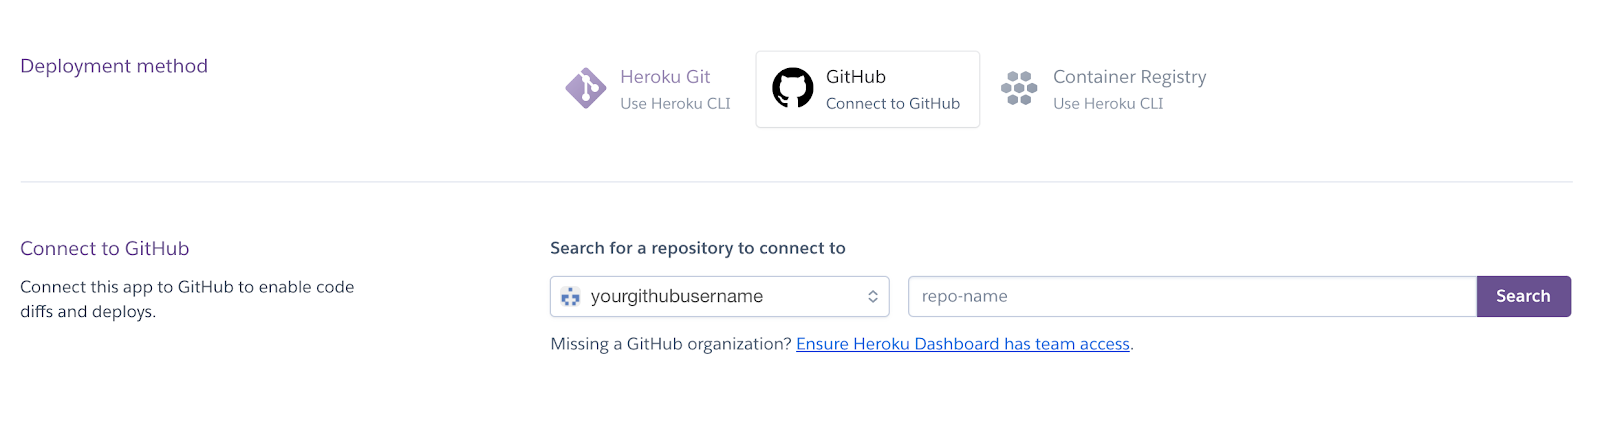
2 - Choose GitHub as the deployment method, and select the app you forked earlier.
Heroku Deploy From GitHub
3 - This final step would be where the deployment would normally happen, but since the code in the forked app connects to a database (which hasn’t been created yet), the app will crash. So skip this step for now, and we’ll come back to it when there is a database ready to accept the code.
Add a Heroku Postgres Database
Creating a database to store the activities can be done in Heroku’s GUI, as well as the Heroku CLI.
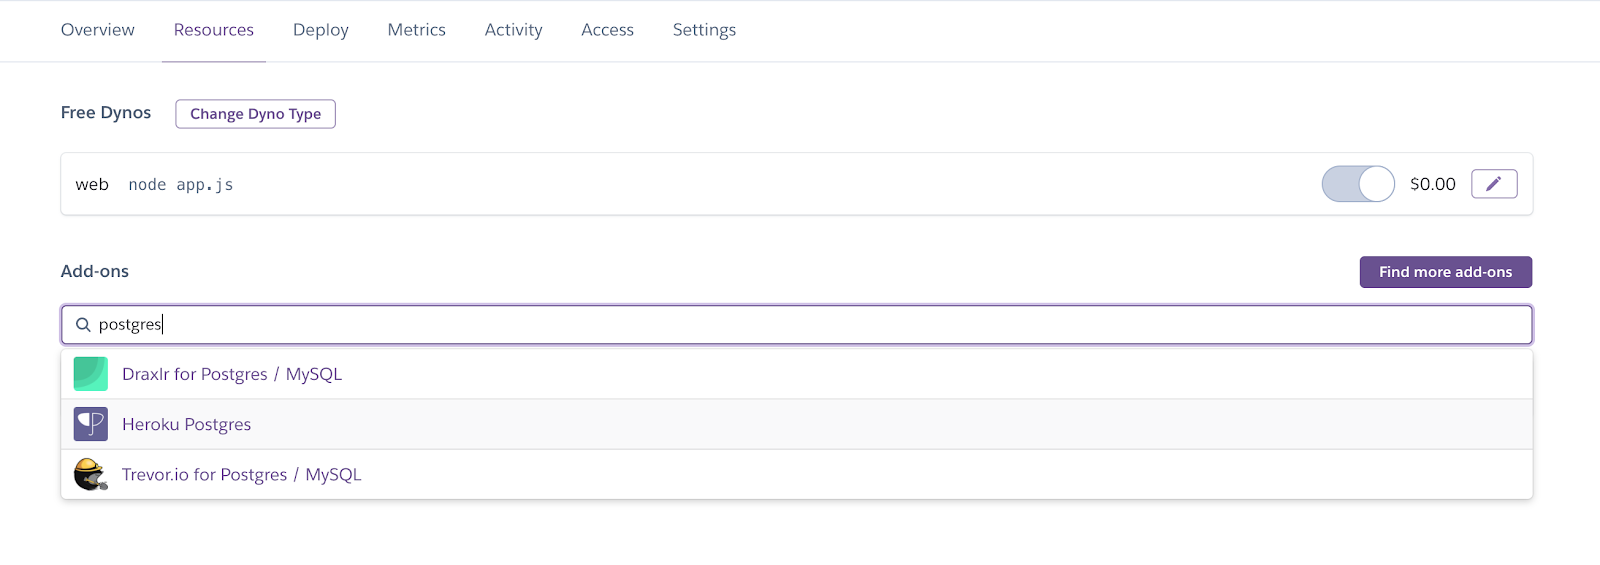
In the GUI, navigate to theResourcestab of your new app’s dashboard. UnderAdd-onstype “postgres”, and clickHeroku Postgresfrom the dropdown.
Heroku Postgres Add-On
Then clickSubmit Order Formto create a free Hobby Dev plan.
If using the CLI, type:
heroku addons:create heroku-postgresql:hobby-devThis command uses theaddons:createargument to create an add-on. Then, theheroku-postgresql:hobby-devargument specifies theadd-on and plan.
Once a database has been created, clickHeroku Postgresto view more details about it.

Close up of the Heroku Postgres open in a new tab link and icon under the Add-ons category
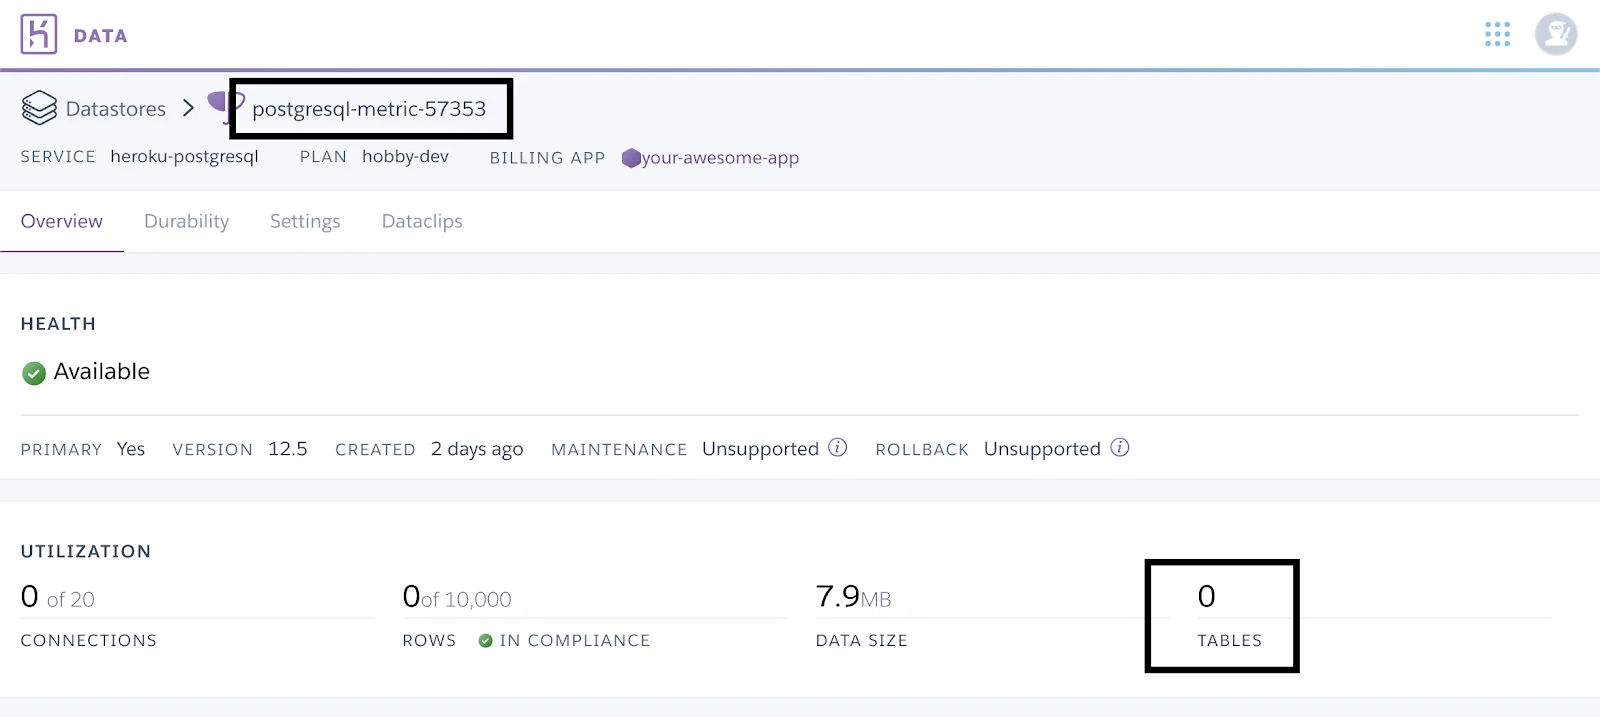
TheOverviewtab contains some general information about the database. Take note of the database name at the top because this is what you will be connecting to when making your firsttable. As you can see in the “Utilization” section, the database is currently empty, and contains no tables yet.
Heroku Postgres Database Dashboard
Create a Table
Creating a table in the database requires using theHeroku CLIand a local installation ofPostgreSQL, which should be installed at this point.
Before creating the table, you first need to connect to the remote database in the Heroku app. In your terminal type:
heroku pg:psql -a <app name>Thepg:psqlargument establishes apsqlsession with your remote database, and the-aflag, followed by the name of your app, tells the Heroku CLI which app to run the command against. In other words, this command allows you to use your local PostgreSQL client to talk to the Heroku Postgres database through the Heroku CLI.

Terminal showing "Connecting to (name of postgres database) followed by the name of your own app with a prompt ready to accept a command
In the image above, notice how the--> Connecting to…line matches the name of the database from earlier in the GUI. You’re now able to run the commands to create a table in that database.
To create the table, run the command:
CREATE TABLE my_activities (activity text);Breaking down this command, you’ll see that it defines a new table named “my_activities”, with a single column: “activity”, that has a data type of “text”.
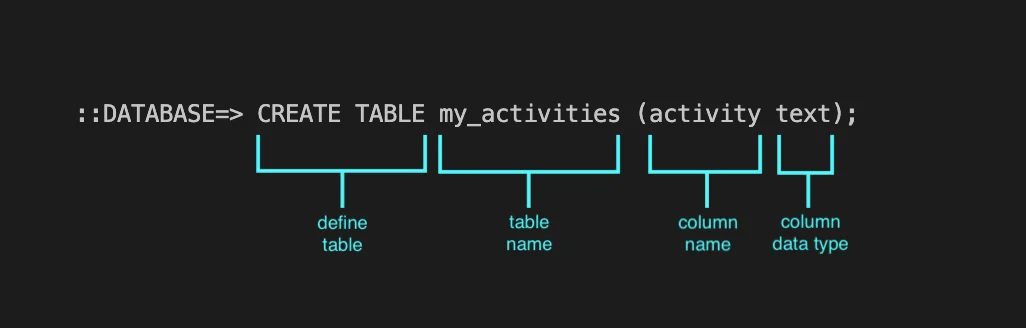
Diagram that explains the command what the 3 arguments CREATE TABLE, my_activities (activity text) are used for, respectively: 1. Define table, 2. It's the table name, 3. It's the column name and column data type.
The command will returnCREATE TABLEconfirming the table was created. If your command doesn’t returnCREATE TABLE, double check that you’re including the semicolon;to terminate the command. You can also check that the table was created by running the\dtcommand to see all tables:
\dtYou should have one table named “my_activities”.
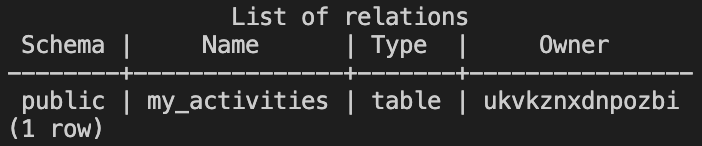
Confirmation of the table being created by showing a List of relations table showing the name of the table.
Deploy the App
Now that you have the new Heroku app connected to your forked GitHub repository, and a Heroku Postgres database provisioned with a “my_activities” table, you’re ready to deploy! In the Heroku GUI, within your app’s dashboard, navigate to theDeploytab and click theDeploy Branchbutton.
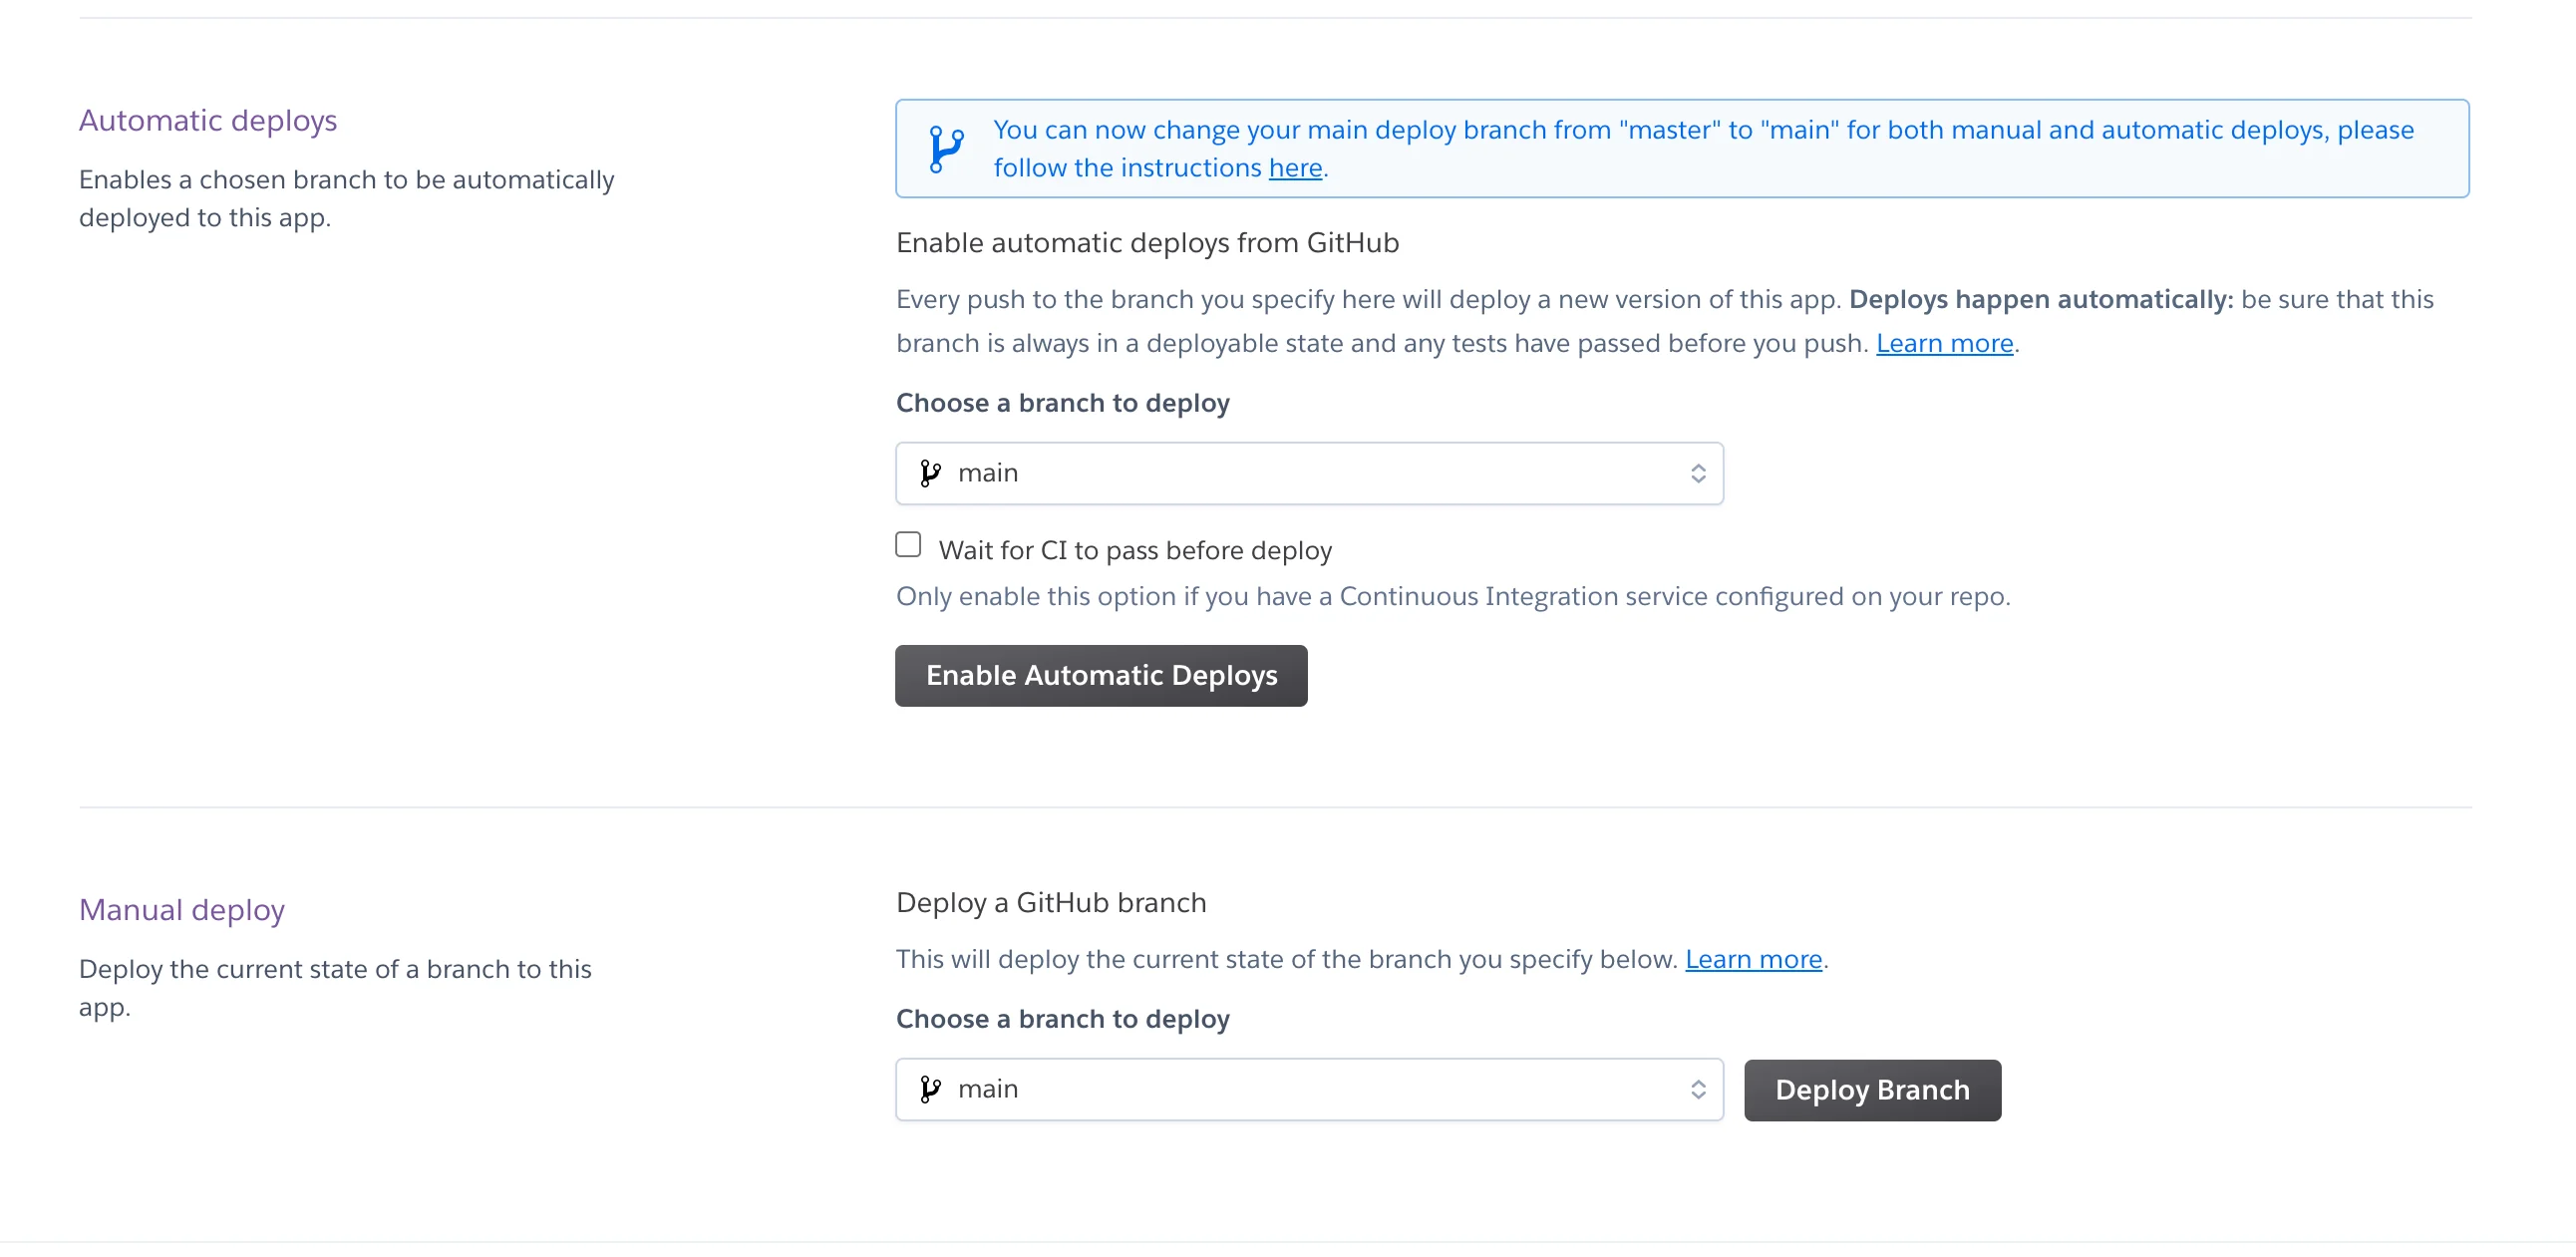
Heroku Automatic and Manual Deploy
After the app finishes building, click theViewbutton to see your new full-stack app up-and-running.

Heroku Successful Deploy
Add some activities to the list, then refresh the page to see the data stick using the Heroku Postgres database!
Wrap Up
Wow, nice work! Congratulations on deploying a full-stack app with Heroku. You forked an app with a front-end using React, and a back-end with code in place to connect to a database. Then got a refresher on how to deploy an app with Heroku, and a crash course in provisioning a Heroku Postgres database.
Explore the new app further bycloningit, andrunning it locally. Try changing some of the code to break it, and then fix it again. Once you have a good understanding of the code, try creating your own app, with a database, all from the Heroku CLI!
'The Codecademy Team, composed of experienced educators and tech experts, is dedicated to making tech skills accessible to all. We empower learners worldwide with expert-reviewed content that develops and enhances the technical skills needed to advance and succeed in their careers.'
Complete Payment to Unlock Full Guide & Source Code
You are viewing the 30% preview. Join TopCourseAI Pro to unlock the remaining 70% of this article, unblur all code snippets, and gain full access to all 412 technical projects and guides.
Ready to access the complete step-by-step tutorial?
Gain full unhindered access to all 412 technical projects and guides, unblur all source code snippets, and download runnable scripts.
Related Project Guides
View all 412 →Accessibility on the Platform
Codecademy is committed to providing a high-quality learning experience for all learners. That includes accommodating different usage forms such as auditory, motor, or visual restrictions, limited hardware, or other acce...
Web developmentAffordances, Signifiers, and Clickability
For users on the web, the mouse click is perhaps the most fundamental human-computer interaction. The webbecamethe web partially through the power ofhypertext, or text in one document that links to other documents or res...
Web developmentAuthentication and OAuth
Authenticationis the process used by applications to determine and confirm identities of users. It ensures that the correct content is shown to users. More importantly, it ensures that incorrect content is secured and u...
Ready to start building your next project?
Enjoyed this guide? Continue exploring our library of 412+ step-by-step guides, starter files, and practical projects across Web Development, Mobile Apps, AI, and Design.