
What is the $w Selector
What is the $w Selector
Exploring $w
By now you should be familiar with the Wix Editor and its Code Panel feature which allows you to write and apply code to your website. When you open the Code Panel, you’ll see default boilerplate code in all the files of a website. Files under the Main Pages section and the Global section in thePage Codeside panel will have the following code (after ignoring the comments):
$w.onReady(function () { });
Copy to clipboard
$w.onReady(function () { });This code should be familiar, both reference the$wsyntax, which is unique to Wix. This namespace, or logical grouping of functions, gives us access to all the various parts that make up a Wix website.
In this case, the$wandonReady(...)syntax seen in the default code of the Page Code files ensures that our code runs when the website has completely loaded in the browser.
In Dev Mode, you can use theVelo API, the ApplicationProgrammingInterface of Wix’s open development platform, to make requests to Wix to do things with your website. This includes customizing the website’s appearance and functionality, such as changing the styling of the website, adding animations, or retrieving information about the functionality of the website, such as what device is being used to view it.
In this article, we’ll take a look at how to use$wto select different elements and manipulate them.
What is an element?
All websites are composed ofHTML elements. These are all the parts of a website that a user interacts with: a body, headers, text, images, forms, buttons, etc.
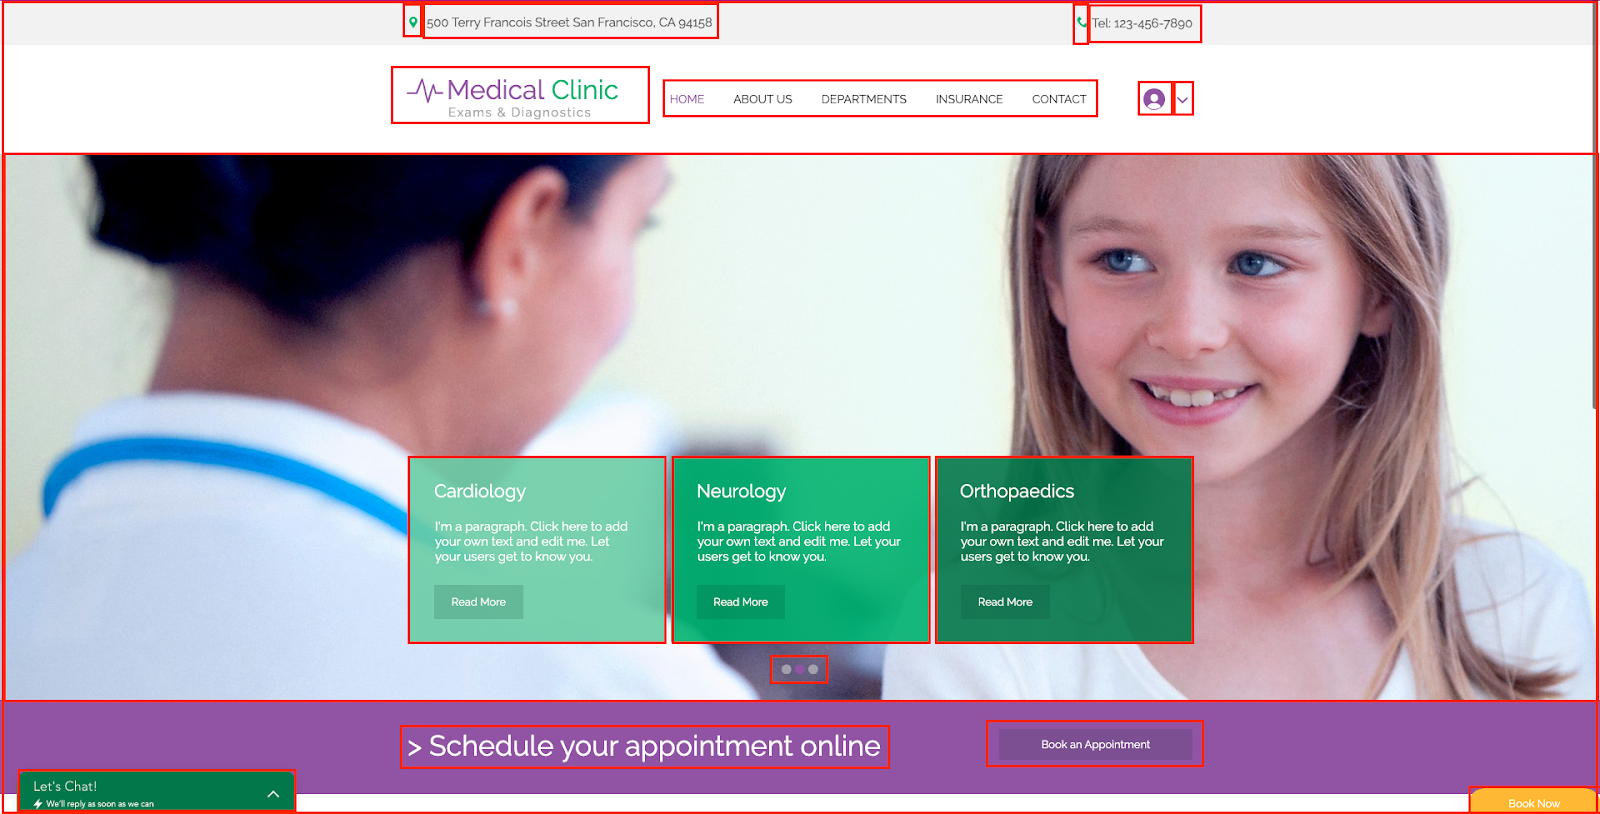
Wix website with elements highlighted
With the Wix Editor, we can generate custom Wix elements for us rather than the traditional way of writing code ourselves. This can save us time and the effort of learning HTML or CSS or styling frameworks in-depth by providing default elements that are already styled and can be customized later.
Knowing that websites are composed of elements allows us to target specific parts of our website for customization through code we write in the Code Panel.
Selecting and Manipulating an Element
Let’s take a look at how to select a specific element of a website so we can manipulate it with code in the Code Panel.
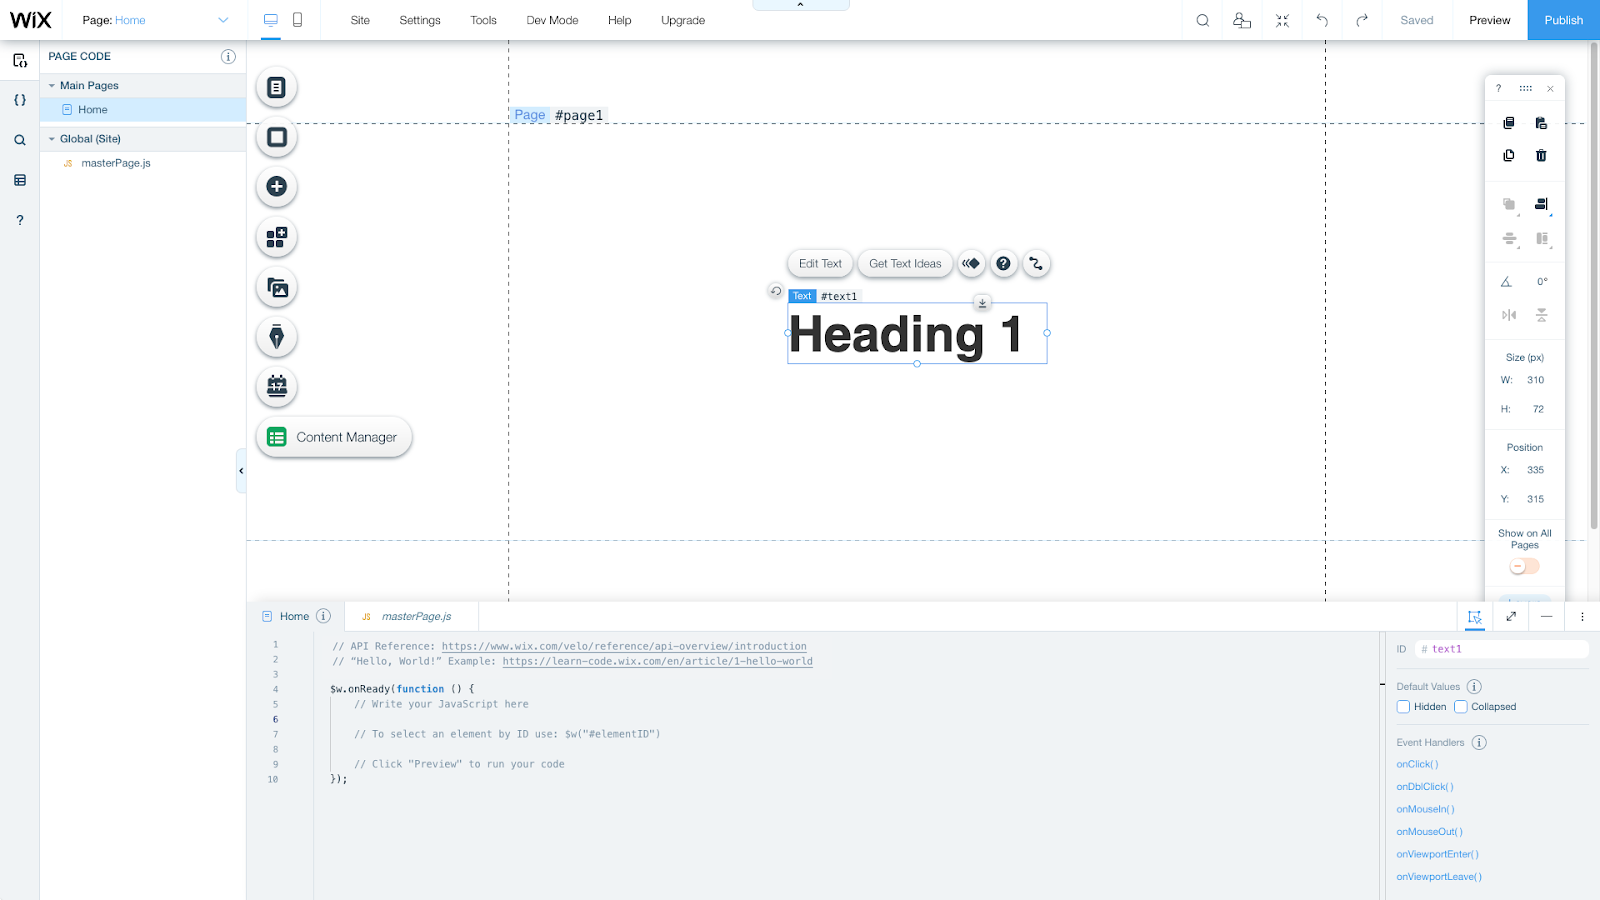
Wix Editor showing heading element
In order to select a specific element, we need to look at one of two properties of an element, either itstypeorid.
A Wix element’stypedescribes the purpose of the element and is generated by Wix.
In addition totype, Wix elements are all assigned anidproperty at the time of their creation.idacts as a specific and unique name for each instance of an element on a webpage.
Hovering over an element in the Wix Editor or clicking on it will reveal itstypehighlighted in blue and itsidprefixed with a#. We can also access theProperties and Eventspanel of an element to find itstypeorid.
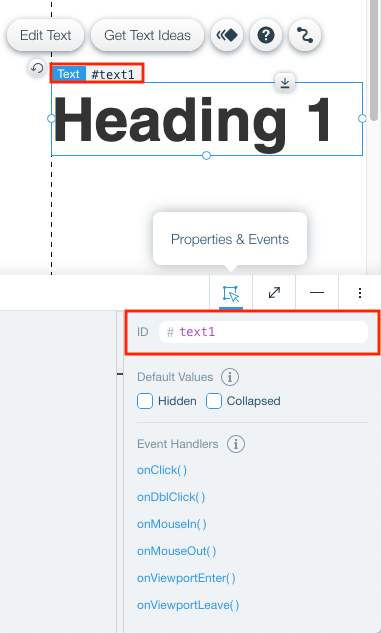
Wix heading element with Properties and Events panel
The name of theidcan be changed in the Wix Editor via theProperties and Eventspanel located in the bottom right corner. Remember,ids are unique and attempting to reuse anidname for another element will result in an error. Anidis particularly useful when we have several elements of the sametypebut want to be specific and target only one of these elements with our code. For the rest of this article, we’ll focus on selecting elements with theid.
Once we know theidname of an element, we can use the$wselector to select it using this syntax inside the boilerplate code in the Code Panel:
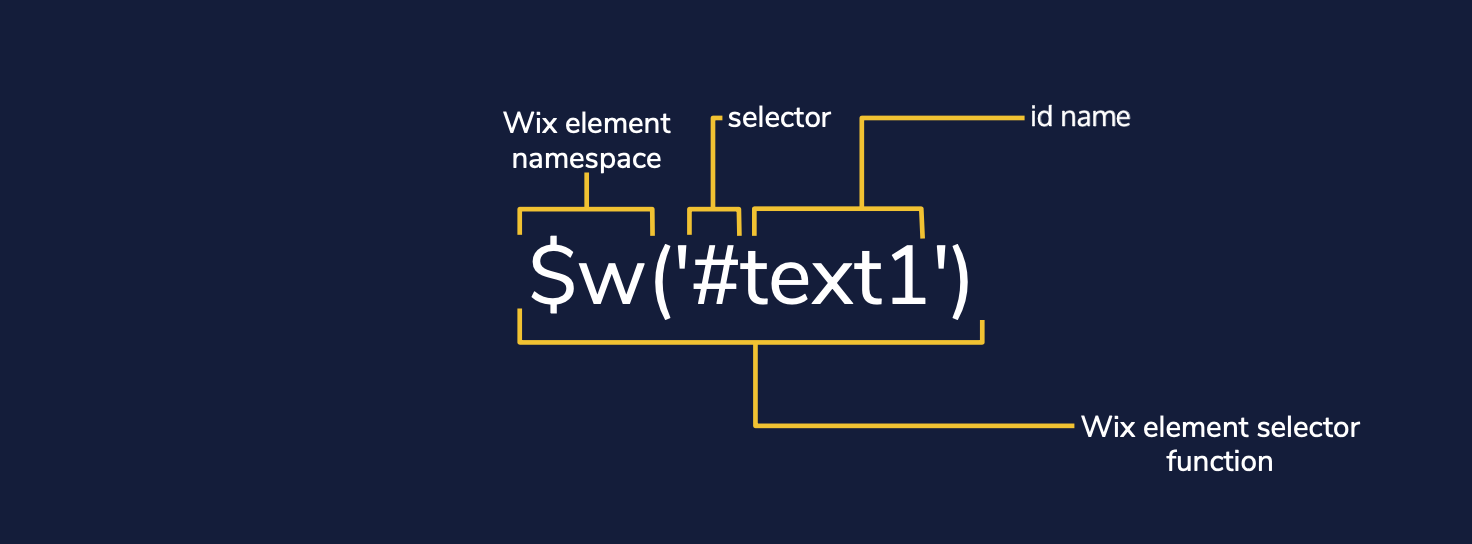
Diagram showing the $w selector function selecting an element with an id
The$wnamespace allows us to access any Wix element. Theidof a specific element in between quotes is a string representing some identifier of a specific Wix element. The#in the string denotes that the string being passed is anidand not another property such as type. Theidname of an element is after the#.
Let’s take a look at this website which has a heading element with some placeholder text:
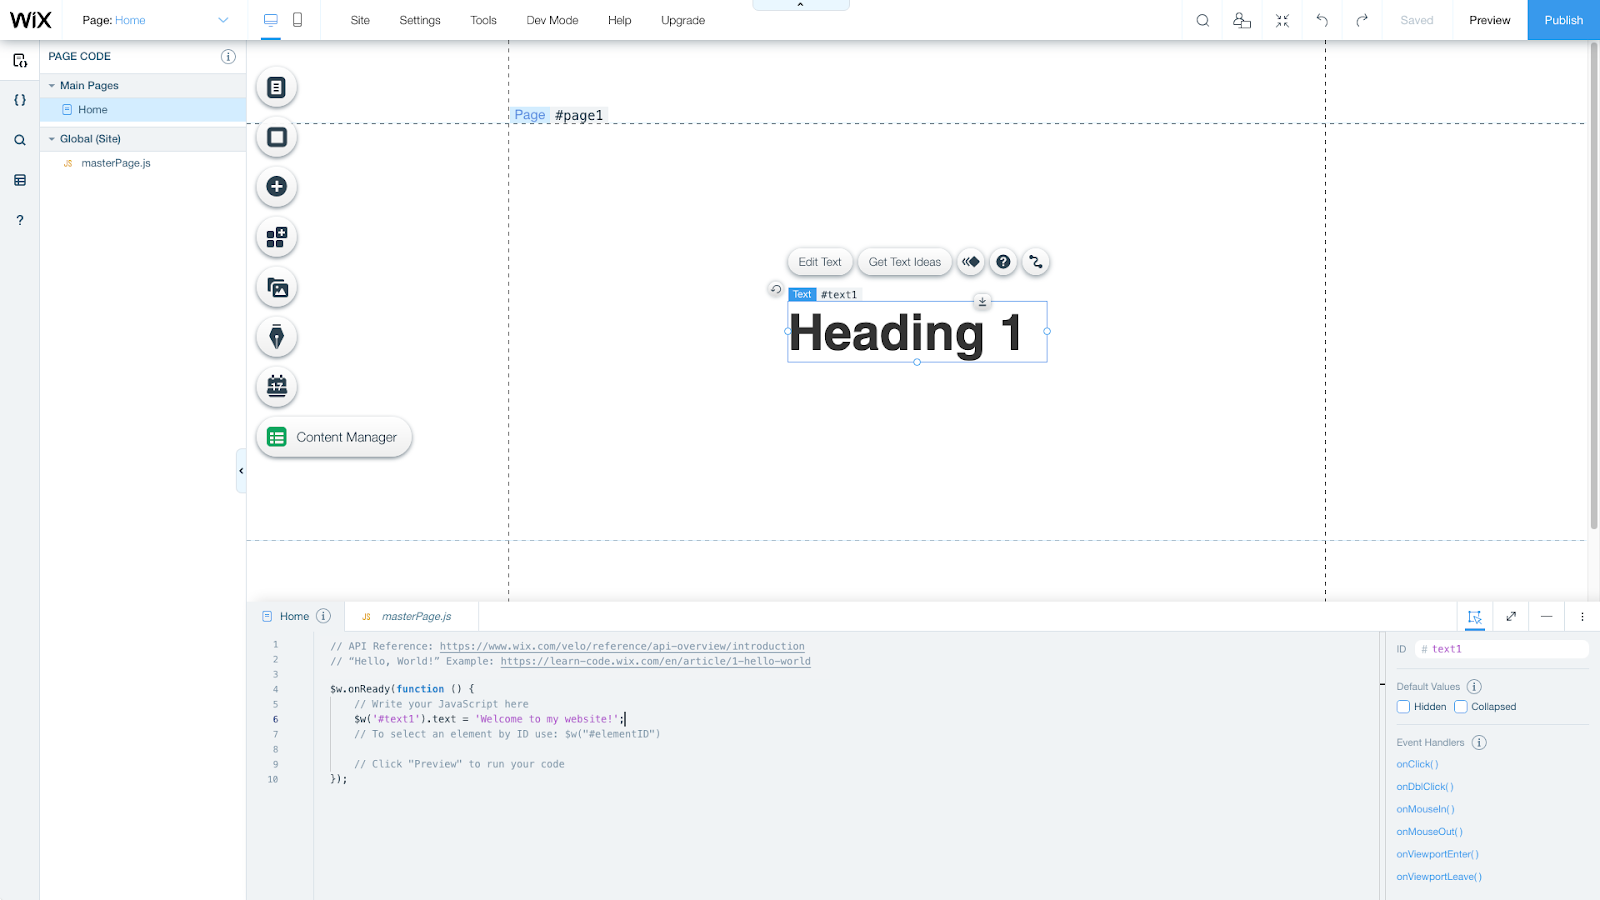
Wix Editor with Code Panel open and code in it
With Dev Mode on, we can add code into the Code Panel. Inside the default code and under the// Write your JavaScript herecomment add the following code:
$w('#text1').text = 'Welcome to my Wix website!';
Copy to clipboard
$w('#text1').text = 'Welcome to my Wix website!';This code selects a Wix element with the id oftext1, which is the heading element..textis a property of the element we’re manipulating and refers to text contained within the selected element.
While we’re in the Wix Editor, any code changes we make to a website won’t be applied until we click thePreviewbutton and won’t change a live website until we click thePublishbutton. Viewing the website in Preview, we can see that the heading’s placeholder text of “Heading 1” has been replaced with the text “Welcome to my Wix website!”
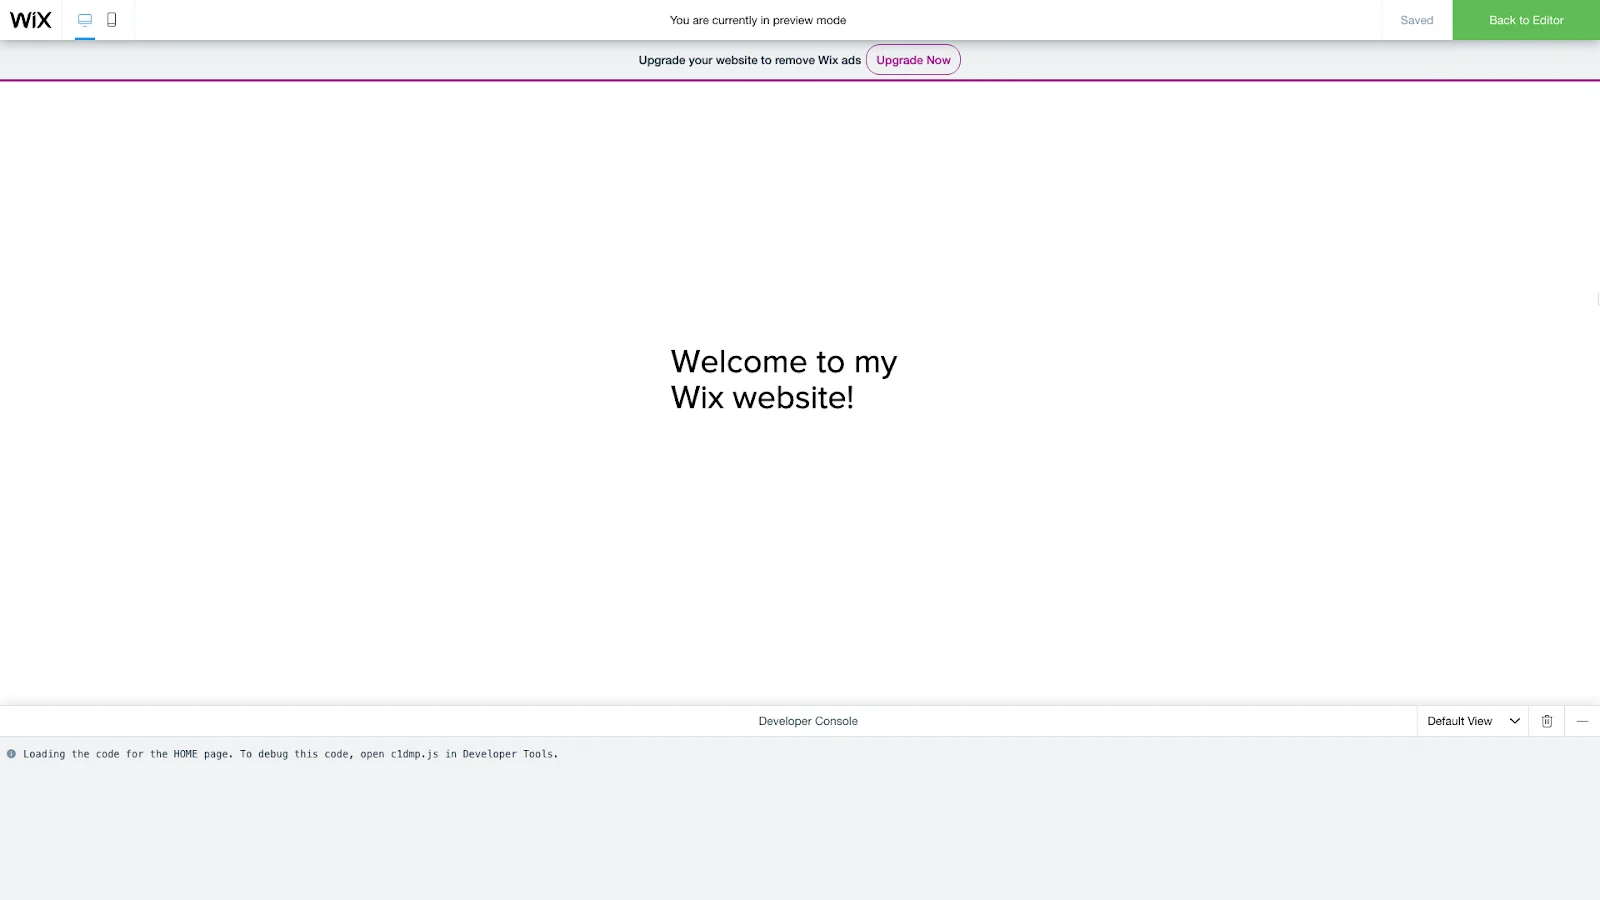
Preview of Wix website
Recap
In this article, we covered:
- What elements are
- How Wix elements differ from traditional HTML elements
- How to select and manipulate an element of a Wix website
As your websites grow in complexity with more elements, being able to easily specify which of these elements you want to change becomes important. The Wix Editor provides the$wselector function to quickly access the elements we want and use theVelo API) to manipulate the selected element. Later, we’ll learn how to change other Wix element properties to provide even more customization.
This is just one example and property of an element that can be accessed and manipulated after the selection of an element. While it might seem like a simple task, once you learn more about Wix and triggering events like clicking or scrolling, you’ll be able to create dynamic, captivating websites.
'The Codecademy Team, composed of experienced educators and tech experts, is dedicated to making tech skills accessible to all. We empower learners worldwide with expert-reviewed content that develops and enhances the technical skills needed to advance and succeed in their careers.'
Complete Payment to Unlock Full Guide & Source Code
You are viewing the 30% preview. Join TopCourseAI Pro to unlock the remaining 70% of this article, unblur all code snippets, and gain full access to all 412 technical projects and guides.
Ready to access the complete step-by-step tutorial?
Gain full unhindered access to all 412 technical projects and guides, unblur all source code snippets, and download runnable scripts.
What is n8n: Build AI Workflows with n8n
Next BlueprintWhy Learn Asynchronous JavaScript?
Related Blueprints & Guides
View all 166 →Accessibility on the Platform
Codecademy is committed to providing a high-quality learning experience for all learners. That includes accommodating different usage forms such as auditory, motor, or visual restrictions, limited hardware, or other acce...
Web developmentAffordances, Signifiers, and Clickability
For users on the web, the mouse click is perhaps the most fundamental human-computer interaction. The webbecamethe web partially through the power ofhypertext, or text in one document that links to other documents or res...
Web developmentAuthentication and OAuth
Authenticationis the process used by applications to determine and confirm identities of users. It ensures that the correct content is shown to users. More importantly, it ensures that incorrect content is secured and u...
Ready to build production-grade AI systems?
Enjoyed this guide? Continue exploring our library of 166+ production blueprints, multi-agent swarms, and autonomous agent systems with 100% unblurred, executable source code.