
Web Programming on a Chromebook
Web Programming on a Chromebook
If you haven’t set up your local Linux environment on your Chromebook yet, please read theProgramming Locally on a Chromebookarticle first.
Installing VS Code
You can follow the below instructions or findinstallation instructions from the VS Code website here.
- We will start by installing some packages using the terminal. We need to install the dependencygnome-keyring. You can do this with the commandsudo apt-get install -y gnome-keyring.yourusername@penguin:~$ sudo apt-get install -y gnome-keyringCopy to clipboard
- Next, to determine which installation file you should download, we need to figure out whichCPUyour Chromebook has. You can do this with the commanddpkg --print-architecture.yourusername@penguin:~$ dpkg --print-architectureCopy to clipboardYou will see eitheramd64orarm64.
- Go to theVS Code Download page. The Linux installation section will be underneath the image of the penguin.If you sawamd64when you ran the previous command, click on the button that says “64 bit” in the “.deb” row underneath the image of the penguin.If you sawarm64when you ran the previous command, click the button that says “ARM 64” in the “.deb” row underneath the image of the penguin.
- Open your “Files” on your Chromebook and go to your “Downloads” section. Double-click on the installer to begin the installation.
- A popup will let you know that you’re going to “Install app with Linux (Beta)”. Click “Install” to start the installation. You can press “Okay” to close the installation window.
- Now, you can search for VS Code whenever you’re ready to start coding!
yourusername@penguin:~$ sudo apt-get install -y gnome-keyring
Copy to clipboard
yourusername@penguin:~$ sudo apt-get install -y gnome-keyringyourusername@penguin:~$ dpkg --print-architecture
Copy to clipboardyourusername@penguin:~$ dpkg --print-architecture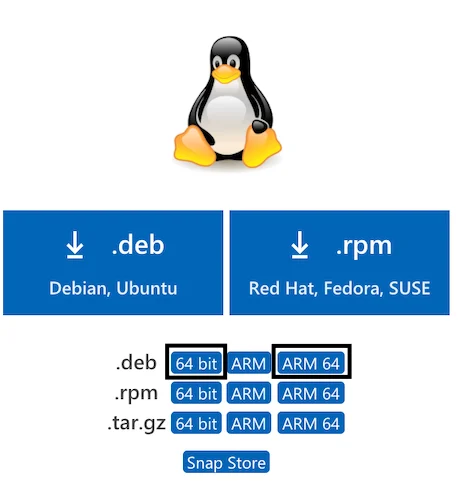
Image of Linux download section
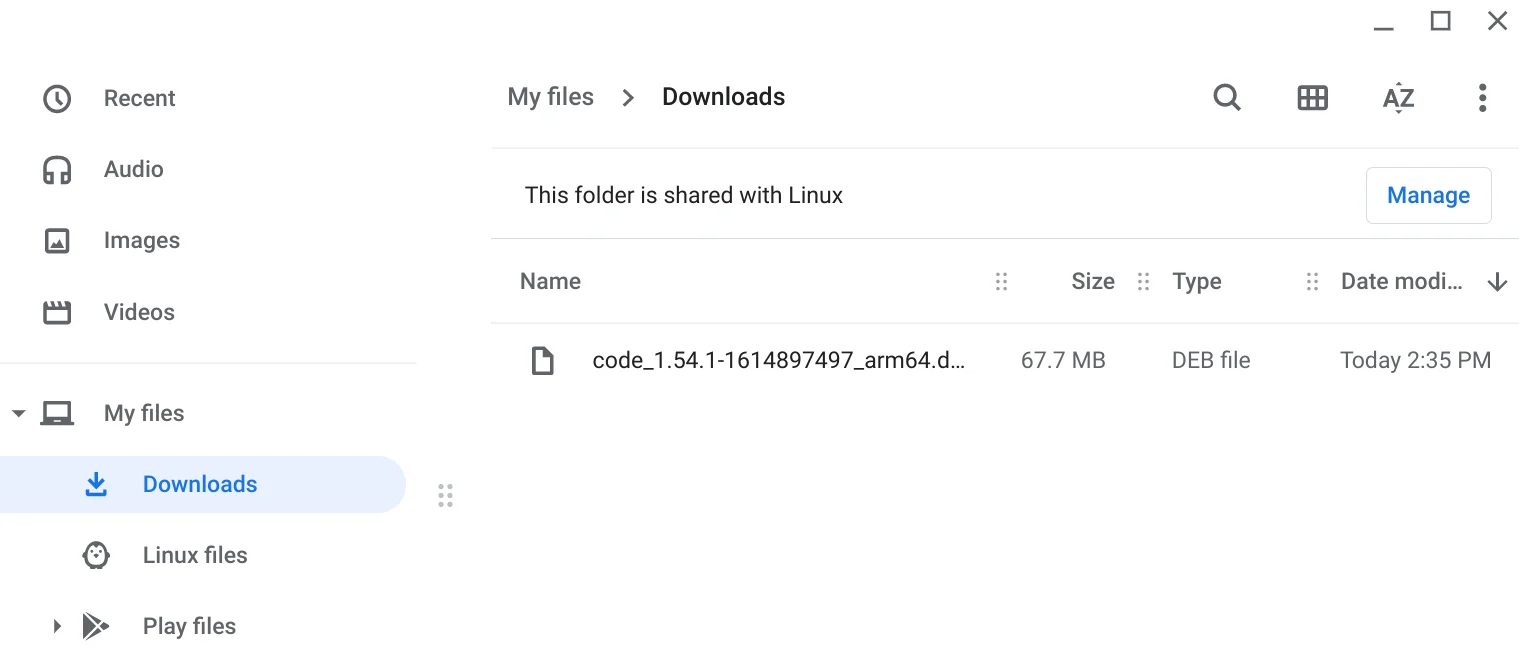
Image of the install file in the Downloads folder
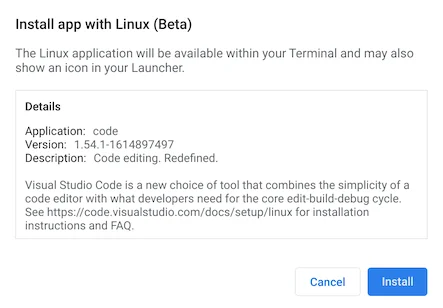
An image of the popup saying "Install"
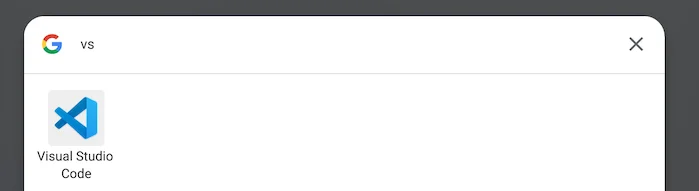
An image of the popup saying "Install"
Installing Node.js
Not all webprogrammingprojects requirenode.js, but, if yours does, make sure to follow the below instructions to set that up as well.
- First, you’ll need to install some dependencies using the terminal. We’ll installcurlandgnupgusing the commandsudo apt-get install curl gnupg -y.yourusername@penguin:~$ sudo apt-get install curl gnupg -yCopy to clipboard
- Next, we’ll installnvm.nvmis what we’ll use to download NodeJS on your computer. There areinstructions in thenvmGitHub repo, but we’ll include the instructions relevant to you here.yourusername@penguin:~$ curl -o- https://raw.githubusercontent.com/nvm-sh/nvm/v0.37.2/install.sh | bashCopy to clipboardThis downloads a specific version of the install script. If this command doesn’t work for you, downloadthe install script from the repo.
- Now, we can install the latest release of node with thenvm install nodecommand.yourusername@penguin:~$ nvm install nodeCopy to clipboardIf you want to download a specific version of node, you can use the version number instead of the wordnode. For example, the following command would install version6.14.4.yourusername@penguin:~$ nvm install 6.14.4Copy to clipboard
- Use the commmandwhich nodeto see where node has been installed on your system.yourusername@penguin:~$ which nodehome/yourusername/.config/nvm/versions/node/v15.11.0/bin/nodeCopy to clipboard
- Let’s check the version of node that was installed on your system.yourusername@penguin:~$ node -vv15.11.0Copy to clipboard
yourusername@penguin:~$ sudo apt-get install curl gnupg -y
Copy to clipboard
yourusername@penguin:~$ sudo apt-get install curl gnupg -yyourusername@penguin:~$ curl -o- https://raw.githubusercontent.com/nvm-sh/nvm/v0.37.2/install.sh | bash
Copy to clipboardyourusername@penguin:~$ curl -o- https://raw.githubusercontent.com/nvm-sh/nvm/v0.37.2/install.sh | bashyourusername@penguin:~$ nvm install node
Copy to clipboardyourusername@penguin:~$ nvm install nodeyourusername@penguin:~$ nvm install 6.14.4
Copy to clipboardyourusername@penguin:~$ nvm install 6.14.4yourusername@penguin:~$ which nodehome/yourusername/.config/nvm/versions/node/v15.11.0/bin/node
Copy to clipboardyourusername@penguin:~$ which nodehome/yourusername/.config/nvm/versions/node/v15.11.0/bin/nodeyourusername@penguin:~$ node -vv15.11.0
Copy to clipboardyourusername@penguin:~$ node -vv15.11.0Creating Your First Project
As you move through various lessons and paths here on Codecademy, you may find yourself needing to create a project on your own computer and not on the Codecademy learning environment. This can be tricky, but it’s an exciting step that signals that you are ready to work independently.
Before using your text editor, it’s important to establish an organized file system. As the number and size of your projects grow, it becomes increasingly important to know where to save new projects and find old projects. All of your projects will be stored in your “Linux files” so they are accessible from your Terminal.
- Let’s create a “web_projects” folder in your “Linux files”. We can do this in using the terminal or in your “Files” window.Using the TerminalFor your web development projects, let’s create aweb_projectsfolder using themkdircommand.yourusername@penguin:~$ mkdir web_projectsyourusername@penguin:~$ lsweb_projectsCopy to clipboardIn the “Files” WindowOpen up your “Files”, navigate to your “Linux files” folder, right-click in the window, then select the “New folder” option. Name your new folder “web_projects” with an underscore between the words “web” and “projects”
- Create a “hello_world” folder in your “web_projects” folder.
- Open VS Code.
- Next, we’ll open your development folder in VS Code. Click “File” in the top menu and click on the “Open Folder” button. This will open a window showing the files and folders in your “Linux files”.Navigate to thehello_worldfolder and select “Open”. This will open the “hello_world” folder in your explorer.
- Create a new file. In Visual Studio Code’s Explorer pane, click on your development folder’s name. You’ll see four icons appear to the right of the folder name. Click the “New File” icon (shown below)Name the fileindex.html. Press Enter when done.
- Let’s add code to ourindex.htmlfile! Copy and paste the following boilerplate HTML code:<html><head><title>Hello World</title></head><body><h1>Hello World</h1></body></html>Copy to clipboardSave your file often with the Auto Save feature. (To turn Auto Save on, click on ‘File’ then ‘Auto Save’. When it’s on, you’ll see a check mark next to ‘Auto Save’.) This will decrease the chances of losing unsaved work.
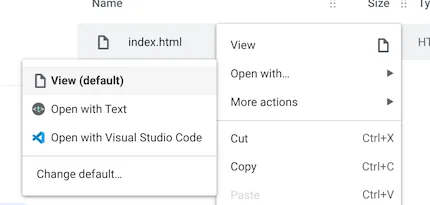
- View your HTML file in the browser. Navigate to theindex.htmlfile in your “hello_world” folder using your “Files” window. Right-click onindex.html, click on the “Open with…” open and select “View”.This will open the page as a webpage in Chrome. Take a second to marvel at your handiwork—you made your first project with Visual Studio Code! And when you’re ready to start your next project, check out ourweb development courses.
Using the Terminal
yourusername@penguin:~$ mkdir web_projectsyourusername@penguin:~$ lsweb_projects
Copy to clipboard
yourusername@penguin:~$ mkdir web_projectsyourusername@penguin:~$ lsweb_projectsIn the “Files” Window
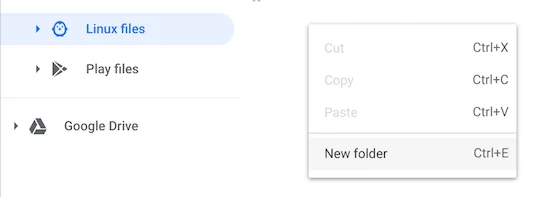
This image shows the New Folder option after right clicking
An image showing the Open folder button in VS Code
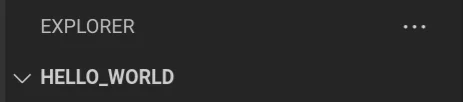
An image showing the hello_world folder open in VS Code

An image showing the new file button icon
<html>   <head>    <title>Hello World</title>   </head>
  <body>     <h1>Hello World</h1>   </body></html>
Copy to clipboard
<html> <head> <title>Hello World</title> </head>
<body> <h1>Hello World</h1> </body></html>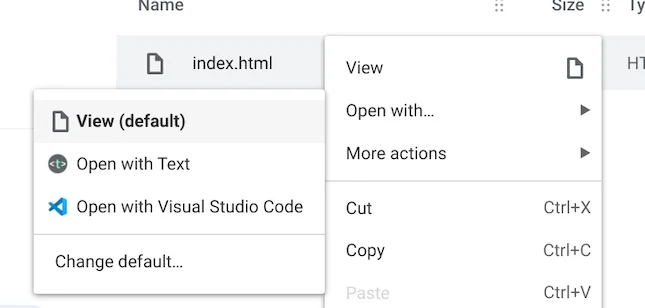
An image showing the View (default) option for index.html
Go Further with Visual Studio Code’s Features
If you already feel comfortable with the previous steps, explore the following features to further customize your development environment. You don’t need to use these suggestions to complete the projects on Codecademy but they can help make you more efficient when writing code and are what make Visual Studio Code such a useful editor!
- Debugging code in the editor:That’s right, you can run and test code from the editor!
- Version control:You don’t need to switch to the terminal on your computer to track changes with Git.
- Integrated terminal:You can run command line commands from your editor with Visual Studio Code.
Programming Locally
While there are some limitations to programming locally on your Chromebook, you can still program in many languages.
The following articles will help you set up a specific language or tool on your Chromebook:
- Programming in Python on a Chromebook
- Installing Jupyter Notebook on a Chromebook
- Installing IDLE on a Chromebook
'The Codecademy Team, composed of experienced educators and tech experts, is dedicated to making tech skills accessible to all. We empower learners worldwide with expert-reviewed content that develops and enhances the technical skills needed to advance and succeed in their careers.'
Complete Payment to Unlock Full Guide & Source Code
You are viewing the 30% preview. Join TopCourseAI Pro to unlock the remaining 70% of this article, unblur all code snippets, and gain full access to all 412 technical projects and guides.
Ready to access the complete step-by-step tutorial?
Gain full unhindered access to all 412 technical projects and guides, unblur all source code snippets, and download runnable scripts.
Related Blueprints & Guides
View all 166 →Accessibility on the Platform
Codecademy is committed to providing a high-quality learning experience for all learners. That includes accommodating different usage forms such as auditory, motor, or visual restrictions, limited hardware, or other acce...
Web developmentAffordances, Signifiers, and Clickability
For users on the web, the mouse click is perhaps the most fundamental human-computer interaction. The webbecamethe web partially through the power ofhypertext, or text in one document that links to other documents or res...
Web developmentAuthentication and OAuth
Authenticationis the process used by applications to determine and confirm identities of users. It ensures that the correct content is shown to users. More importantly, it ensures that incorrect content is secured and u...
Ready to build production-grade AI systems?
Enjoyed this guide? Continue exploring our library of 166+ production blueprints, multi-agent swarms, and autonomous agent systems with 100% unblurred, executable source code.