
How to use Jupyter Notebooks: A Complete Tutorial
How to use Jupyter Notebooks: A Complete Tutorial
What is Jupyter Notebook
Jupyter Notebooksare a powerful way to write and iterate on your Python code for data analysis. Rather than writing and re-writing an entire program, Jupyter Notebooks allow you to write code in separate blocks (or “cells”) and run each block of code individually. Then, if you need to make a change, you can go back and make your edit and rerun the program again, all in the same window.
Jupyter Notebook is built off ofIPython, an interactive way of running Python code in the terminal using theREPL model(Read-Eval-Print-Loop). The IPython Kernel runs the computations and communicates with the Jupyter Notebook front-end interface. It also allows Jupyter Notebook to support multiple languages. Jupyter Notebooks extend IPython through additional features, like storing your code and output, and allowing you to keep markdown notes.
If you’d rather watch a video instead of read an article, please watch the following instructions on how to use a Jupyter Notebook. They cover the same information.
Installing Jupyter Notebook
There are two common ways to install Jupyter Notebook:
- Using the Anaconda distribution or
- Installing viapip.
The Anaconda distribution is the most beginner-friendly option as it comes with Jupyter Notebook pre-installed, along with Python and many useful packages likeNumPy, pandas, and Matplotlib. To install it, visit theAnaconda websiteand download the installer for your operating system, and follow the setup instructions. Once installed, Jupyter will be available from the Anaconda Navigator or directly from the terminal.
If you already have Python installed and prefer to manage packages manually, you can install Jupyter usingpip. Open yourterminalor command prompt and enter the following command:
pip install notebook
Copy to clipboard
pip install notebookThis will install Jupyter Notebook and all its dependencies, so you can start using it with your existing Python setup.
How to launch a Jupyter Notebook from terminal
To launch a Jupyter notebook, open your terminal and navigate to the directory where you would like to save your notebook. Then type the commandjupyter notebookand the program will instantiate a local server atlocalhost:8888(or another specified port).

terminal
A browser window should immediately pop up with the Jupyter Notebook interface, otherwise, you can use the address it gives you. The notebooks have a unique token since the software uses pre-builtDockercontainers to put notebooks on their own unique path. To stop the server and shut down the kernel from the terminal, hitCtrl+Ctwice.
Understanding the Jupyter Notebook interface
Now you’re in the Jupyter Notebook interface, and you can see all of the files in your current directory. All Jupyter Notebooks are identifiable by thenotebook iconnext to their name. If you already have a Jupyter Notebook in your current directory that you want to view, find it in your files list and click it to open.
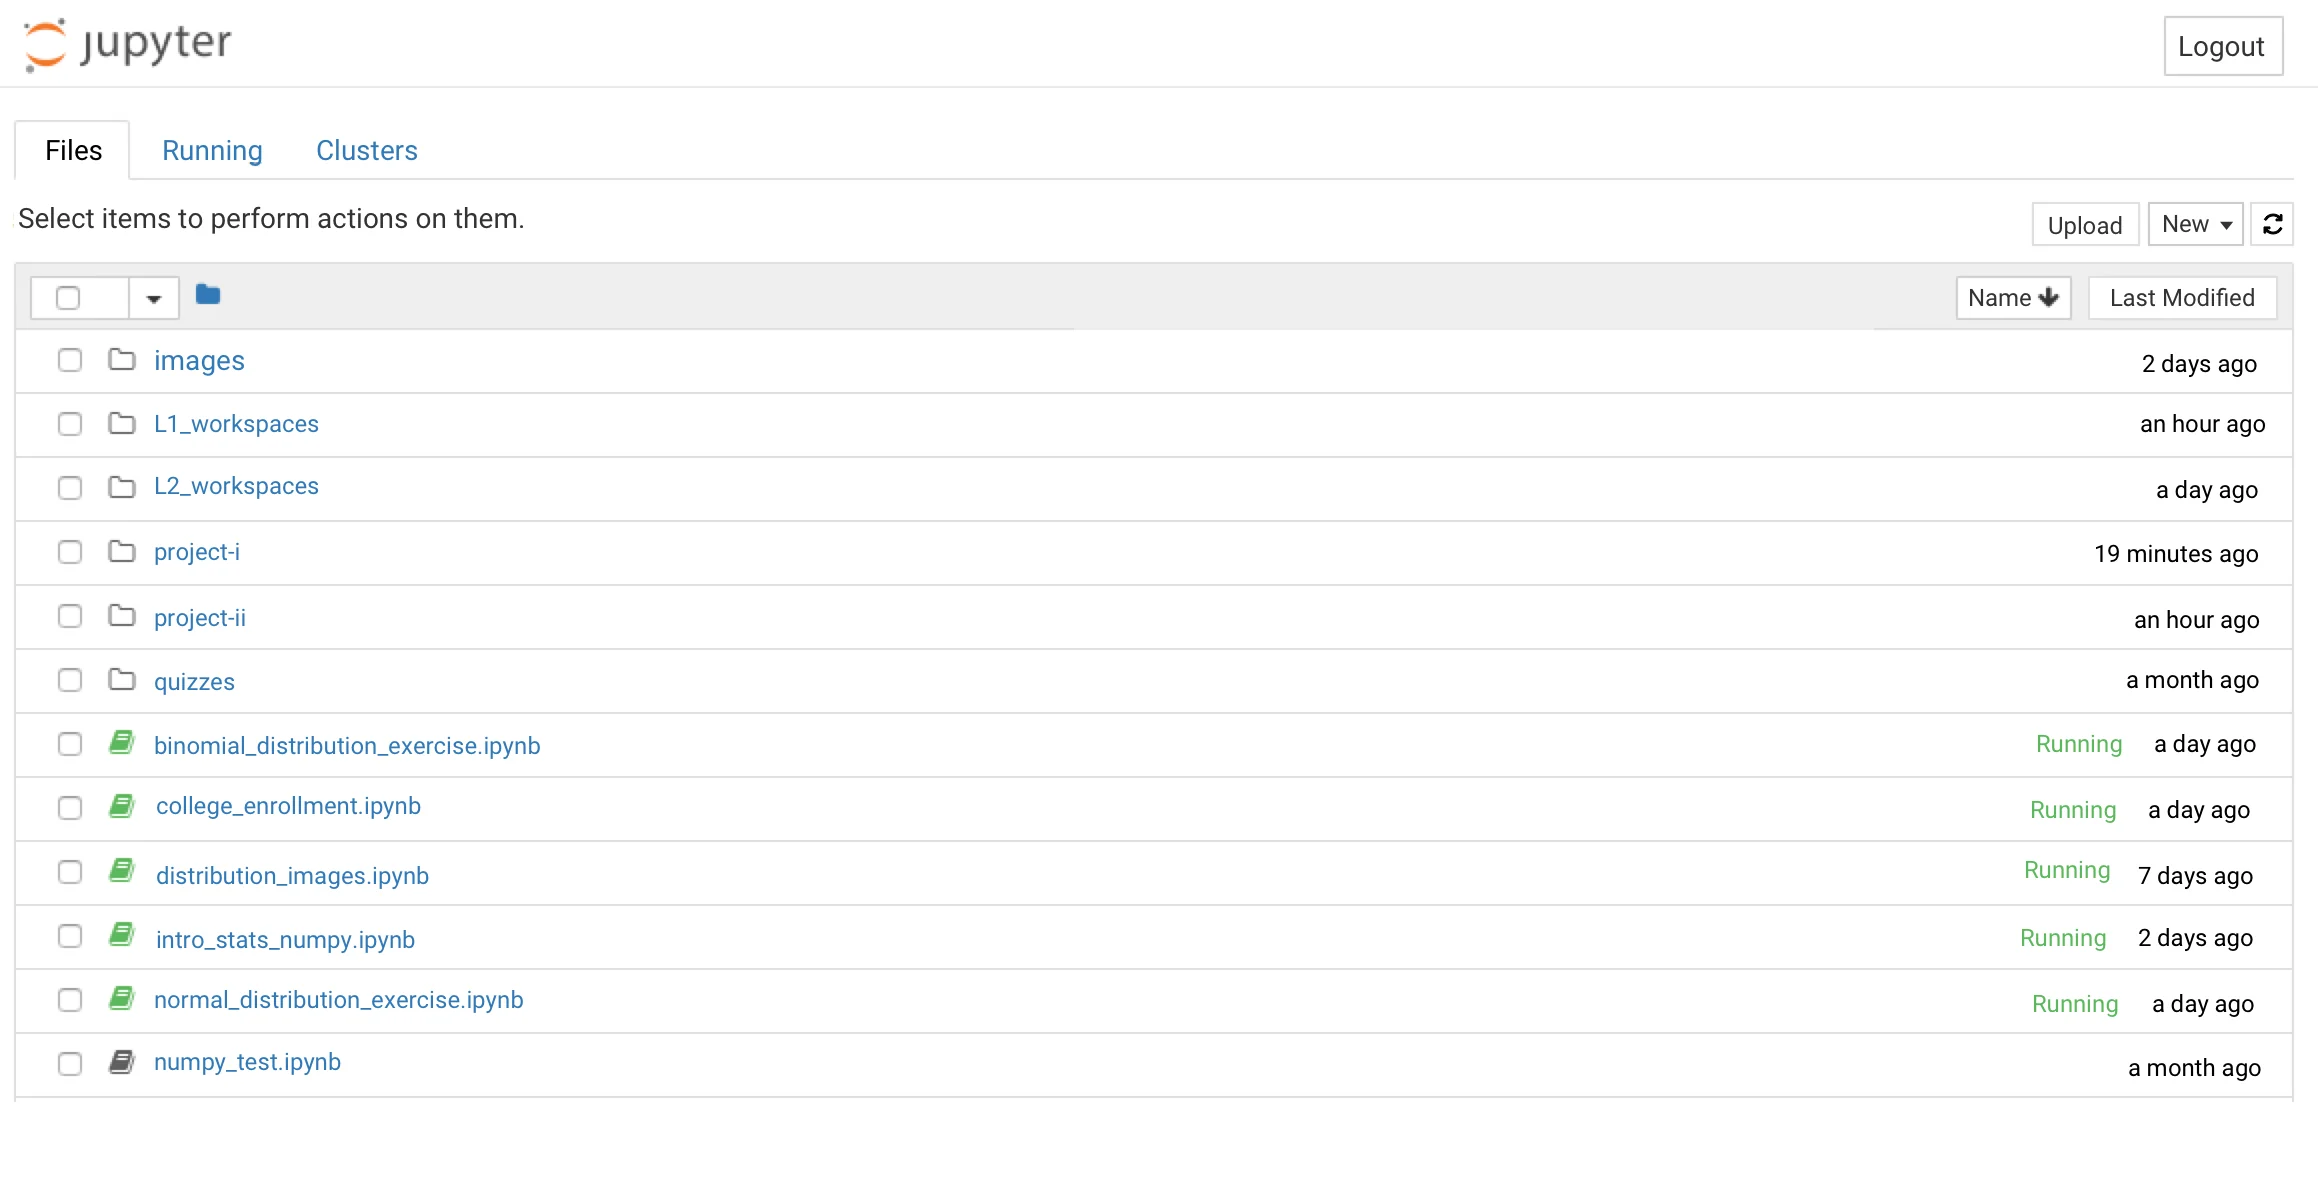
directoryl
How to create a new notebook in Jupyter
To create a new notebook, go toNewand selectNotebook - Python 3. If you have other Jupyter Notebooks on your system that you want to use, you can clickUploadand navigate to that particular file.
Notebooks currently running will have a green icon, while non-running ones will be grey. To find all currently running notebooks, click on theRunningtab to see a list.
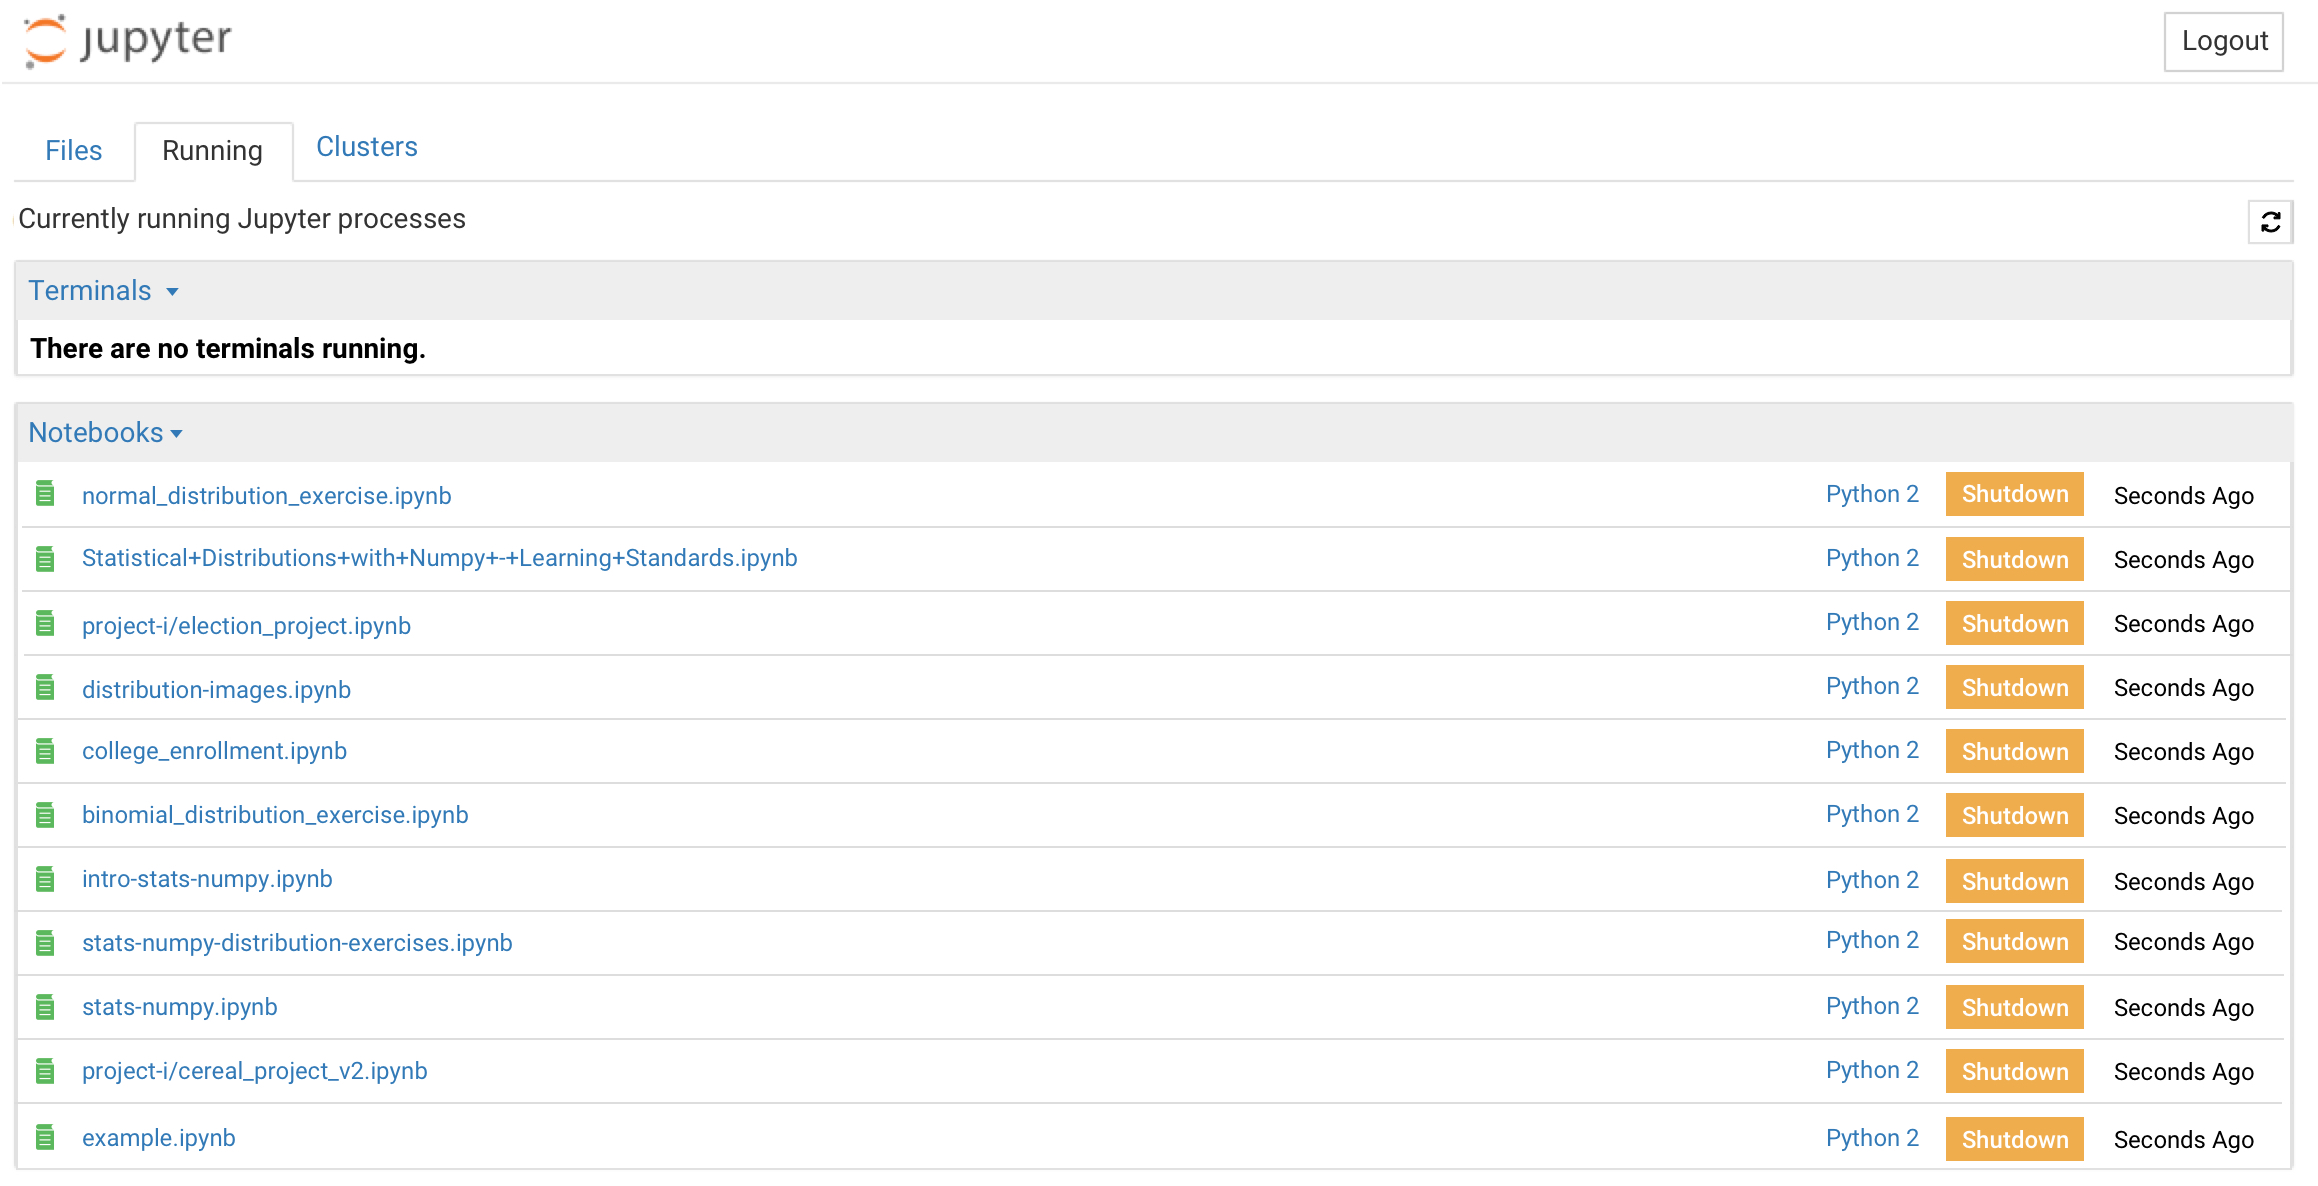
running
How to use cells, markdown, and code execution in Jupyter Notebooks
When you open a new Jupyter notebook, you’ll notice that it contains acell.

empty_cell
Cells are how notebooks are structured and are the areas where you write your code. To run a piece of code, click on the cell to select it, then pressShift+Enteror press the play button in the toolbar above. Additionally, theCelldropdown menu has several options to run cells, including running one cell at a time or running all cells at once.
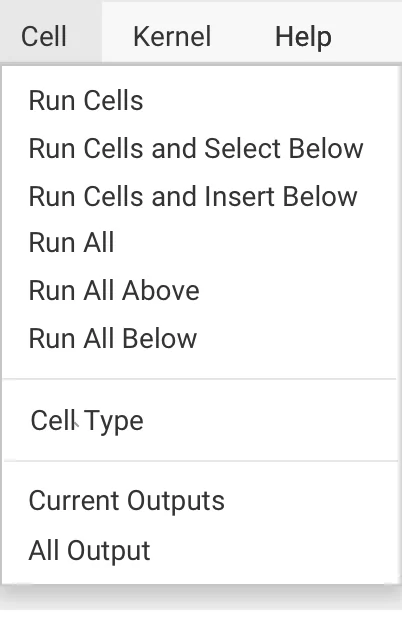
cell
After you run a cell, the output of the cell’s code will appear in the space below. To stop running a piece of code, press the stop button.

cell_output
To create new cells, use the plus (+) button in the toolbar or hitShift+Enteron the last cell in the Notebook. To cut, copy, delete, or just generally edit cells - select the cell you want to modify and go to theEditbutton in the navigation bar to see your options.
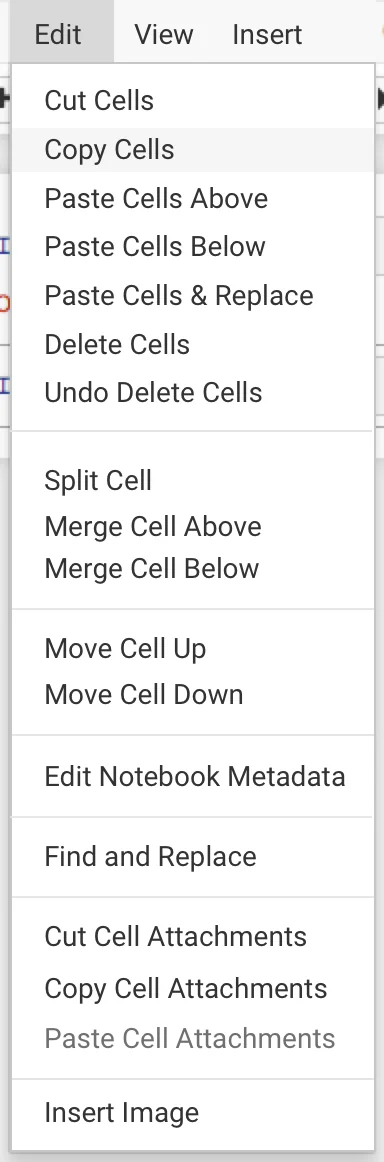
edit
In addition to running lines of code, you can also includetext-onlycells that use Markdown to format and organize your notebooks.

better_markdown
When you create a new cell, it will default to being aCodecell. To create a cell that uses markdown, click on theCellmenu from the navigation bar, scroll down toCell Type, and choose Markdown.
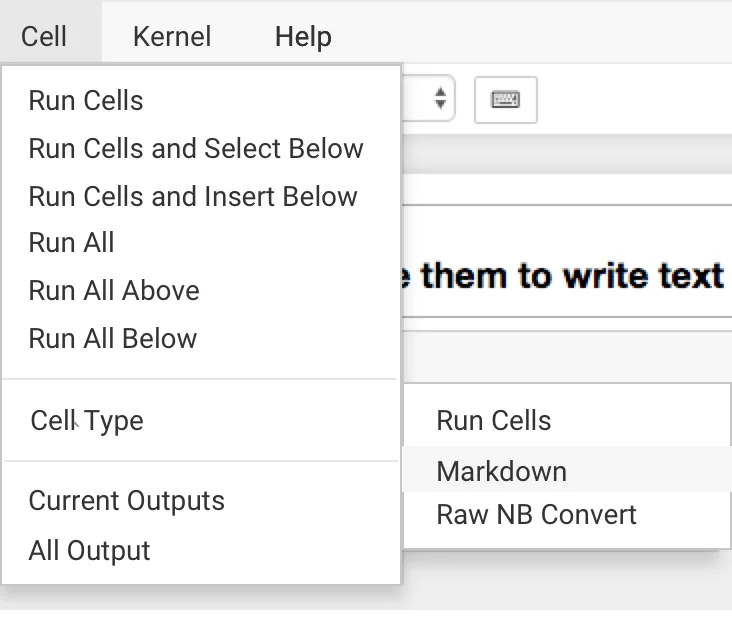
add_markdown
Occasionally, you might need to restart the kernel. Head to theKerneldropdown and hitRestart. To shut down a kernel, you can clickShutdown, which will have a dialogue process asking if that’s what you would like to do. To force an immediate shutdown, go to theFiledropdown and clickClose and Halt, and the browser window will close itself. Restarting and shutting down kernels will affect your variables, so be careful.
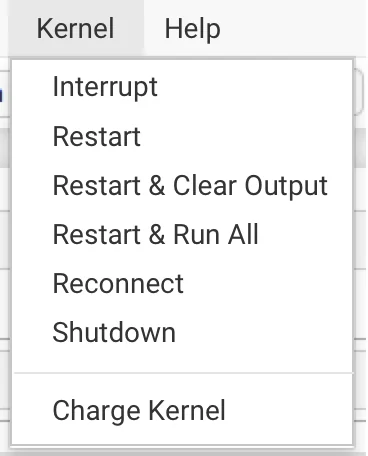
kernel
In theHelpdropdown, you’ll find useful information such as keyboard shortcuts as well as links to different documentation for modules such as Numpy, SciPy, and Matplotlib.
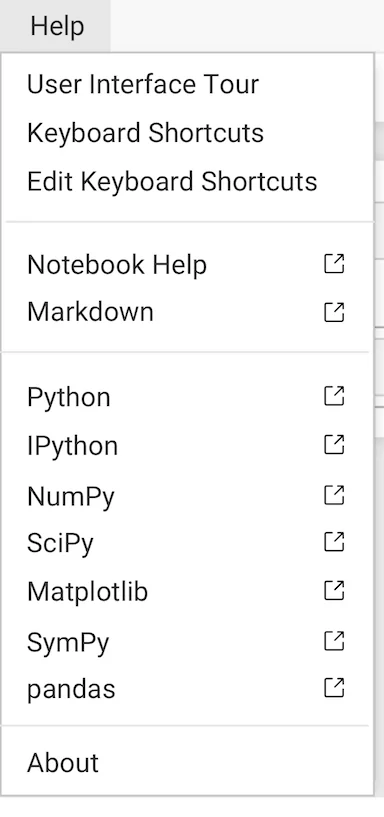
help
Thetoolbarhas several shortcut buttons for popular actions. From left to right: save, add a new cell, cut selected cells, copy selected cells, paste cells below, move selected cells up, move selected cells down, run, interrupt the kernel, restart the kernel, a dropdown that allows you to change the cell type, and a shortcut to open the command palette.

toolbar
Jupyter Notebook files are saved as you go. They will exist in your directory as aJSONfile with the extension.ipynb. You can also export Jupyter Notebooks in other formats, such as HTML. To do so, go to the File menu, scroll down toDownload as, and select the type of file you’re looking for. A pop-up will appear asking where you would like this new file to download. Once you’ve navigated to the appropriate directory, clickSave and Checkpoint.
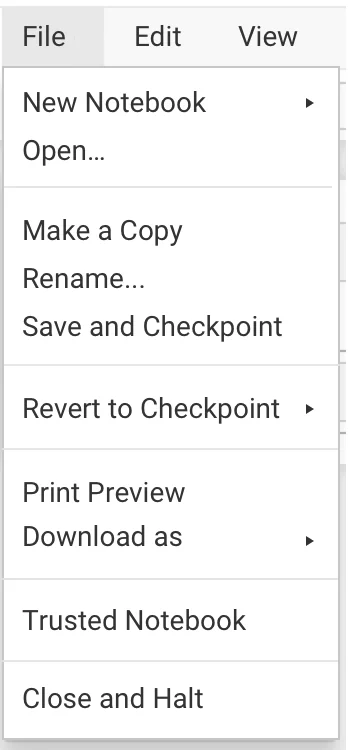
file
Conclusion
Jupyter Notebooks offer an intuitive and flexible environment for writing, testing, and organizing Python code. Whether you’re running code in cells, adding markdown notes, or managing kernels, Jupyter makes it easy to experiment and build projects efficiently—all in one interface.
To practice using Jupyter Notebooks with real data, explore Codecademy’sLearn Python for Data Sciencecourse. It’s a great way to apply your skills and work with data directly inside notebooks.
Frequently asked questions
1. What is Jupyter Notebook mainly used for?
Jupyter Notebook is mainly used for writing and running code interactively. It’s popular in data science and machine learning for combining code, visuals, and text in one workspace.
2. How to run a Python file in Jupyter Notebook?
To run a Python file (.py) in Jupyter Notebook, you can use the%runmagic command. First, make sure the.pyfile is in the same directory as your notebook. Then, in a code cell, type:
%run your_script.py
Copy to clipboard
%run your_script.py3. How do I import code into Jupyter?
You can import functions, classes, or variables from other Python files using the standardimportstatement. For example, if you have a file namedhelper.py, you can write:
import helper
Copy to clipboard
import helperOr use from helperimport function_nameto import specific elements. Make sure the file is in the same directory or in your Python path so Jupyter can access it.
'The Codecademy Team, composed of experienced educators and tech experts, is dedicated to making tech skills accessible to all. We empower learners worldwide with expert-reviewed content that develops and enhances the technical skills needed to advance and succeed in their careers.'
Complete Payment to Unlock Full Guide & Source Code
You are viewing the 30% preview. Join TopCourseAI Pro to unlock the remaining 70% of this article, unblur all code snippets, and gain full access to all 412 technical projects and guides.
Ready to access the complete step-by-step tutorial?
Gain full unhindered access to all 412 technical projects and guides, unblur all source code snippets, and download runnable scripts.
How to use Generative AI for Unit Testing
Next BlueprintImplementing Memory in LLM Applications Using LangChain
Related Blueprints & Guides
View all 166 →Accessibility on the Platform
Codecademy is committed to providing a high-quality learning experience for all learners. That includes accommodating different usage forms such as auditory, motor, or visual restrictions, limited hardware, or other acce...
Web developmentAffordances, Signifiers, and Clickability
For users on the web, the mouse click is perhaps the most fundamental human-computer interaction. The webbecamethe web partially through the power ofhypertext, or text in one document that links to other documents or res...
Web developmentAuthentication and OAuth
Authenticationis the process used by applications to determine and confirm identities of users. It ensures that the correct content is shown to users. More importantly, it ensures that incorrect content is secured and u...
Ready to build production-grade AI systems?
Enjoyed this guide? Continue exploring our library of 166+ production blueprints, multi-agent swarms, and autonomous agent systems with 100% unblurred, executable source code.